
To effectively connect two wires to solar panels, ensure the correct wiring techniques and safety protocols are applied. 1. Use appropriate gauge wires, 2. Ensure polarity (positive and negative connections), 3. Check for secure connections, 4. Utilize waterproof connectors for outdoor use. The most critical aspect is ensuring proper polarity to avoid short circuits, which can damage the solar panels and the connected system. It is essential to match the positive terminals of both wires and connect them to the respective positive terminal of the solar panel. The same applies to the negative terminals. For durable and long-lasting connections, it is suggested to use high-quality connectors that can withstand weather elements.
1. UNDERSTANDING SOLAR PANEL CONNECTIONS
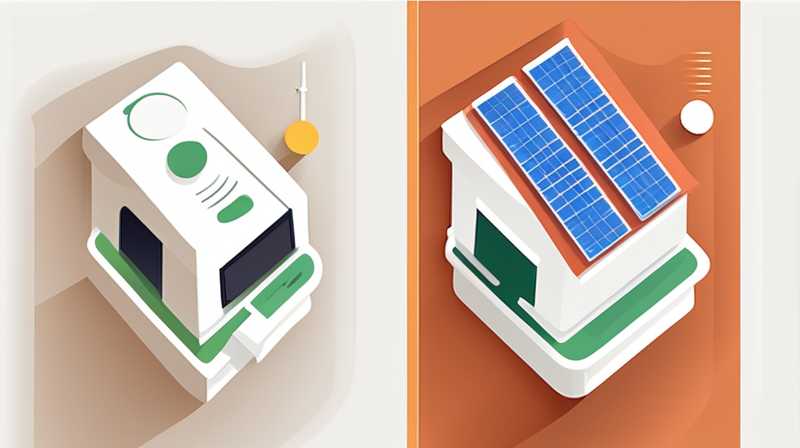
Connecting two wires to solar panels might appear straightforward, but a deeper comprehension reveals numerous underlying principles and processes. The successful operation of solar energy systems fundamentally relies on the proper interconnection of components, ensuring not only efficiency but also safety and longevity of the entire system.
Conducting a careful analysis of electrical flows and connections, as well as the materials employed in wiring, is essential. Using the correct wire gauge is paramount, as wires that are too thin may overheat, leading to potential hazards. Typically, the wire gauge will depend on the distance between the solar panel and the battery or inverter, as well as the system’s voltage and amperage. The implications of incorrect wiring can lead to inefficiencies or even catastrophic failures under certain conditions.
Moreover, while utilitarian aspects dominate the conversation about connections, many overlook the environmental factors at play. Outdoor installations can be subjected to various weather conditions that necessitate the use of weather-resistant wiring. Connections susceptible to corrosion could jeopardize the performance of the solar energy system. Therefore, using materials that can withstand exposure to the elements ensures maximized energy capture and system reliability.
2. PREPARING THE WIRING
Before proceeding with the wiring connection process, meticulous preparation is imperative. Proper preparation not only secures a successful connection but also mitigates potential issues in the future. Identifying the proper equipment and materials is a significant first step. Appropriate wire, connectors, and tools must be gathered to avoid interruptions during the installation process.
2.1 Selecting the Appropriate Wire
One vital consideration in preparation is selecting wires with the requisite gauge suitable for the application. Standard wire gauges for solar applications typically range from 10 to 12 AWG (American Wire Gauge). A common pitfall arises from selecting wires without considering the total amperage and voltage of the solar panel system, which can compromise performance. Thicker wires can handle higher currents and minimize voltage drops during energy transmission. Taking the time to measure the distance between the solar panels and the point of connection ensures the chosen wire gauge will suffice.
Additionally, wires must possess insulation rated for outdoor use, particularly when installations are exposed to extremes, including humidity and temperature fluctuations. Insulation protects the conductor from environmental damages and safety hazards.
2.2 Acquiring Tools and Safety Gear
Having the right tools at hand is equally crucial. Standard tools include wire strippers, crimping tools, and wrenches, along with safety gear such as gloves and goggles. Investing in quality equipment not only enhances efficiency but also reduces the likelihood of injury during the installation process. In electrical work, adhering to safety standards is not merely a suggestion but a necessity; failing to equip oneself properly could lead to avoidable accidents, especially when working with live circuits.
Before beginning any electrical work, it is prudent to turn off any power sources to prevent short circuits or electric shocks. This preparatory phase fortifies the groundwork for a seamless and secure wiring experience.
3. CONNECTING THE WIRES
Engaging in the connection process of two wires to solar panels requires diligence and precision. Understanding the wiring diagram of the solar system aids significantly in comprehending how connections should be executed. In most systems, the wires are color-coded: red typically indicates the positive connection while black signifies the negative.
3.1 Establishing Polarity
As mentioned previously, ensuring correct polarity during connection is an essential step. Neglecting this aspect could lead to reversed current flows, which may damage the solar energy components, including the panels themselves. It is advisable to double-check the solar panel specifications; often, the diagrams provided can clear up any ambiguity regarding connection points.
3.2 Making the Connections
To establish the actual connections, the first step involves stripping the ends of the wires to about half an inch of insulation to expose the copper conductor. This exposed section enables a solid connection to be built. Depending on the type of connector, different methods may be employed. Crimp connectors are popular for their ease of use and reliability; users can crimp the wire into the connector using a specialized tool, ensuring a secure mechanical bond.
Alternatively, terminal block connectors can serve in applications where multiple connections are made simultaneously, as they provide easy access and improved organization. Always ensure that connections are tight and secure, as loose connections can cause heat buildup, leading to potential failures. Utilizing a torque wrench helps achieve the appropriate tightness standards, ensuring that connections will withstand both time and environmental challenges.
4. SECURING AND TESTING THE CONNECTIONS
After the wiring connections have been established, subsequent steps turn toward securing them and validating their integrity. Testing connections post-installation is critical in ensuring functionality and performance.
4.1 Waterproofing and Insulation
One of the final steps in securing connections involves protecting them from exposure to moisture and preventing corrosion. Waterproof connectors are recommended for outdoor setups, as they prevent water ingress, which could compromise the entire solar energy system. Additionally, utilizing heat shrink tubing over the wire connection and sealing the ends with a heat gun can provide an effective barrier against water infiltration.
To further enhance durability, considering implementing some cable management strategies is essential. Using zip ties or cable clips not only keeps wiring organized but also minimizes movement, which can wear down connections over time.
4.2 Testing for Functionality
Before the system is put into operation, testing is necessary to verify proper functionality. Use a multimeter to measure voltage output, ensuring that the system operates within expected parameters. Engage in checking cable continuity by ensuring that current flows freely from the solar panel to the connected load, indicating a successful setup.
Confirming correct voltage reads even small deviations can signal connection issues or component failures. In cases where discrepancies arise, revisiting the connections and tightening or repositioning wires as needed may correct the issue.
5. MAINTAINING SOLAR CONNECTIONS
Establishing a solar connection is just the beginning; maintaining it is essential for long-term performance. Regular inspections and upkeep not only prolong the system’s life but also enhance its efficiency.
5.1 Routine Inspections
In adherence to recommended practices, regular inspections of the wiring and connections should be conducted at least once or twice yearly. This periodic examination allows for identifying any signs of wear, corrosion, or loose wires that could hinder performance. Checking for weather-related damage can also yield insights into how well the connections hold up against external elements, such as sun exposure and humidity.
5.2 Upgrading Components as Necessary
As technology evolves, components can become outdated or less efficient. Upgrading connections to newer, more efficient technologies can enhance overall system performance. Keeping abreast of advancements in solar technologies may also present opportunities for improving the system further, utilizing the most effective strategies available.
FREQUENTLY ASKED QUESTIONS
WHAT IS THE BEST WAY TO CONNECT WIRE TO SOLAR PANELS?
The optimal method for connecting wires to solar panels hinges on both polarity and quality connections. Initially, identify the panel’s positive and negative terminals. Use the appropriate gauge wire to ensure sufficient current handling capacity. Securely attach the wires via crimp connectors or terminal blocks, ensuring tight connections to prevent overheating or inconsistencies in energy transfer. Lastly, prioritize waterproof connectors to safeguard against moisture, thereby enhancing connection longevity.
HOW DO I PREVENT CORROSION IN SOLAR PANEL CONNECTIONS?
Corrosion can severely impact solar panel connections over time, undermining their performance. To combat this risk, proper insulation and protective measures are essential. Utilize high-quality waterproof connectors alongside heat shrink tubing to guard against moisture penetration. Conduct routine inspections to check for early signs of corrosion, allowing for timely interventions. The implementation of dielectric grease can also create a barrier when used on metal connections, preventing moisture from reaching the conductive parts.
HOW OFTEN SHOULD I CHECK MY SOLAR PANEL CONNECTIONS?
Routine inspections of solar panel connections should occur at least once or twice a year as part of regular maintenance. Seasonal changes can affect connections due to weather conditions, so examining your connections before extreme weather occurs is prudent. During inspections, check for loose wires, damage to insulation, or more severe issues that can impact performance should be prioritized. Additionally, ensure that you keep records of any maintenance carried out to enable tracking changes or improvements in performance over time.
Final thoughts encapsulate the broader understanding of connecting two wires to solar panels. The importance of appropriate wiring practices cannot be overstated; employing the correct gauge wires, ensuring proper polarities, and maintaining connections will significantly enhance the overall effectiveness and longevity of a solar energy system. By diligently following the proper procedures outlined herein, users can harness solar energy more effectively. The shift to renewable energy sources like solar power presents a unique opportunity to contribute positively to the environment while also reaping the benefits of reduced energy costs. However, ensuring that connections are secure and well-maintained is integral to maximizing these benefits. Staying informed about advancements in solar technology will further empower users to optimize their systems, paving the way for a sustainable energy future. When undertaking any electrical installation, prioritizing safety is paramount; understanding how to work with electrical systems responsibly can prevent hazards, ensuring peace of mind alongside energy independence. The transition to solar energy represents not just a technical undertaking but a lifestyle shift toward embracing sustainability. Whether through DIY installations or professional setups, commitment to proper practices from the onset will yield immediate and long-lasting rewards in the utilization of solar technologies.
Original article by NenPower, If reposted, please credit the source: https://nenpower.com/blog/how-to-connect-two-wires-to-solar-panels/
