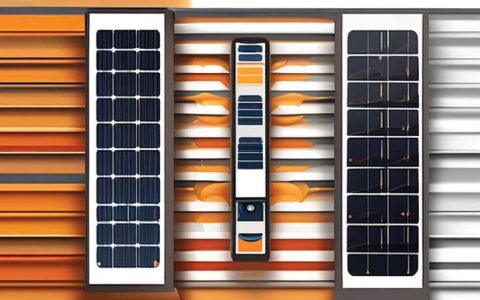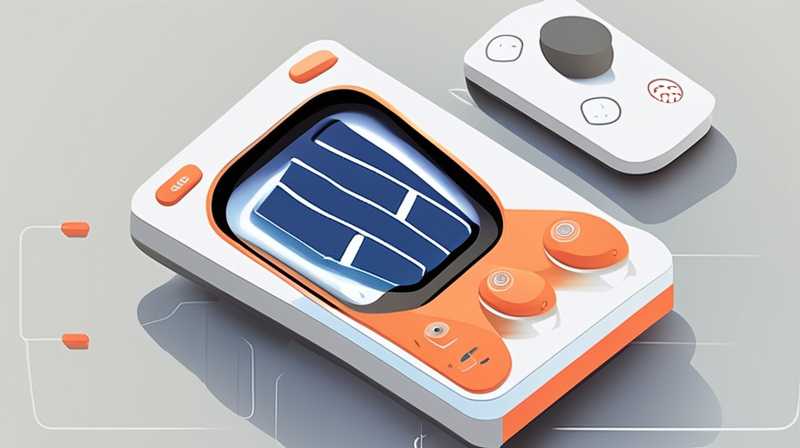
If the solar remote controller is broken, one should 1. check the batteries, 2. inspect for physical damage, 3. reset the remote, 4. consult the user manual or manufacturer for troubleshooting, 5. consider contacting customer support or seeking a replacement. Battery issues are often the most common culprit for a malfunctioning remote. Replacing old or corroded batteries with fresh ones can resolve the issue in many cases. Ensuring proper contact and alignment when installing new batteries is crucial for efficient operation; users must carefully follow any guidelines set by the manufacturer.
1. UNDERSTANDING THE IMPORTANCE OF SOLAR REMOTE CONTROLLERS
In the modern landscape of solar energy, solar remote controllers play a pivotal role. They function as the interface between the user and the complex system of solar technology, enabling smooth operation of solar energy systems and providing convenience in managing various settings. As these devices move to center stage, understanding their operation becomes increasingly critical.
Solar remote controllers allow users to manage settings such as charging cycles, battery management, and energy usage efficiently. Their importance cannot be overstated, as they help users optimize the performance of their solar systems. A malfunctioning controller could hinder the efficiency of the entire solar setup, ultimately leading to decreased energy production and increased costs.
2. COMMON CAUSES OF MALFUNCTIONS IN SOLAR REMOTE CONTROLLERS
Understanding the common causes behind the failure of solar remote controllers is crucial for effective troubleshooting. Multiple factors contribute to the degradation of these devices, with each having its unique implications.
2.1 BATTERY ISSUES
One predominant factor is battery-related problems. Over time, batteries may corrode, lose charge, or even become completely depleted. Issues related to batteries can easily lead to a malfunctioning controller, thus impeding the user’s ability to operate the solar system effectively.
2.2 ENVIRONMENTAL FACTORS
Environmental conditions also play a significant role in the performance of solar remote controllers. Devices exposed to extreme temperatures, humidity, or physical trauma can deteriorate more quickly. For instance, prolonged exposure to high heat can damage internal components and shorten their lifespan.
2.3 TECHNICAL GLITCHES
Technical glitches may also arise from outdated firmware or software bugs. As technology advances, manufacturers frequently release updates to improve functionality and fix known vulnerabilities. If these updates are not applied, users may experience issues that an updated version would have otherwise resolved.
3. INITIAL STEPS TO ADDRESS A MALFUNCTIONING REMOTE CONTROLLER
Upon discovering that a solar remote controller is not functioning, specific steps should be taken to identify and rectify the issue. Each action can lead users toward restoring their controller’s functionality.
3.1 CHECKING THE BATTERIES
Firstly, checking the batteries is a wise starting point. If the remote is unresponsive, replacing or recharging the batteries may solve the problem. It is best practice to utilize high-quality batteries that meet manufacturer guidelines, increasing the likelihood of improved performance.
3.2 INSPECTING FOR PHYSICAL DAMAGE
Following a battery examination, it is prudent to inspect the remote for any visible signs of damage. Cracks, water damage, or loose components can indicate a faulty device. In such cases, a careful evaluation is required to determine if the controller can be repaired or if a new one needs to be acquired.
4. TROUBLESHOOTING THROUGH RESETTING THE REMOTE
When conventional fixes fail, resetting the remote controller serves as a powerful alternative. This often returns the device to its factory settings, removing any temporary glitches that may have compromised its performance and allowing it to function anew.
4.1 HOW TO RESET
To reset, users generally need to locate a reset button or follow specific procedures outlined in the user manual. In many cases, pressing the power button for an extended period or removing batteries temporarily can achieve a similar result.
4.2 REASSESSING SETTINGS
Post-reset, users must reevaluate the settings and preferences. Familiarizing oneself with the features of the remote can minimize future complications. Taking the time to explore different functionalities will enhance user experience when managing solar systems.
5. SEEKING PROFESSIONAL ASSISTANCE
In situations where internal components malfunction or if issues persist, professional assistance may be the best recourse. Consulting with experts allows users to obtain precise diagnostics tailored to their specific system and remote model.
5.1 CONTACT CUSTOMER SUPPORT
Manufacturers typically have dedicated support teams that handle inquiries regarding malfunctioning devices. They can provide guidance, warranty information, and insights into necessary procedures. Interaction with customer support is invaluable if the warranty still covers the remote controller.
5.2 LOCAL REPAIR SERVICES
In cases where the issue stems from physical damage, seeking local repair services could be beneficial. Professionals with experience in solar technology are likely to offer efficient solutions and may possess access to replacement parts that general consumers do not.
6. CONSIDERATIONS FOR REPLACEMENT
Should it become apparent that repairing the controller is no longer a viable option, considering a replacement is essential. This step requires careful attention to various factors to ensure compatibility and functionality with existing solar systems.
6.1 COMPATIBILITY
When selecting a new remote, compatibility serves as the foremost criterion. It is crucial to ensure that the replacement device matches the specifications of the solar system in use. Compatibility guarantees seamless operation, preventing future malfunctions and unnecessary expenses.
6.2 FEATURES AND FUNCTIONALITY
Not all solar remotes are created equal. Evaluating the features and functionalities of potential replacements can substantially enhance user experience. Advanced remotes may offer expanded capabilities, improved user interfaces, and greater connectivity options, making them worthwhile investments.
7. PREVENTIVE MEASURES FOR AVOIDING FUTURE MALFUNCTIONS
To minimize the chances of a controller malfunctioning in the future, users should adopt preventive measures. These steps aim to prolong the remote controller’s lifespan and ensure that solar systems maintain optimal performance.
7.1 REGULAR MAINTENANCE
Regular maintenance is one of the most effective strategies. Ensuring that the remote and its components remain clean and free of debris will significantly contribute to extending its lifespan. It is essential to routinely examine batteries and replace them as needed to avoid potential issues.
7.2 ENVIRONMENTAL PROTECTION
Additionally, protecting the remote from environmental hazards is critical. Storing the device in a climate-controlled area when not in use can save it from extreme conditions that could lead to damage. If the remote must be outdoors, utilizing protective casings can safeguard it from adverse weather effects.
8. UPGRADING TO NEW TECHNOLOGIES
The rapidly evolving landscape of solar technology means that new remotes and systems frequently hit the market. In this dynamic environment, considering upgrades can foster improved efficiency and engagement with technological advancements.
8.1 INNOVATIVE SOLUTIONS
New solar remote technologies may incorporate features such as smartphone integration, real-time data monitoring, and extended communication ranges. As these advancements emerge, they present opportunities for users to capitalize on enhanced functionalities and increase the overall effectiveness of their solar systems.
8.2 LONG-TERM INVESTMENT
Investing in modern remotes not only enhances user experience but also serves as a long-term financial strategy. New devices often come equipped with warranties, ensuring coverage for faults that may arise, thus providing peace of mind when committing resources to upgrade.
QUESTIONS AND ANSWERS
WHAT SHOULD I DO IF THE REMOTE DOESN’T TURN ON?
If the remote appears completely unresponsive, the first step involves checking the batteries. Replace old or depleted batteries with new ones to see if functionality resumes. Ensure the batteries are installed correctly, paying attention to positive and negative terminals. If replacing the batteries fails to resolve the issue, inspect the remote for physical damage or any signs of corrosion. Sometimes, connecting the solar system directly without using the remote might help test the system’s basic functionality. After these steps, if the remote still doesn’t turn on, the next logical course of action is to consult the user manual provided by the manufacturer for troubleshooting instructions applicable to that specific model. If necessary, reaching out to customer support may yield further direction for potential repair or replacement options.
HOW DO I RESET MY SOLAR REMOTE CONTROLLER?
Resetting a solar remote controller typically involves locating a reset button or following a prescribed process laid out in the user manual. Normally, a remote can be reset by pressing and holding the reset button for a few seconds, which may be hidden within a small hole requiring a pointed object to activate. Alternatively, removing the batteries for a brief duration before reinstalling them can function as a reset as well. After performing a reset, one must take the time to readjust settings based on individual preferences. This refocus on feature utilization is essential to ensure optimal performance of the solar system post-reset. In most cases, fully understanding how to reset a solar remote controller empowers users to alleviate minor glitches independently.
HOW CAN I PREVENT MY REMOTE CONTROLLER FROM BREAKING AGAIN?
Preventive measures play a critical role in safeguarding a solar remote from future breakage. First, it is important to maintain cleanliness, ensuring that dirt and grime do not accumulate within or on the device. Regularly inspect the batteries, replacing them whenever signs of corrosion appear or if they have been in operation for an extended period. Secondly, consider utilizing protective casings or keeping the remote in climate-controlled environments to guard against extreme temperatures or moisture, which can damage electronic components. Engaging in regular check-ups to assess the condition of the remote can help catch issues promptly. Staying attuned to any updates provided by the manufacturer regarding new technologies, features, or troubleshooting tips increases the likelihood of maintaining a properly functioning device throughout its intended lifespan.
FINAL THOUGHTS
Addressing a malfunctioning solar remote controller requires a systematic approach to uncover the underlying issues at hand. The initial investigation must include checking batteries as the most common source of inconvenience. Following that, a thorough inspection for any physical damage or advanced technical problems can illuminate next steps. If standard troubleshooting methods like resetting or contacting customer support do not yield results, considering a replacement may be the only option—being sure to evaluate compatibility and features of new models before making a decision. Prevention strategies, including regular maintenance and protective measures against environmental hazards, will be vital for prolonging the lifespan of solar remotes. Ultimately, by being equipped with knowledge and resources, users can overcome the challenges posed by broken remote controllers and ensure that their solar energy systems operate smoothly and efficiently for years to come, taking full advantage of renewable energy’s benefits while minimizing disruption to their daily lives.
Original article by NenPower, If reposted, please credit the source: https://nenpower.com/blog/what-to-do-if-the-solar-remote-controller-is-broken/


