
Sealing a solar tube into the house involves several key steps to ensure optimal performance and energy efficiency. 1. Proper insulation is essential, as it prevents heat loss and enhances the overall effectiveness of the installation. 2. The use of high-quality sealants will help in minimizing leaks, ensuring that the solar tube functions efficiently. 3. Correctly measuring and cutting the components guarantees a snug fit, which is crucial for effective sealing. 4. Finally, periodic maintenance and checks will ensure long-term performance of the solar tube system.
1. UNDERSTANDING SOLAR TUBES
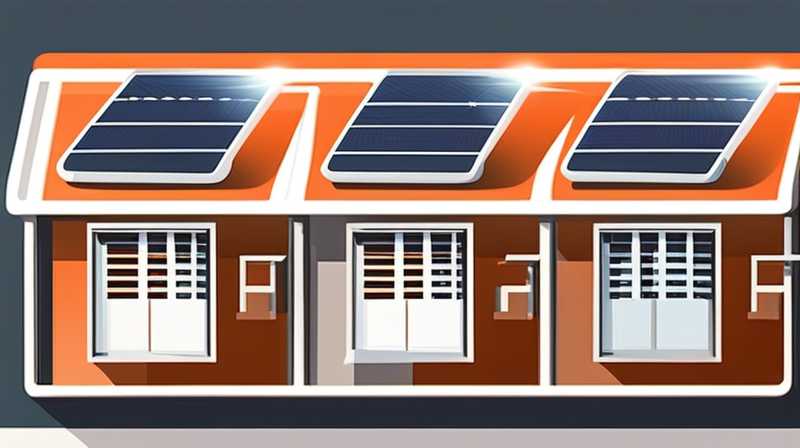
In recent years, solar tubes have gained immense popularity as an energy-efficient solution for illuminating spaces while harnessing renewable energy. Unlike traditional skylights, solar tubes, also known as solar tubes or solar tubes, use reflective materials to channel natural sunlight into buildings. This innovative design allows sunlight to reach otherwise dim areas, providing abundant illumination while reducing reliance on artificial lighting.
The installation of solar tubes is relatively straightforward; however, sealing them effectively is crucial for their functionality. A well-sealed solar tube enhances energy efficiency, preserves indoor climate control, and reduces energy bills. Failure to seal properly can lead to air and moisture infiltration, detracting from the benefits these tubes offer. Understanding the components involved and the steps necessary for a secure installation is vital for maximizing the advantages of solar tube systems.
2. PREPARING FOR INSTALLATION
Before embarking on the installation of solar tubes, thorough preparation is necessary. 1. Site assessment is crucial to identify optimal locations for the solar tube installation. Factors such as roof angles, potential obstructions like branches or nearby buildings, and the direction facing the sun must be considered to maximize sunlight effectiveness. Careful evaluation of these elements sets the foundation for a successful installation.
2. Gathering essential materials is the next step in the preparation process. High-quality sealants, flashing kits, insulation materials, and tools such as a drill, saw, and ladder will ensure that all aspects of the installation are properly executed. Investing in quality materials is vital, as inferior products may lead to premature failure or inefficiency in the system. Additionally, safety gear such as gloves and goggles should be worn throughout the installation process to protect against potential hazards.
3. SEALING THE SOLAR TUBE
As the solar tube installation progresses, focus shifts to sealing it securely into place. 1. Cutting the hole correctly is essential for achieving an airtight fit. Precise measurements should be taken to ensure that the hole in the roof matches the diameter of the solar tube perfectly. A snug fit minimizes air gaps that can allow moisture and drafts to enter the living space. Care should be taken to smooth out any sharp edges around the cut, as this can contribute to a better seal.
2. Utilizing high-quality sealants will further enhance the sealing process. Silicone or weather-resistant caulking should be applied around the edges of the solar tube to prevent leaks. This specialized sealant should be applied generously but carefully to cover any gaps. Once the tube is inserted, ensure that you press it firmly into the sealing material to create an effective barrier against moisture and air. Following this step, additional flashing materials can be installed to provide an extra layer of protection against the elements.
4. INSULATING AROUND THE SOLAR TUBE
After sealing the solar tube in place, attention must be directed towards insulation. 1. Proper insulation around the solar tube is necessary to further enhance energy efficiency. Insulating material should be installed to minimize heat transfer between the inside and outside of the house. The goal is to eliminate temperature differentials that could lead to condensation or energy loss. Using insulation batts or spray foam can effectively eliminate air gaps, ensuring that indoor temperatures remain stable.
2. Assessing the insulation material’s performance is crucial. Different insulation materials possess varying R-values, indicating their thermal resistance effectiveness. By selecting materials with high R-values for this purpose, the overall efficiency of the solar tube will improve significantly. Regular inspections of the insulation will ensure that it remains intact and prevents any potential issues related to moisture buildup or drafts.
5. TESTING FOR LEAKS
Once sealing and insulating are complete, conducting tests to identify any potential leaks becomes essential. 1. Visual inspections should be the first step in this process. Check the connections between the solar tube and the roofing materials to ensure that the sealant has bonded securely. Look for any signs of gaps or cracks that could allow moisture to permeate through. In addition to visual assessments, using a moisture meter can help detect any hidden moisture problems that could arise in the future.
2. Performing a water test can confirm the effectiveness of both sealing and insulation. Lightly spraying water around the solar tube area can help identify any leaks. If water seeps through, it will be apparent where additional sealing may be necessary. Promptly addressing any leaks found during testing will lead to a better-performing solar tube installation and enhance the overall energy efficiency of the home.
6. MAINTAINING SOLAR TUBE INTEGRITY
After successfully sealing and insulating the solar tube, consistent maintenance is paramount. 1. Regular inspections should be scheduled to assess the general condition of the solar tube installation. Check for any signs of wear or damage to the sealant that may necessitate repair. Roof conditions can change with the weather over time, leading to deterioration; thus, early identification of issues will contribute to the longevity of the system.
2. Cleaning the solar tube’s reflector is essential for optimal performance. Accumulation of dust, dirt, or debris on the reflector can diminish the amount of sunlight being transmitted into the home. Regularly cleaning the exterior portion of the solar tube will help ensure that maximum light is captured and directed into the living space, thereby maintaining its energy efficiency. Establishing a routine maintenance schedule encourages ongoing performance and helps avoid unexpected repair costs.
FAQS
WHAT ARE THE BENEFITS OF SOLAR TUBES COMPARED TO TRADITIONAL SKYLIGHTS?
Solar tubes offer numerous advantages over traditional skylights. While both options provide natural light, solar tubes are more efficient in directing sunlight into various areas of a home, thus enhancing illumination. They are also less prone to leaks due to their design, which involves a smaller opening cut into the roof. Moreover, solar tubes minimize heat gain, as their reflective tubes divert sunlight away from harsher temperatures, keeping indoor environments cooler during hot seasons. The installation of solar tubes tends to be less invasive than that of traditional skylights, making them a practical option for homeowners seeking efficient lighting without extensive renovation.
HOW LONG DOES IT TAKE TO INSTALL SOLAR TUBES?
The installation timeline for solar tubes varies based on factors such as the experience of the installer, roof type, and the number of tubes being installed. Typically, a professional installation can take between two to six hours for one or two tubes, assuming the weather is favorable and no complications arise. Homeowners may choose to perform the installation themselves, which can increase the overall time required based on their skill level. It is advised to allocate enough time for thorough preparation, ensuring that all components are ready for effective installation. By outlining a clear plan, homeowners can facilitate a smoother process.
ARE SOLAR TUBES ENERGY-EFFICIENT DURING WINTER MONTHS?
Solar tubes remain energy-efficient during winter months, as they capture and transmit natural sunlight despite lower daylight hours. They act as passive solar lighting systems, meaning that they rely on sunlight for indirect illumination without introducing heat into a space. During cold months, maximizing sunlight is crucial for reducing reliance on artificial lighting sources. When installed correctly with adequate sealing and insulation, solar tubes effectively contribute to maintaining ambient lighting levels while reducing total energy expenditure. Quality solar tube designs allow for performance throughout the year, helping homes remain well-lit and energy-efficient regardless of seasonal variations.
The importance of effectively sealing the solar tube cannot be overstated. By following a thorough approach to installation, continuous inspections, and proper maintenance, homeowners can ensure long-term performance and stability of their solar tube systems. This attention to detail not only enhances energy efficiency but also contributes to overall environmental benefits, reducing reliance on conventional energy sources. Choosing high-quality materials, performing precise installations, and committing to regular evaluations will result in maximizing the benefits solar tubes have to offer. Commitment to such practices solidifies the practicality and reliability of solar tubes in modern households, ultimately fostering a sustainable future.
Original article by NenPower, If reposted, please credit the source: https://nenpower.com/blog/how-to-seal-the-solar-tube-into-the-house/
