
To effectively replace the electronics of solar tubes, one must follow systematic steps that ensure proper functionality and safety. 1. Assess the current condition of the solar tube electronics, 2. Gather the necessary tools and replacement parts, 3. Disconnect the old components, 4. Install the new electronics with precision, 5. Test the system for optimal performance. Among these steps, thoroughly evaluating the existing electronics is critical, as it helps identify not only the components that need replacing but also any additional issues that may arise during installation. This detailed examination can prevent future malfunctions and ensure the longevity of the solar tube system, providing efficient energy collection.
1. UNDERSTANDING SOLAR TUBE ELECTRONICS
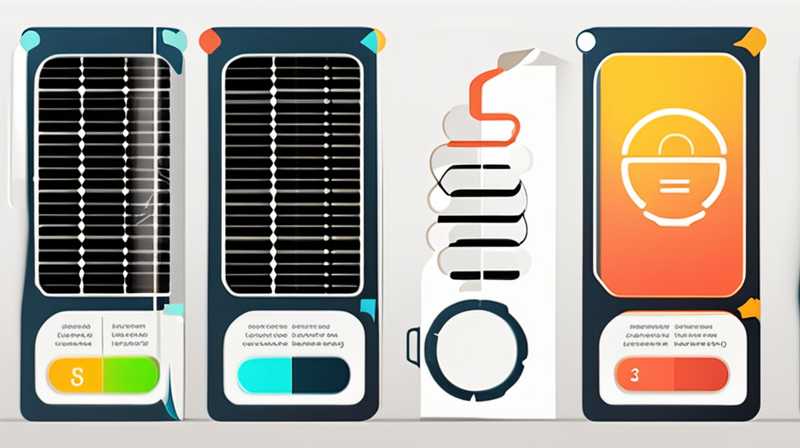
Solar tubes are designed to capture sunlight and convert it into usable energy through intricate electronic systems. The primary components involved in this technology typically include solar panels, charge controllers, inverters, and sometimes batteries. Each of these parts serves a unique function that is crucial for the optimal performance of the entire solar energy system. Understanding how these components work together can simplify the process of replacing faulty electronics and enhance the overall efficiency of the solar tube.
The solar panel is paramount as it converts sunlight into direct current (DC) electricity. This energy is then directed to the charge controller, which regulates the voltage and current to prevent battery overcharging and prolong battery life if batteries are involved. In the presence of batteries, this electronic equipment stores excess energy for use during periods of low sunlight. The next component in the system, the inverter, converts DC into alternating current (AC), which is necessary for powering most household appliances. Without a deep understanding of each element, the process of replacing electronics could lead to errors, ultimately causing further complications.
2. IDENTIFYING COMPONENTS FOR REPLACEMENT
When it becomes apparent that the electronics of solar tubes require replacement, the first step is to identify the components that are malfunctioning. Common problems may manifest through sporadic energy generation, failure to charge batteries, or the inverter not functioning as expected. Accurate diagnosis is essential in this phase, as replacing the wrong component can lead to wasted time and resources.
Visual inspections are fundamental in identifying any potential faults. Check for physical damage, such as burnt connectors, frayed wires, or corrosion on terminals. Additionally, using a multimeter to test voltage output can help determine whether the solar panels are functioning effectively. If the solar panels are intact yet the charge controller is not performing up to standard, it may need replacement. Furthermore, ensuring correct connections and compatibility with existing systems is essential, as mismatched components could compromise the functionality of the solar energy system.
3. PREPARING FOR REPLACEMENT
Once the faulty components have been pinpointed, gathering the necessary tools and replacement parts becomes the next logical step. Preparation is crucial to streamline the replacement process and minimize delays. Basic tools such as screwdrivers, wire cutters, and socket wrenches are typically required. Additionally, safety gear, including gloves and goggles, should be donned to provide protection during the replacement process.
Acquiring replacement parts may involve purchasing from an authorized dealer or reputable online retailers. It is vital to ensure that the new components are compatible with the existing solar tube setup. Each part should come with specifications and instructions to facilitate smooth installation. Moreover, having all tools and components ready before commencing work can enhance efficiency and mitigate risk. Failures in this stage can lead to undue complications, emphasizing the importance of meticulous planning prior to initiating the replacement.
4. DISCONNECTING OLD ELECTRONICS
When it comes time to replace the components, the old electronics must be safely disconnected. This phase involves careful handling to prevent damage to the remaining functional parts. Begin by turning off the solar tube system to eliminate the risk of electrical shock during disconnection. Properly documenting wiring connections through photographs or notes can assist in reconnecting the new components later.
Careful disassembly of the previous electronics is vital. Start with the solar panels by detaching them from any mounting hardware, ensuring the wiring harness is labeled or recorded. The next step involves disconnecting the charge controller and inverter, following the documentation created earlier to avoid confusion. Paying attention to details is crucial, as any mistakes during this phase can complicate the reassembly process significantly.
5. INSTALLING NEW ELECTRONICS
Now that the old electronics have been completely removed, one can proceed with the installation of the new components. Following a clean and organized approach can facilitate optimal results. If the replacement parts arrived with instructions, it is beneficial to follow them step by step. Careful handling during installation is essential, ensuring that components are securely attached and not twisted or pinched.
Beginning with the solar panels, mount them back onto their supports following their original orientation. Make sure that all connections are tight and that there are no risk factors for poor connectivity. The next phase involves carefully connecting the charge controller, following the notes taken during disassembly to ensure everything is wired correctly. Finally, the inverter should be hooked up, followed by double-checking connections and securing all components. This thorough approach ensures a higher success rate after the installation process is complete.
6. TESTING FOR OPTIMAL PERFORMANCE
With the new electronics installed, it is crucial to conduct testing to ensure everything functions as intended. Initially, re-engage the solar tube system and observe the functionality of each component. Starting with the solar panels, confirm that they are generating energy efficiently. This can be assessed through a multimeter, checking if voltage output meets the expected levels.
Next, evaluate the performance of the charge controller. It should properly regulate incoming energy and indicate battery status if batteries are involved. The inverter also warrants attention, as it converts DC into AC and should reflect the proper output for household or commercial use. Performing such comprehensive testing can help identify any remaining issues, allowing for prompt rectification before they lead to greater failures down the line. Focusing on maintaining these systems is necessary to ensure long-term functionality and efficiency.
7. MAINTAINING THE SOLAR TUBE SYSTEM
Proper maintenance goes a long way in ensuring the longevity and effectiveness of solar tube systems. After replacing the electronics, it becomes important to develop a routine check-up plan to regularly assess the overall condition. This can include visual inspections to detect potential issues, voltage checks to evaluate performance, and ensuring the cleanliness of solar panels, as dirt or debris can hinder energy collection.
A proactive approach to maintenance can avoid unforeseen glitches that may arise as solar technology ages. Documenting performance metrics over time can provide insights into efficiency and help pinpoint irregularities. Additionally, forming a relationship with professional service providers who specialize in solar energy can offer further advice and assistance when necessary. Investing time in proper maintenance is essential for sustaining the health of the solar tube system, promoting dependable energy sourcing for years to come.
8. UNDERSTANDING COSTS AND SAVINGS
Replacement costs can vary significantly depending on the components’ quality and compatibility. Investing in branded, high-quality electronics can mean higher upfront costs; however, it often results in better efficiency and longevity. Calculating potential savings, based on energy efficiency, is a prudent way to assess whether the investment is worthwhile.
Long-term savings on energy bills can be considerable, especially in systems using solar energy for residential or commercial purposes. An efficient solar tube installation can reduce reliance on conventional energy sources, thus yielding considerable savings over time. Overanalyzing the total lifetime costs, along with potential savings, not only aids in decision-making but also ensures value for investment related to these essential solar technologies.
COMMON QUESTIONS RELATED TO REPLACING SOLAR TUBE ELECTRONICS
WHAT ARE THE SIGNS THAT SOLAR TUBE ELECTRONICS NEED REPLACEMENT?
Several indicators may suggest that the electronics in solar tubes require replacement. One of the most noticeable signs is poor energy output. If the solar panels are not producing energy up to their rated capacity, this may indicate a fault in the charge controller or the inverter. Furthermore, if the charge controller fails to regulate energy flow, it could lead to battery overcharging or undercharging, leading to further issues.
In addition, flickering lights or erratic appliance behavior may indicate problems within the inverter, preventing efficient conversion of DC to AC. Finally, visual signs such as burning smell, scorch marks on components, or corrosion in connectors can also be warning signals that replacement is imperative. It is crucial to monitor these signs closely to ensure the longevity of your solar tube system.
HOW LONG DOES THE REPLACEMENT PROCESS TAKE?
The time required for replacing the electronics of solar tubes can vary depending on several factors, primarily the particular components being replaced and the user’s level of expertise. On average, individuals familiar with the technology may complete the process within a few hours. This includes assessing current electronics, disconnection, installation of new parts, and thorough testing afterwards.
For those who are less experienced or face unforeseen challenges during the replacement, the process could extend significantly. Furthermore, complexity increases if multiple parts are being replaced simultaneously or if the installation requires additional extensive troubleshooting. Adequate preparation and familiarizing oneself with component specifications can help mitigate delays in the replacement timeline.
WHAT TO DO IF INSTALLATION DOESN’T WORK?
In the unfortunate event that the replacement installation fails to work as expected, immediate troubleshooting is necessary. Begin by checking all connections to ensure that they are secure and free from damage. It may also be beneficial to revisit the documentation or photos taken during disassembly to confirm that all components were correctly replaced and wired.
If everything appears to be in order yet problems persist, testing each individual component can help isolate issues. Using a multimeter to assess voltage levels at various points can provide insight into where a failure might have occurred. If the troubleshooting process becomes too complex or time-consuming, it is often best to consult a professional to ensure a thorough examination and resolution of the problem.
A comprehensive approach to replacing the electronics of solar tubes contributes significantly to the functionality and efficiency of the entire solar energy system. Careful assessment, preparation, and execution during the process are vital in maintaining system integrity and ensuring long-term usability. By understanding the components involved and committing to consistent maintenance, individuals can greatly benefit from cost savings, renewable energy efficiency, and long-lasting performance. Making informed decisions concerning replacement components can lead to a more reliable and effective solar energy system, ultimately fostering an environmentally friendly energy solution that promotes sustainability for the future.
Original article by NenPower, If reposted, please credit the source: https://nenpower.com/blog/how-to-replace-the-electronics-of-solar-tubes/
