
1. Repairing a broken solar temperature control valve requires a methodical approach to ensure functionality is restored effectively. 2. First, identify the underlying cause of the malfunction, which may involve checking for leaks, obstructions, or mechanical failures within the valve. 3. Next, acquire the appropriate tools and replacement parts to address the specific issues identified during initial assessments. 4. Finally, execute the repair with attention to details, ensuring that all connections are secure and that the system is tested thoroughly after completion. Notably, understanding how these valves operate within the solar heating system greatly aids in troubleshooting and repair efforts.
1. UNDERSTANDING THE SOLAR TEMPERATURE CONTROL VALVE
Solar temperature control valves play a vital role in managing temperature levels within solar heating systems. They help regulate the flow of water or heat transfer fluids based on preset temperatures, ensuring optimal efficiency and reducing energy waste. These valves operate by responding to temperature sensors that signal when to open or close the valve mechanism, thereby controlling the heat exchange process.
Understanding the components of a solar temperature control valve is essential for effective repairs. Typically, a valve consists of a body, actuator, and an internal mechanism that opens or closes based on inputs from temperature sensors. Issues can arise from mechanical fatigue, thermal expansion beyond limits, or even improper installation. Therefore, recognizing the different components and their functions is paramount for diagnosing any faults that may compromise the valve’s operation.
2. COMMON ISSUES WITH SOLAR TEMPERATURE CONTROL VALVES
Identifying common problems associated with solar temperature control valves can save time and resources during repair processes. Primary issues include leaks, which can result from wear and tear, corrosion, or improper fitting of the connections. A leaking valve not only affects the efficiency of the solar heating system but may also lead to water damage and loss of energy.
Another frequent issue involves valve jamming or sticking, often caused by debris accumulation, mineral deposits, or internal corrosion. This jamming prevents the valve from moving freely between open and closed positions, impeding the system’s ability to maintain desired temperatures. Regular maintenance and cleaning can mitigate these risks, ensuring the valve remains functional and responsive to temperature changes.
3. TOOLS REQUIRED FOR REPAIR
Before embarking on the repair process, gathering the necessary tools is crucial for efficient execution. Basic tools such as wrenches, screwdrivers, and pliers are essential for disassembly and reassembly of the valve. Additionally, specialized tools like torque wrenches and sealant applicators may be required to ensure all connections are tight and leak-free.
It is also advisable to have replacement parts on hand, including O-rings, seals, or complete valve assemblies, depending on the identified issues. Using compatible parts will guarantee longevity and enhance the performance of the valve post-repair. The correct tools not only simplify the repair process but also ensure that the work adheres to safety standards, thereby preventing further complications.
4. INITIAL ASSESSMENT AND DIAGNOSIS
Commencing the repair involves a thorough assessment of the solar temperature control valve. This involves isolating the valve from the rest of the system to prevent unintended water flow during work. Examine the valve for visible signs of wear or damage, such as cracks or corrosion on the body or connections. Conducting a pressure test can help identify leaks that are not immediately visible.
Taking note of how the valve operates prior to disassembly is also important. Observing whether the valve opens and closes correctly in response to changing temperatures can guide the diagnosis. Documenting these observations will assist in pinpointing the exact cause of the malfunction, ensuring that all necessary repairs are undertaken.
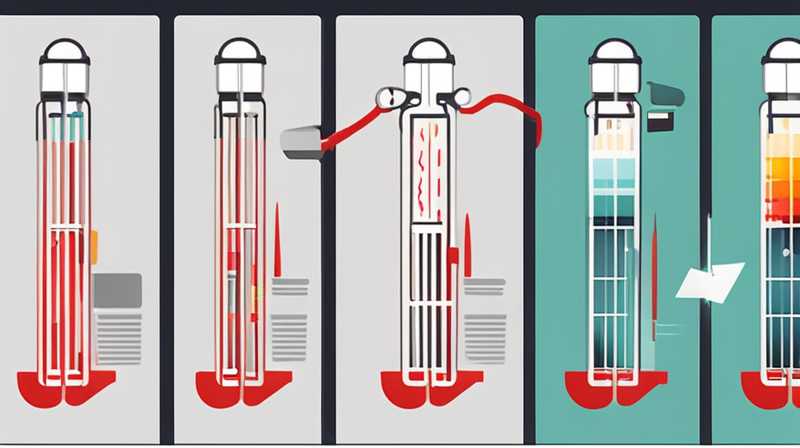
5. DISASSEMBLING THE VALVE
Once the initial assessment is complete, the next step involves disassembling the valve carefully. Use appropriate tools to loosen and remove the connections without causing additional damage. Keep track of the order in which components are removed for easier reassembly. It is advisable to clear out any debris or mineral buildup found within the valve body during this phase.
Inspect each component for signs of wear and damage. For instance, examine the O-rings and seals for cracks or hardening, indicating they may require replacement. Similarly, check the actuator mechanism for any signs of malfunction. Understanding each part’s condition will guide the decision on whether to repair or replace certain components.
6. REPLACING DAMAGED COMPONENTS
After thorough inspection, begin replacing any damaged components. If seals or O-rings are compromised, replace them with high-quality, compatible parts to ensure a tight fit. For more complex interior mechanisms that may be damaged, consult the manufacturer’s specifications to find exact replacements.
When replacing components, applying lubricants appropriately can enhance performance and ease future disassembly. Ensure that new parts are seated correctly and match the specifications outlined by the manufacturer. Proper replacement not only restores functionality but can improve the entire system’s efficiency, preventing similar issues in the future.
7. REASSEMBLING THE VALVE
Following the replacement of damaged components, proceed with reassembling the solar temperature control valve. Ensure that all parts are aligned correctly and that none of the components are forced into place. Utilize a torque wrench to tighten the connections according to the manufacturer’s specifications to avoid overtightening, which could lead to further issues.
During reassembly, be vigilant for any unusual resistance or misalignment, which could indicate improper assembly. After everything is back in place, double-check all seals and connections before moving onto the next phase of testing.
8. TESTING THE REPAIRED VALVE
After reassembly, testing the repaired solar temperature control valve is essential to confirm that all issues have been resolved. Reconnect the valve to the solar heating system and ensure the system is filled with fluid, eliminating any air pockets. Gradually increase the temperature to observe whether the valve opens and closes appropriately in response to the heat changes.
Pay close attention to the system pressure to detect any leaks during the test. If any leaks are found, it is crucial to address them immediately before relying on the system for regular operation. Conducting this thorough test ensures that the repair has restored functionality and that no further issues are present.
9. REGULAR MAINTENANCE TO PREVENT FUTURE DAMAGE
To ensure long-lasting performance of a solar temperature control valve, implementing a regular maintenance schedule is crucial. This includes periodic inspections to detect any early signs of wear or damage. Cleaning the valve regularly can prevent the buildup of debris and mineral deposits, which are common culprits of valve malfunction.
Additionally, visually inspecting the operational components during seasonal changes will help maintain optimal performance levels. Using protective coatings or lubricants can also extend the lifespan of internal mechanisms. By proactively maintaining the valve, potential problems can be minimized, safeguarding the overall efficiency of the solar heating system.
FREQUENTLY ASKED QUESTIONS
WHAT SIGNS INDICATE A BROKEN SOLAR TEMPERATURE CONTROL VALVE?
Several signs may indicate that a solar temperature control valve is malfunctioning. 1. Inconsistent Temperature Control: If the system fails to maintain the desired temperature consistently, it may suggest that the valve isn’t regulating flow correctly. 2. Leaks: Any observable water leaks around the valve connections usually signify a problem. 3. Noise: Unusual sounds such as clunking or whining during operation are typically indicative of mechanical issues. 4. Freezing or Sticking Mechanism: If the valve doesn’t open or close smoothly, it may be stuck due to debris or mechanical failure. 5. Error Codes from the Controller: If the solar heating system uses a controller that displays error messages, these alerts may point directly to the temperature control valve. If multiple signs are present, it’s imperative to investigate effectively to determine the necessary repairs.
HOW CAN ONE IMPROVE THE EFFICIENCY OF A SOLAR TEMPERATURE CONTROL VALVE?
Improving the efficiency of a solar temperature control valve can yield significant benefits for the entire solar heating system. 1. Regular Maintenance: Regular inspections should be conducted to clean and lubricate the valve components, preventing clogs and improving functionality. 2. Quality Components: Utilizing high-quality and compatible replacement parts when repairs are needed ensures longevity and reliability. 3. Calibration: Ensuring that the valve is calibrated to the specific needs of the system helps it react correctly to temperature changes, enhancing efficiency. 4. Insulation: Adding insulation to the valve and its connections will minimize thermal losses, thereby improving the overall efficiency of the heating system. Implementing these strategies will not only enhance the performance of the valve but also contribute positively to the entire solar heating system’s effectiveness.
IS IT POSSIBLE TO REPAIR A VALVE WITHOUT PROFESSIONAL HELP?
Yes, it is feasible to repair a solar temperature control valve without professional assistance, provided certain conditions are met. 1. Knowledge: Individuals should possess a basic understanding of how solar heating systems function, as well as familiarity with valve mechanisms. 2. Tools: Adequate tools and replacement parts must be available to conduct repairs effectively. 3. Safety: Precautions should be adhered to, ensuring that water or electrical systems are safely isolated prior to engaging in repair work. 4. Manufacturer Guidelines: Following the manufacturer’s instructions for the valve and system is critical for successful repairs. However, if the diagnosis or repair seems complex or beyond the individual’s skill level, it may still be advisable to consult a professional. This will guarantee repairs are executed correctly and efficiently, minimizing potential risks.
Repairing a solar temperature control valve requires a systematic approach and a thorough understanding of the mechanisms involved. Successful diagnostics should strive for accuracy in identifying issues, followed by careful execution of the repair process. Necessary tools and components must be collected prior to work initiation, enabling efficient and effective repairs. After thorough inspection and replacement of damaged parts, the valve should be reassembled and tested to ensure proper operation before being returned to service. By adopting routine maintenance practices post-repair, one can significantly enhance the longevity and efficiency of the valve, thereby ensuring uninterrupted operation of the entire solar heating system. Failure to address issues promptly or adequately can result in inefficient heat management and financial loss over time. Ultimately, investing time and effort into understanding and maintaining the solar temperature control valve can yield substantial benefits, both in terms of energy savings and reliable system performance.
Original article by NenPower, If reposted, please credit the source: https://nenpower.com/blog/how-to-repair-a-broken-solar-temperature-control-valve/
