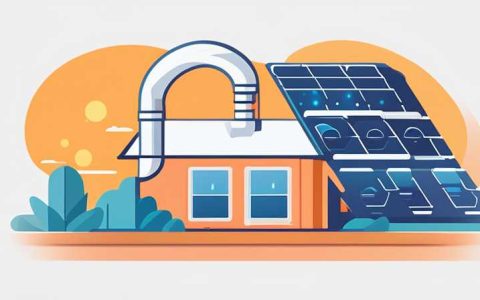
To effectively address the issue of repairing a broken home solar tube, several essential steps must be undertaken. 1. Identify the damage, 2. Gather necessary tools, 3. Remove the damaged tube, 4. Install the new or repaired tube. Identifying the damage entails examining for leaks or cracks that affect performance. Once you know the issue, gathering proper tools like a screwdriver, replacement parts, and sealant is crucial. Carefully removing the damaged unit requires ensuring safety and minimizing further damage to the surrounding areas. Finally, correctly installing the new or repaired tube ensures optimal functionality. Each of these steps is critical to achieving a successful repair.
1. UNDERSTANDING SOLAR TUBES
Solar tubes, or solar tube skylights, are innovative installations designed to enhance natural light within indoor spaces. These devices harness sunlight, channeling it through a highly reflective tube to diffuse illumination evenly in a room. Their design typically consists of an exterior dome and an interior diffuser, effectively diffusing sunlight. Understanding their functionality and advantages is paramount before delving into repair techniques.
The effectiveness of solar tubes stems from their ability to capture light across varying angles and is not limited to traditional skylights. The efficiency of solar tubes exceeds that of conventional skylights, particularly in terms of light distribution. As a result, homeowners benefit from reduced dependency on electric lighting during daylight hours, leading to cost savings on electricity bills. Furthermore, they contribute to energy conservation and an eco-friendly environment. However, like all devices, solar tubes can sustain damage, necessitating a comprehensive understanding of their structure and common issues.
2. COMMON PROBLEMS WITH SOLAR TUBES
Despite their advantages, solar tubes are susceptible to various issues that may occasionally arise. Leaks, cracks, and condensation buildup are among the most prevalent problems encountered by homeowners. Understanding these mechanics can aid significantly in diagnosing and fixing issues efficiently.
Water leakage is a significant concern, primarily if the installation was not performed correctly. Over time, aging materials and weather exposure can compromise the integrity of the sealant around the openings. Inadequate sealing may expose the interior to moisture. Consequently, this could lead to water damage, mold growth, or decreased indoor air quality. Regular inspections and maintenance can help avoid such complications, but understanding the installation process can significantly help identify potential problems early on.
Cracks can also occur due to structural shifts in a home or extreme weather conditions. Harsh storms, hail, intense sun, or temperature fluctuations can lead to visible damage, impacting performance. A crack may seem minor but can increase over time, jeopardizing the entire system’s effectiveness. Monitoring the condition of solar tubes regularly allows for prompt interventions, thereby reducing repair costs and ensuring optimal light transmission within the home.
3. TOOLS REQUIRED FOR REPAIRING SOLAR TUBES
Undertaking repairs necessitates a comprehensive understanding of the tools required for a successful outcome. Gathering the correct tools, such as safety gear, a screwdriver set, sealant, and replacement parts, is crucial. Each tool serves a specific purpose, facilitating the various stages of the repair process.
Safety gear, including gloves and goggles, should be your first priority. Securing the workplace against potential hazards is vital, as working on roofs can present risks. Climbing ladders requires caution, and ensuring that weather conditions are suitable for repairs can significantly reduce the likelihood of accidents. Moreover, having the right tools on hand will streamline the process and make it more efficient.
A screwdriver set typically helps remove and install the mounting hardware associated with solar tubes. Additionally, having replacement dome or internal parts readily available can expedite the process. For sealing purposes, using high-quality sealant is essential to prevent leaks and ensure long-term durability. Choosing an adhesive designed for exterior use guarantees resilience to UV rays and extreme weather conditions. Having everything organized before starting contributes to a more efficient repair process, minimizing lengthy interruptions.
4. STEP-BY-STEP REPAIR PROCESS
With all necessary tools in place, it is now time to proceed with the actual repairs. Each stage requires attention to detail to ensure a successful repair, and thorough execution will enhance the lifespan of the solar tube installation.
The first step involves assessing the extent of the damage. After climbing to the location of the damaged tube, carefully inspect the exterior and interior components. This assessment helps in determining whether you need to replace a small part or the entire unit. If you discover significant structural issues, ordering replacement parts may be the most prudent choice. However, if it involves minor cracks or surface wear, a simple patch job with sealant may suffice.
Once you’ve made the necessary assessments, the next step is to detach the damaged unit carefully. This process typically involves unscrewing the tube’s mounting hardware and gently lifting the dome. Ensure that you cover the opening during removal to prevent debris from entering the house during repairs. After successfully detaching the tube, clean the surrounding area to prepare it for the installation of the new or repaired tube.
Installing the new or repaired tube involves reversing the removal process. Carefully position the solar tube or the replacement segment into place, ensuring everything aligns correctly with the pre-drilled holes. Once aligned, secure the mounting hardware tightly, utilizing the screwdrivers for a snug fit. Properly sealing the edges with high-quality sealant is crucial for preventing moisture intrusion; ensure that the entire perimeter is covered.
5. MAINTENANCE TIPS FOR SOLAR TUBES
After completing repairs, developing a routine maintenance schedule is essential for prolonging the life of solar tubes. Regular cleaning, inspections, and proper sealing are key components of effective maintenance. These practices can help identify potential issues early before they escalate into more significant concerns.
Cleaning solar tubes periodically allows for optimal performance. Dust, debris, and bird droppings can accumulate on the outer dome, obstructing natural light transmission. A simple routine involving water and a soft cloth can suffice to keep the external dome spotless. Additionally, inspecting seals for wear and tear ensures any developing cracks or gaps can be addressed immediately. Be sure to perform cleaning activities during dry weather for safety reasons.
Performing maintenance checks at least twice a year, preferably in conjunction with seasonal changes, can significantly enhance the performance of solar tubes. Look for visible signs of damage, such as cracks or separation in the sealant. If discovered, make timely repairs to mitigate further issues down the line. These simple practices contribute significantly to preserving the efficiency of solar tubes and ensuring that they continually provide natural light to homes.
6. PROFESSIONAL ASSISTANCE IN SOLAR TUBE REPAIRS
While many homeowners can undertake solar tube repairs independently, there are instances when professional assistance becomes advantageous. Engaging industry professionals fosters a smoother process, offering access to specialized knowledge and tools not always available to the average homeowner. Such experts can assess and resolve complicated issues, ensuring comprehensive repairs and maintenance.
When considering professional assistance, conducting thorough research proves imperative. Seek reputable contractors specializing in solar tube installations and repairs. Their experience allows them to identify potential problems swiftly and implement effective solutions. This can not only save time but also mitigate the risk of errors during the repair process.
Moreover, professional services often provide warranties or guarantees on their work, which can be an invaluable asset for homeowners. These assurances reduce the likelihood of incurring additional expenses shortly after repairs are completed. By relying on trained technicians, homeowners gain the confidence that repairs will lead to long-lasting results.
7. ENVIRONMENTAL BENEFITS OF SOLAR TUBES
The integration of solar tubes into residential settings delivers numerous environmental advantages. Using solar tubes enhances energy efficiency and reduces carbon footprints, playing a significant role in sustainable living. Their adoption contributes to decreasing reliance on artificial lighting, thus minimizing energy consumption.
In an age where environmental concerns are prevalent, solar tubes emerge as a viable solution. By maximizing natural light in interior spaces, these installations diminish the need for conventional lighting sources. This translates to lower energy expenditures and reduced greenhouse gas emissions, underscoring their importance in promoting eco-conscious living.
Furthermore, solar tubes offer a sustainable alternative to traditional skylights. Many conventional skylights may utilize energy-consuming glass, which requires more maintenance and may not be as efficient in light distribution. Solar tubes, in contrast, utilize reflective materials and efficient technology, ensuring superior functionality linked with minimal energy loss. Investing in such devices not only benefits individual households but also aligns with broader sustainability goals, contributing positively to the environment.
8. DIY VS PROFESSIONAL REPAIRS
Deciding between undertaking repairs independently or engaging a professional often depends on the complexity of the issue. Assessing personal skills, available time, and specific circumstances can guide this choice. Evaluating the severity of the damage and potential risks determines whether a DIY approach is appropriate.
For minor repairs, such as small leaks or cracks, many homeowners possess the skills and tools necessary to resolve the issue without professional assistance. This can save time and money, provided safety precautions are followed. Consulting guides or tutorials online can also enhance confidence for those inclined to tackle the task independently.
Conversely, complex repairs often necessitate professional involvement. Challenges such as extensive water damage or structural concerns need expert knowledge and can pose safety risks if not addressed adequately. Homeowners should prioritize safety and efficiency. Making an informed decision would yield optimum results, ensuring a positive outcome regardless of the chosen route.
FREQUENTLY ASKED QUESTIONS
HOW DO I KNOW IF MY SOLAR TUBE IS DAMAGED?
Identifying damage often requires a combination of observation and assessment. Common indicators include reduced light output, visible cracks in the dome, or signs of water leakage in the interior area served by the solar tube. Regular monitoring helps in the early detection of potential issues, which can prevent further damage and reduce repair costs.
During inspections, pay close attention to the outer dome. Accumulation of dirt or debris can obstruct light flow, but if such accumulations are removed and there is still a significant reduction in light, it could indicate internal issues such as misalignment or potential loss of reflective surfaces inside the tube.
Water stains or moisture on your ceiling or walls near the solar tube are red flags suggesting a leak. If left untreated, these leaks may cause significant damage, leading to higher repair costs down the line. Regular maintenance and prompt attention can safeguard against more complex problems arising from minor damage.
WHAT ARE THE COSTS ASSOCIATED WITH REPAIRING SOLAR TUBES?
Costs associated with repairing solar tubes can vary significantly based on several factors. The primary considerations include the extent of the damage, type of repairs needed, and whether one opts for professional assistance or a DIY approach. Minor repairs could incur costs as low as a few dollars, while extensive damage may necessitate considerable investment for materials and labor.
DIY repairs typically reduce costs since homeowners avoid labor charges. However, costs for materials such as sealant, tools, and replacement parts still apply. Conversely, engaging professionals may represent a larger upfront cost but could ultimately save money by ensuring the job is done correctly without the risk of further damage.
It’s fundamental also to consider maintenance costs, which can mitigate larger repair needs over time. Regular inspections, cleaning, and resealing may incur annual costs but can preserve the integrity and efficiency of solar tubes long term. As such, understanding the landscape of repair costs encompasses both immediate expenditures and long-term perspectives.
CAN I REPAIR A SOLAR TUBE MYSELF?
Many homeowners successfully repair solar tubes on their own, provided they possess suitable skills and equipment. Determining the feasibility of a DIY approach hinges on various factors, including the complexity of the issue at hand. Simple leaks or minor cracks often lend themselves to manageable repairs.
To tackle a DIY repair effectively, ensure that safety precautions are in place. Utilizing the necessary tools, such as screwdrivers and sealant, is vital; safe ladder use is equally important. Consulting instructional resources before commencing repairs can also bolster confidence and enhance accuracy, giving a clearer idea of the required process.
Nonetheless, more complex issues, such as significant structural damage or persistent leaks, often necessitate professional assistance. Proper evaluation of personal comfort levels and abilities is key to deciding whether to proceed with a DIY repair. Should uncertainties arise, seeking professional guidance may be the most prudent course of action to ensure optimal repairs.
Repairing a broken home solar tube requires meticulous attention to detail, proper tools, and a clear understanding of the steps involved. Identifying the problem, gathering the necessary equipment, and systematically executing the repair leads to successful outcomes. While some homeowners may opt for DIY methods, others may find that professional assistance yields more lasting results, especially in the case of extensive damage. Regular maintenance and inspection remain crucial for the longevity and efficiency of solar tubes, thereby contributing to a brighter, more energy-efficient home. Ultimately, enhancing not only light transmission but also the environmental values of energy conservation resonates positively in both personal and broader community contexts.
Original article by NenPower, If reposted, please credit the source: https://nenpower.com/blog/how-to-repair-a-broken-home-solar-tube/


