
1. THE PROCESS OF REMOVING A SOLAR TAILLIGHT REQUIRES SEVERAL STEPS, BEGINNING WITH IDENTIFYING THE MOUNTING MECHANISM, FOLLOWED BY DISCONNECTING THE POWER SOURCE, AND FINALLY, CAREFULLY TAKING OUT THE TAILLIGHT ITSELF. 2. ANY ATTACHMENTS OR SCREWS HOLDING THE UNIT IN PLACE MUST BE REMOVED WITH APPROPRIATE TOOLS. 3. AFTER PROCESSING THESE STEPS, ENSURING PROPER REINSTALLATION WITH GASKETS OR SEALS IS CRUCIAL TO MAINTAIN WEATHERPROOFING. 4. UNDERSTANDING YOUR VEHICLE’S SPECIFIC TECHNICAL MANUAL CAN ALSO PROVIDE CUSTOMIZED GUIDANCE FOR COMPLETING THIS TASK SAFELY AND EFFECTIVELY.
THE SIGNIFICANCE OF SOLAR TAILLIGHTS
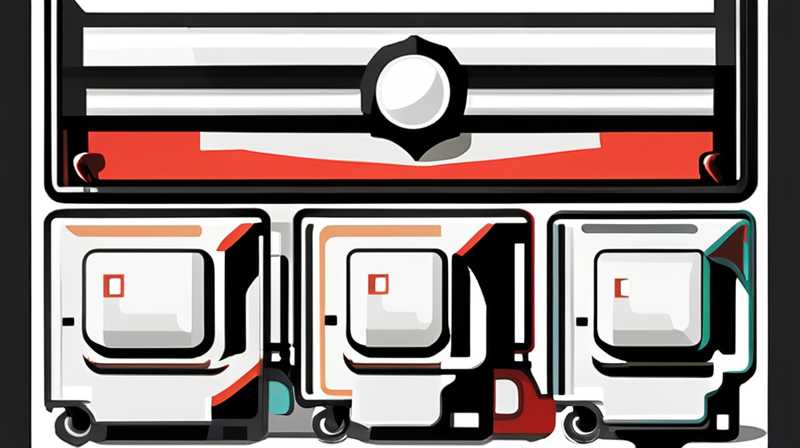
Solar taillights represent an innovative approach to automotive lighting, combining energy efficiency with environmental considerations. These lights utilize solar energy to operate, reducing reliance on the vehicle’s electrical system and allowing for extended use during emergencies or while parked. The mechanics behind solar taillights involve photovoltaic cells that capture sunlight, converting it into electrical energy to power the LEDs within the taillight assembly. These features not only help in conserving energy but also contribute to a vehicle’s sustainability profile.
Understanding how to remove a solar taillight can prove beneficial for various reasons, such as replacing a damaged unit or upgrading to a more advanced model. Given the technological integration of solar components, this process may differ from standard taillight removal. Therefore, familiarity with specific tools and techniques is essential for ensuring both safe removal and successful reinstallation.
1. IDENTIFYING THE SOLAR TAILLIGHT ASSEMBLY
Before embarking on the removal venture, it is vital to accurately identify the location and type of solar taillight installed on the vehicle. Most modern vehicles may have different variations and designs in their taillight assemblies. Generally, a solar taillight is positioned on the rear side of the vehicle, near the fender or bumper area. In many cases, the assembly may comprise multiple components, such as the outer lens, inner mount, and solar panel, all contributing to the complete functionality of the light.
Utilizing the vehicle’s manual may provide insights regarding the type of taillight model used. This contains essential information about mounting brackets and electrical connections, enabling one to prepare accordingly. To identify the right tools, recognizing whether the assembly employs screws, clips, or adhesive tapes can drastically influence the approach to take. Knowledge about these mounting mechanisms will enhance the procedure’s efficiency while minimizing the risks of damaging any associated components during the removal.
2. GATHERING NECESSARY TOOLS AND MATERIALS
Equipping oneself with the appropriate tools is fundamental for a successful removal process. Generally, essential tools include a screwdriver, socket wrench, and pliers, depending on the specific vehicle model and the type of mounting system used. Screwdrivers of varying sizes will assist in removing screws that may secure the taillight assembly to the vehicle. Furthermore, a socket wrench will be necessary if the assembly is fitted with bolts or nuts. Pliers can help manipulate any clips or fasteners that may require additional force for removal.
It is prudent to gather materials such as gaskets or weather seals, which are pivotal for maintaining water resistance when reinstalling the new or existing taillight. Having a clean cloth or towels is advisable for wiping away dirt or debris that may obscure connections and lenses. Additionally, if the taillight is connected to the electrical system, a multimeter may come in handy to test and ensure the power supply is completely shut off before commencing the removal. Collectively, having these items on hand streamlines the process and minimizes disturbances during the task.
3. DISCONNECTING THE POWER SOURCE
Prior to commencing the actual removal of the solar taillight, ensuring the power source is disconnected is crucial. This step mitigates the risk of electric shock or short circuits that may arise from accidental contact with live wires. Initially, opening the vehicle’s trunk or rear hatch provides access to the taillight area, revealing the electrical harness connecting it to the vehicle’s power supply.
Identifying the correct harness is essential, as vehicles often house multiple connectors in the same vicinity. Detaching the plug from the taillight requires a careful approach—gently pressing tabs or lifting levers to avoid damaging any components. For vehicles equipped with solar charging mechanisms, understanding the unique connections related to the solar panel becomes vital. Certain models may have an additional link that connects the panel to the vehicle’s battery, which must also be disconnected.
4. REMOVING MOUNTING HARDWARE
Once the power supply has been securely disconnected, the next phase entails removing the mounting hardware that secures the solar taillight assembly. Depending on the make and model of the vehicle, this hardware may manifest as screws, bolts, or clips. If screws or bolts are present, employing a screwdriver or socket wrench to unscrew these fixtures begins the process of releasing the assembly from its secured position.
In cases where clips hold the taillight in place, utilizing a flat-head screwdriver with utmost care can lift the clips without jeopardizing the surrounding panels or the light assembly itself. It’s crucial to track the removed hardware, as having all components will facilitate a smoother reinstallation later on. Always keep a designated area for the screws, bolts, or clips, which helps prevent misplacement during this intricate process.
5. CAREFULLY EXTRACTING THE TAILLIGHT
With the mounting hardware properly detached, the next step involves extracting the taillight assembly. This requires a gentle yet firm grip, to avoid breaking any plastic components while removing it from the vehicle. Sometimes, the taillight may be tightly fitted, necessitating light wiggling to dislodge it from its housing.
It’s advisable to inspect the area for obstructions as you remove the unit, as debris might have accumulated over time and could hinder the process. In certain cases, the solar panel may also be attached to the taillight assembly, complicating the extraction. Assessing whether the panel is integrated or detachable aids in avoiding damage. Furthermore, inspecting the sealant or weather stripping surrounding the assembly will reveal whether it needs replacement during reinstallation—an essential factor in ensuring longevity.
6. HANDLING THE SOLAR PANEL
Upon extracting the solar taillight, careful handling of the solar panel is paramount. Given that these panels are often composed of delicate materials, avoiding direct pressure is vital to prevent compromising their functionality. If the panel is separate from the taillight, placing it on a soft, flat surface can safeguard it from scratches or cracks.
Examining the solar panel for damage is prudent, especially prior to reinstallation. Any visible scratches, cracks, or discoloration may weaken its performance upon reinstallation. If signs of damage are present, investing in a replacement unit ensures the integrity of the entire taillight system remains intact. Proper inspection of the connectors and wiring attached to the panel should also occur, as fraying or loss of insulation can lead to functionality issues down the line.
7. REPLACING OR REINSTALLING THE TAILLIGHT
Once the taillight assembly and solar panel have been successfully extracted, the next logical step is either replacing the components with new ones or reinstalling the existing parts. Evaluate the conditions of both the solar panel and the taillight assembly. If either component reflects significant wear, acquiring replacements allows for improved performance and reliability. Conversely, ensuring the existing components are clean will enhance performance when they are put back into place.
If opting for a replacement, following the manufacturer’s guidelines regarding installation is crucial. Adhering to the prescribed sequence of assembly will ensure that the components are fitted securely and work seamlessly. Additionally, it’s wise to apply fresh sealant or gaskets to fortify against moisture infiltration, contributing to the durability of the taillight setup in various weather conditions.
8. TESTING THE NEW INSTALLATION
After reinstalling or replacing the taillight assembly, testing its functionality becomes a paramount final step. Reconnecting the power supply established earlier allows for a straightforward assessment of the new setup. Attaining illumination when pressing the brake pedal or activating the headlights signifies successful installation.
An additional examination of the solar charging system’s integrity should occur if applicable. By placing the vehicle under light conditions and verifying that the solar panel generates power efficiently, one can ensure that all components are operating as intended. This testing phase not only provides confidence for the driver but also assures safety on the roads, enhancing the overall vehicle performance.
COMMON INQUIRIES
HOW OFTEN SHOULD SOLAR TAILLIGHTS BE REPLACED?
Solar taillights typically exhibit considerable durability; however, their lifespan can be influenced by various factors including exposure to the elements, quality of the product, and the vehicle’s usage patterns. On average, these components are designed to function optimally for several years. It’s prudent to regularly inspect them for any signs of fading, malfunction, or corrosion. Defective bulbs or damaged solar panels should prompt immediate replacement to maintain optimal visibility and increase safety.
CAN I REMOVE A SOLAR TAILLIGHT WITHOUT PROFESSIONAL HELP?
Yes, removing a solar taillight does not necessarily require professional intervention, provided you possess the appropriate tools and knowledge. Following manufacturer guidelines and understanding your vehicle’s specific assembly will empower you to undertake the task effectively. However, caution is essential—missteps can lead to inadvertent damage. If familiarity with automotive repair is limited or if any complications arise, consulting a professional mechanic is recommended to avert unexpected issues.
WHAT ARE THE ADVANTAGES OF SOLAR TAILLIGHTS OVER TRADITIONAL ONES?
Solar taillights present multiple advantages compared to conventional lighting systems that rely on the vehicle’s electrical circuit. These include energy efficiency, which minimizes the load on the battery and contributes to longer-lasting bulb life. Furthermore, their advantage of functioning independently by harnessing solar energy makes them especially beneficial for outdoor or recreational vehicles. This innovative technology underscores environmental sustainability by reducing carbon footprint while providing superior visibility.
THE IMPORTANCE OF EXPERIENCE AND SAFETY MEASURES IN MAINTENANCE
In an era where technology plays a pivotal role in our everyday lives, the capacity to manage one’s vehicle effectively—notably in maintaining solar taillights—must not be underestimated. This DIY approach encompasses a sense of accomplishment and encourages vehicle owners to learn more about their machines. Thorough familiarity with the components involved empowers individuals, fostering a proactive stance toward vehicle maintenance.
While this task might seem daunting, understanding the procedural guidelines can alleviate concerns. As this process not only ensures the vehicle runs optimally, it also promotes safety awareness through visible lighting—an essential aspect for any driver.
Moreover, taking proper safety measures—including disconnecting the power source and using the right tools—creates an environment conducive to successful repairs. Such actions significantly diminish the chances of personal injury and potential damage to the vehicle. This balance of effective maintenance and safety ensures that vehicles equipped with solar taillights continue to operate efficiently while reflecting their owners’ commitment to larger environmental responsibilities.
Original article by NenPower, If reposted, please credit the source: https://nenpower.com/blog/how-to-remove-the-solar-taillight/
