
To effectively eliminate solar lights affixed to a pillar, one must follow a systematic approach. 1. Locate the power source of the solar light; this is typically found at its base or attached to the light fixture. 2. Detach any mounting mechanisms holding the solar unit in place; this may involve unscrewing or unclipping components. 3. Carefully pull the fixture away from the pillar to avoid damaging surrounding surfaces. 4. If applicable, remove the solar panel either by unscrewing or unclipping, which often allows for easier management of the wiring.
To elaborate further, the most critical aspect involves identifying the power source. Understanding how the solar light is powered can significantly aid in the removal process. Often, solar lights come with batteries that require careful handling during disassembly to prevent any potential hazards, ensuring that safety is paramount throughout the procedure, especially when working with electrical elements.
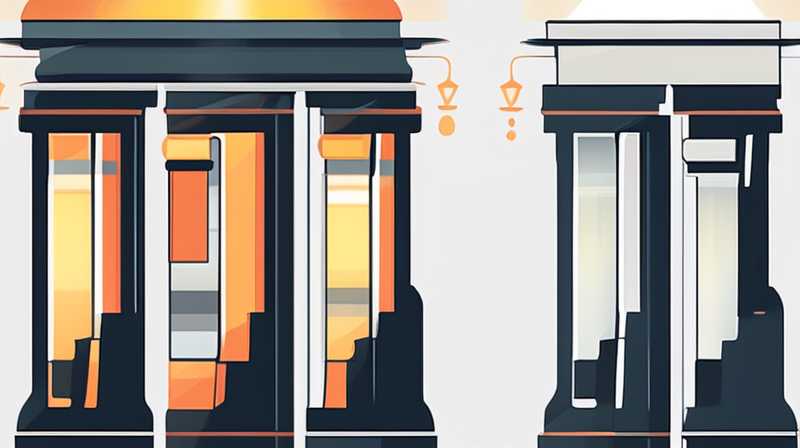
1. UNDERSTANDING SOLAR LIGHTS
Solar lights have become increasingly popular in residential and commercial settings due to their energy efficiency and ease of installation. They harness solar energy during the day and convert it into electrical energy for use at night. Understanding the operational mechanics of these lights is essential for anyone considering removing or replacing them.
The basic components of a solar light include the solar panel, battery, LED light source, and internal circuitry, all housed within a protective casing. Each of these elements plays a crucial role; the solar panel gathers sunlight, the battery stores energy, and the LED converts that stored energy into light. Moreover, appreciating how weather conditions affect the efficiency of solar lights can inform decisions about their placement and potential removal.
Solar lights are typically mounted onto surfaces using various means of attachment, such as screws or adhesive pads. Knowing the installation method will facilitate a smoother removal process. For instance, lights screwed into a pillar may need a drill and specific screwdrivers to disengage them safely without causing damage.
2. SAFETY PRECAUTIONS
Before undertaking the removal of solar lights, one must prioritize safety. Working with electrical components, even if they are low-voltage systems, necessitates caution. Proper protective equipment such as gloves and goggles should be utilized to safeguard against any unforeseen incidents such as cuts or debris.
It is also advisable to disconnect the solar light from its power source before starting the removal process. Though solar lights don’t typically pose the same risks as conventional wiring, preventing any potential shock is prudent. In the event that a solar light uses a battery, ensure that it is entirely drained or removed beforehand to eliminate any risks associated with electrical storage.
In addition to personal safety, one should also consider the surrounding environment. Ensure that the area is clear of obstructions to allow easy movement and prevent accidents. If it’s necessary to use a ladder or climb, follow recommended guidelines to avoid falls. Planning the removal process can significantly minimize unnecessary risks.
3. GATHERING NECESSARY TOOLS
Before embarking on the removal task, it is beneficial to gather all necessary tools and materials. This proactive approach eliminates interruptions that can lead to accidents or incomplete work. Essential tools may include a screwdriver set, pliers, a utility knife, a ladder, and flathead or Phillips-head screwdrivers, depending on the fittings used.
If the fixture is secured by adhesive, a utility knife or similar tool can assist in carefully cutting through adhesive material. When lifting the solar light off its mounting site, be cautious and gentle to ensure that non-destructive techniques are employed. Having an organized work station can significantly facilitate the process and provide easy access to tools as needed, thus streamlining the removal.
Additionally, it may be helpful to have a container or tray available to keep loose screws and small parts organized. This prevents loss, ensuring that every component can be accounted for and aids in future reinstallation or replacement if desired. By equipping oneself with the proper tools and setup, any potential setbacks during the removal process can be minimized.
4. REMOVING THE SOLAR LIGHT
With all safety precautions taken and tools gathered, the actual process of removing the solar light can begin. Start by inspecting any visible mounts and identifying how they are attached to the pillar. If screws are present, use the appropriate screwdriver to loosen and remove them. Always work in a clockwise direction, as this will help dislodge the secured light.
If the solar light is affixed with adhesive, consider gently prying it away from the surface of the pillar. It’s essential to use a gentle hand to avoid damaging the pillar. Sometimes, heat from a blow dryer or heat gun can soften the adhesive enough for easy removal, but care must be taken to avoid overheating and damaging any surrounding materials.
In some difficult cases where the removal of the light proves resistant, seeking the assistance of a friend or neighbor might make the task more manageable. A second pair of hands can ensure that one person manages tools while the other holds the fixture steady, facilitating a safer and more efficient process.
5. HANDLING THE SOLAR PANEL
Once you have successfully detached the main solar light fixture from the pillar, attention should shift to the solar panel, which may be connected or built into the light unit. Disengaging this component often involves a few essential steps.
If the solar panel can be detached physically from the light, examine the mechanism holding it in place. Should it be connected via wires, caution is necessary; carefully pull the connectors apart without causing any damage. These connections might consist of simple plug-ins or clips, which must be disengaged without excessive force.
Furthermore, keeping an eye on the condition of the wires and connections is vital. Frayed wires can lead to issues in the future if one considers reinstallation or replacement with a new unit. Taking a moment to inspect and secure any loose wiring will ensure that the area remains safe and is ready for any future lighting solutions.
6. DISPOSAL AND RECYCLING
Following the successful removal of the solar lights, an important consideration is how to go about disposing of or recycling the materials. Solar lights often contain recyclable components, including metals and plastic, which can contribute to sustainable practices. Instead of discarding them in general waste, look for local recycling centers that accept solar components.
Additionally, many municipalities have e-waste programs that can be utilized for proper disposal of electronic components. Participating in these programs helps reduce environmental impact, particularly given that batteries and electronic parts can pose hazards if not disposed of correctly.
It is also possible to repurpose old solar lights. For individuals with a penchant for DIY projects, transformed fixtures can serve as decorative items, garden ornaments, or even as parts in new creative lighting solutions. This option may require creativity and resourcefulness, but it offers an environmentally friendly alternative to outright disposal.
7. MAINTAINING THE PILLAR
After the solar lights have been removed, it’s wise to consider maintenance or repair of the pillar itself. Depending on the condition of the surface left behind, it may require cleaning, sanding, or repainting to ensure it remains in good condition.
Evaluate whether any adhesive residue remains; if so, utilizing a solvent or adhesive remover designed for the material of the pillar will help restore the surface. Following that, if scratches or marks have been left behind, applying a suitable paint or finish can rejuvenate the area aesthetically.
Additionally, if contemplating reinstallation of different fixtures in the future, consider prepping the site for new mounting systems. This may involve making any necessary repairs or reinforcements to ensure a secure installation.
8. PLANNING FOR FUTURE INSTALLATIONS
Should one decide to install new lighting solutions in the future, this is an excellent opportunity to evaluate what styles would best fit the area. Various options exist, from traditional fixtures to modern LED solutions that cater to contemporary aesthetics. Each lighting type comes with its energy efficiency ratings and maintenance requirements, so research is essential to select the most fitting option.
When planning new installations, consider the placement and orientation of lights relative to their energy sources; this maximizes their efficiency. Analyze factors like the availability of sunlight throughout the day and adjustments in landscape or structures that may cast shadows affecting performance.
It might also be wise to discuss personal preferences with neighbors or community members who have experience with specific products. Gathering insights can be beneficial in ensuring that chosen lighting solutions meet individual expectations and community standards.
FREQUENTLY ASKED QUESTIONS
HOW LONG DO SOLAR LIGHTS LAST?
Typically, solar lights can last anywhere from 3 to 10 years, depending on several factors—light quality, battery health, and environmental conditions. Notably, the components that can fail include the solar panel, the battery, and LED lights. Regular maintenance can extend the longevity of solar lights, as cleaning the solar panel and replacing the battery as needed will help maintain their efficiency.
CAN SOLAR LIGHTS BE REPAIRED?
Indeed, many issues with solar lights can be rectified. Identifying whether the solar panel, battery, or bulb is faulty is the key element in determining repair viability. If cost-effective and practical, replacing components like batteries is often feasible. However, if sustaining functionality becomes consistently costly, purchasing new solar lights may be a better alternative.
ARE THERE GREEN DISPOSAL OPTIONS FOR SOLAR LIGHTS?
Yes, there are environmentally friendly ways to dispose of solar lights. Many communities offer recycling programs for e-waste, including batteries and electronic components. Ensuring responsible disposal limits environmental impact and promotes sustainability. Some organizations or manufacturers may also accept old solar lights for recycling.
To summarize, removing solar lights from a pillar involves specific steps, beginning with safe disconnection from power sources and loosening any fasteners. Gathering necessary tools prepares one for effective removal while considering safety precautions prevents accidents. Understanding how solar lights function plays an essential role, as does carefully handling removal without damaging the pillar. Post-removal, it’s critical to think of recycling options and maintain the pillar’s condition, ensuring future installations are planned with consideration for aesthetics and efficiency. Ultimately, embracing environmentally friendly disposal methods reflects a commitment to sustainability and responsible practices.
Original article by NenPower, If reposted, please credit the source: https://nenpower.com/blog/how-to-remove-the-solar-light-on-the-pillar/
