
1. Removal of a roof solar fixture requires a systematic approach using proper tools to ensure safety and effectiveness. 2. The process begins with assessing the solar panel’s connectivity and layout. 3. Following this, safely disconnecting the electrical components is crucial to avoid hazards. 4. Finally, once detached, the panel must be removed without damaging the roof structure.
1. UNDERSTANDING SOLAR FIXTURES
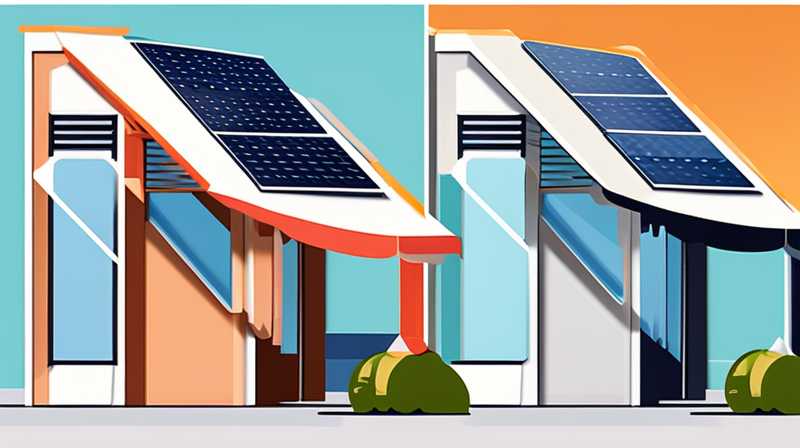
Solar fixtures installed on roofs harness the sun’s energy, converting it into usable electricity. These systems are increasingly popular as more homeowners seek sustainable energy solutions. However, various circumstances may lead one to consider the removal of such installations, whether due to upgrades, roof repairs, or relocating the solar system.
Before embarking on the removal process, it is imperative to understand how solar panels are integrated into the roofing system. Each solar panel is typically mounted on brackets that secure it to the roof’s surface. These mounts may vary in complexity and require specific tools for removal. Furthermore, the electrical components connected to the panels are sensitive and should be handled with care to prevent any damage or safety risks.
In addition to understanding the physical aspects of solar fixtures, one must also be aware of local regulations and the potential need for permits when removing solar panels. Local building codes may have stipulations regarding the structural integrity of the roof following the removal process, ensuring safety and compliance.
2. PREPARING FOR REMOVAL
Having established a foundational understanding, the next phase involves preparation. Proper preparation includes gathering the necessary tools and ensuring appropriate safety measures are in place. The tools typically required for this endeavor may consist of a socket set, wrenches, screwdrivers, safety goggles, and gloves to protect oneself during the operation.
Safety considerations should be paramount. This includes wearing appropriate gear to guard against falls or electrical shocks. Installing temporary barriers or using safety harnesses can significantly reduce the risk of accidents while removing fixtures from elevated surfaces. Furthermore, it is recommended to check the weather conditions before proceeding. A dry and calm day is ideal, as wet or windy conditions can create hazards.
In addition to physical preparations, it may be wise to inform neighbors or household members about the impending work. This courtesy ensures that individuals are aware of possible disruptions, particularly if heavy equipment or tools are used during the removal.
3. DISCONNECTING ELECTRICAL CONNECTORS
Before any physical removal of solar panels, disconnecting the electrical components is essential. Most solar panel systems consist of several key elements: the solar panels themselves, the inverter, batteries (if applicable), and associated wiring. Each component must be approached with caution to prevent electrical shocks or damage.
Identifying the inverter is crucial. This device converts the direct current (DC) generated by the solar panels into alternating current (AC), which is usable in homes. Find the inverter’s shutdown switch or disconnect mechanism, which will cut the power supply to the system. Following this, it is essential to disconnect the wiring connected to the panels, usually located at the back of each solar unit.
Once the wiring is exposed, carefully unscrewing or unclipping the connectors is necessary. Ensure that you are using insulated tools during this process to mitigate the chances of electrical exposure. Once these components are disconnected, check multiple times to ensure that no electrical current is flowing before proceeding to remove the mounted structure.
4. REMOVING MOUNTING BRACKETS
After successfully disconnecting electrical connections, the next step encompasses removing the mounting brackets from the roof. These brackets, designed to secure solar panels to a roof, can vary in design based on the manufacturer and installation method. Typically, they consist of bolts, screws, or clamps.
Begin by examining each bracket closely. This examination allows identification of how they are fixed to the roof and where the screws or bolts need to be removed. Using the appropriate socket wrench, begin unscrewing the brackets, retaining all screws and hardware for potential reinstallation or future use.
As brackets are removed, it is vital to check for any damage sustained by the roof itself. Areas where brackets have been installed may feature sealants or flashing, which should be managed carefully to prevent leaks. Documenting the condition of the roof during this process can be beneficial for future repairs or installations.
If multiple solar panels are installed, a systematic approach to removing them one at a time can simplify the task. Completing this stage with care ensures that damage to the roof is minimized, paving the way for a smoother overall removal procedure.
5. REMOVING SOLAR PANELS
Once the brackets have been successfully detached, attention can shift towards the removal of the solar panels themselves. This part of the process requires careful handling, as solar panels are often fragile despite their robust construction. Understanding how solar panels are connected allows for a smoother extraction.
Typically, solar panels are secured into place using a combination of clamps and bolts. Most systems would have specific points of attachment for each panel. Carefully loosen these attachments, being wary of any potential snapping or shattering that could occur if too much force is applied. It is advisable to have a partner assist during this phase to safely lower each panel once it becomes detached.
If the installation involves multiple panels, it’s crucial to create a clear workspace. Utilizing a staging area where panels can be laid flat and safe distances apart will minimize the risk of breakage or accidents during the removal process. As each panel is removed, it should be properly wrapped to prevent scratches or damages when stored or transported.
6. MANAGING ROOF INTEGRITY POST-REMOVAL
Once all components have been removed, assessing the integrity of the roof becomes paramount. After the brackets are taken off and solar panels are extracted, it is crucial to inspect the roof surface for any potential damage caused by the installation or removal process.
Ensure there are no indications of water damage or panel-related leaks. Inspect areas where mounts were attached for any gaps or openings that might allow moisture penetration. Depending on the observed conditions, it may be necessary to apply additional sealants or make repairs to the roofing material, thus ensuring longevity.
Furthermore, cleaning the roof does play a significant role after removing these fixtures. Accumulated debris or dirt can typically be found in areas occupied by panels. This attention to cleanliness helps in evaluating the overall roof condition and can serve as a preventive measure against future deterioration.
7. DISPOSAL AND RECYCLING OPTIONS
Thinking about disposal is essential after removing solar fixtures. Solar panels, while durable, must be disposed of properly due to environmental regulations that may govern how electronic waste is handled. Most jurisdictions encourage recycling or reusing components where feasible.
Seeking local recycling centers or manufacturers that accept used solar equipment can help facilitate the disposal process. Many organizations have established recycling programs aimed at minimizing environmental impact, providing an excellent option for responsible disposal. Additionally, researching new vendors or entities that could repurpose old solar panels can be a sustainable approach, allowing such technologies to find a new lease of life.
Once you identify suitable recycling or disposal avenues, it’s critical to document the process. Keeping records can be beneficial for potential tax deductions or rebates for sustainable practices, particularly if the removal process was associated with upgrades or system replacements.
FAQs
WHAT TOOLS ARE REQUIRED FOR REMOVING ROOF SOLAR FIXTURES?
To effectively remove roof solar fixtures, one must utilize a selection of tools. Primarily, a socket set is indispensable, providing the necessary tools to unscrew bolts and screws securing the solar panels and brackets to the roof. A sturdy ladder will ensure accessibility to the roof, enabling a secure work environment. It’s also advisable to have adjustable wrenches handy, addressing various sizes and types of fasteners used in solar installations. Precision screwdrivers could facilitate the careful undoing of smaller screws. Additionally, personal protective equipment (PPE) like safety gloves and goggles is essential to guard against injuries. If the installation includes high-voltage electrical components, insulated tools must be used to prevent electric shock. Planning for contingencies is wise, making a thorough checklist of tools ensures no vital equipment is overlooked.
HOW LONG DOES IT TAKE TO REMOVE SOLAR PANELS FROM A ROOF?
The duration required to remove solar panels from a roof can vary significantly based on numerous factors, including the number of panels being removed, the type of mounting system in use, and the expertise of the individual or team performing the removal. For an experienced professional, the actual removal of multiple solar panels could take anywhere from a few hours to a full day to complete. Whereas, for someone inexperienced with the installation mechanisms, the removal process may take much longer, surpassing a day due to precautions, safety checks, and the learning curve associated with unfamiliar tools and components. Thus, it becomes essential to allocate adequate time for the endeavor to avoid rushing, which may compromise safety and efficiency.
ARE THERE PERMITS REQUIRED FOR REMOVING SOLAR FIXTURES?
Permitting requirements for the removal of solar fixtures vary by location. Typically, jurisdictions may not necessitate specific permits solely for the removal of solar panels, especially if the system was installed under certain regulations. However, if roof work or structural repair follows removal, it could trigger local building code requirements. Sometimes, utilities or local governments may have established guidelines around handling solar installations. Prior to commencing work, checking with the local building department or utility provider can clarify any obligations regarding permits. Understanding these requirements beforehand avoids possible legal ramifications that could arise from unauthorized alterations to the property. Overall, engaging with appropriate authorities ensures compliance and provides peace of mind during the removal process.
The removal of solar fixtures involves meticulous planning and execution, ensuring safety and efficiency throughout the process. Proper understanding of the components, systematic disassembly, and attention to post-removal cleanliness all contribute to a successful project. While the removal may appear daunting at first, the undertaking becomes manageable with adequate knowledge, suitable tools, and responsible practices. Always prioritize safety and respect local regulations, as they guide the removal process effectively. Engaging professionals can streamline the endeavor if it seems overwhelming. By handling the removal with awareness of potential challenges and best practices, one can successfully navigate the process, whether for upgrades or repairs.
Responsibility towards environmental considerations and roof integrity will further contribute to satisfaction long after the job concludes. The thoughtful management of disposing of or recycling solar fixtures is crucial for minimizing negative impacts on the environment. As solar technology continues evolving, the removal of outdated or inefficient systems increasingly aligns with sustainable energy goals. This movement fosters a conscious approach towards energy solution installations, ultimately leading to a more sustainable environment. Adopting practices that prioritize safety and sustainability ensures that while one transitions away from older solar systems, they contribute positively to a cleaner, greener future.
Original article by NenPower, If reposted, please credit the source: https://nenpower.com/blog/how-to-remove-the-roof-solar-fixture/
