
Removing the glass from a solar lamp can be achieved through a series of straightforward steps. 1. Carefully assess the solar lamp design, as different models may vary in construction. 2. Use appropriate tools for the removal process; standard tools include a screwdriver or pliers depending on the lamp type. 3. Handle with care to avoid breaking the glass, which is fragile and can shatter. 4. Replace the glass if it is damaged, and ensure that the solar panel remains intact to maintain functionality. In detail, understanding the specific lamp design will inform the approach, whether it’s unscrewing components or sliding out the glass.
1. UNDERSTANDING THE SOLAR LAMP DESIGN
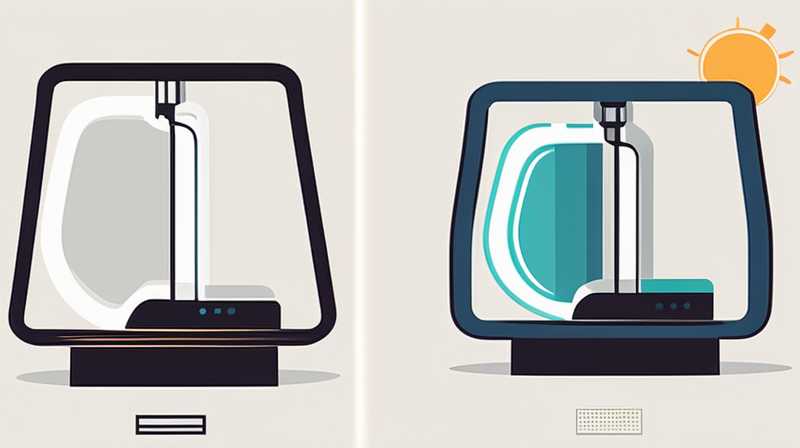
Solar lamps come with various designs and functionalities, influencing the removal process of the glass component. Typically, the design consists of a casing that encases the solar panel, battery, and light emisser, all whilst featuring a glass cover to protect the internal components. Various manufacturers might adopt distinct designs, making it crucial to identify the type of your solar lamp before beginning any removal steps.
1.1 Components of a Solar Lamp
The core parts of a solar lamp include the solar panel, battery, LED light, and encompassing casing. The solar panel captures sunlight during the day and transforms it into electrical energy stored in the battery. As night falls, the lamp utilizes this stored energy to power the LED light, which illuminates the surrounding area. The glass cover provides protection against environmental factors, prolonging the lifespan of the internal components. Understanding these components can aid in determining how to approach glass removal safely without damaging other parts.
1.2 Different Types of Solar Lamps
Solar lamps can be categorized into several types, including decorative garden lamps, portable lanterns, and security lights. Each type has unique methods of glass attachment. For instance, decorative garden lamps often feature glass held in place by clips, while security lights may use screws for mounting. Familiarity with your specific lamp type ensures a tailored approach, reducing the risk of accidental damage during the glass removal process.
2. TOOLS REQUIRED FOR GLASS REMOVAL
The appropriate selection of tools is paramount when seeking to remove the glass from a solar lamp efficiently. Using the right tools minimizes the risk of damage to both the glass and the overall lamp unit.
2.1 Basic Tool Set
A basic toolkit should include a screwdriver (both Philips and flathead varieties), pliers, and a soft cloth. The screwdriver serves to untighten screws, whereas pliers can assist in lifting or gripping the glass cover. The soft cloth is functional for cleaning debris away from the lamp’s edges, ensuring a clear field of vision for removal tasks.
2.2 Additional Tools for Complex Designs
For more intricate lamps, additional tools might be necessary. Utility knives can help in loosening adhesive holding the glass in place, while a multitool may provide extra leverage during the removal process. If the lamp model is highly specialized, consulting the manufacturer’s guidelines on recommended tools can be beneficial.
3. STEP-BY-STEP GUIDE FOR REMOVING GLASS
To ensure a smooth glass removal process without any setbacks, a detailed methodological approach is necessary. This section highlights the progression from assessment to completion.
3.1 Initial Assessment
Before attempting to remove the glass, conduct a thorough examination of the lamp’s exterior. Look for screws, clips, or any visible means of securing the glass. If the glass section appears bonded by adhesive, additional time and effort will be required. If you notice cracks or other signs that the glass has endured wear, prioritizing caution is essential to prevent shattering during removal attempts.
3.2 Detaching the Glass
Once the assessment phase is complete, begin the detachment process. For models featuring screws, utilize the screwdriver to carefully remove them. Place the screws in a secure location to avoid losing them during the process. In models with clips, push gently to release the clips while keeping a steady hand around the edges of the glass to catch it if it loosens suddenly. If adhesive is present, apply gradual pressure with a utility knife to break the seal without exerting too much force.
3.3 Removing the Glass Safely
After successfully loosening the screws or clips, hold the lamp steady with one hand and use the other to gently lift the glass. It is advisable to wear protective gloves during this step for added safety. Should the glass refuse to come off easily, double-check for any remaining clips or adhesive before proceeding. The aim is to avoid any excessive force that could lead to shattering the glass cover.
4. HANDLING BROKEN GLASS
In scenarios where the glass breaks during the removal process, proper methods of handling the shards ensure personal safety and cleanliness.
4.1 Immediate Action
If glass does break, turn your attention immediately to personal safety. Do not use bare hands to handle the shards; instead, utilize gloves for protection. Gather any larger pieces carefully and place them in a sturdy container. Small shards can often scatter, but a vacuum cleaner may provide effective gathering.
4.2 Cleaning the Area
After collecting the larger pieces, thoroughly clean the area where the glass shattering occurred. Carefully inspect for any remaining shards that might present a hazard, including tiny fragments overlooked in sweeping or vacuuming. This attention to detail is critical in ensuring that no remnants remain to pose a hazard later on.
5. REPLACING THE GLASS
Once the glass has been successfully removed, consideration should be made for the replacement process, particularly if the original glass has sustained damage.
5.1 Selecting Replacement Glass
Identifying the correct type of replacement glass can be challenging, given the variety of solar lamp designs available. It is essential to either consult the manufacturer’s specifications or take the removed glass to a home improvement store for assistance in finding the correct type. Glass should ideally mirror the original’s thickness and dimensions, ensuring a secure fit.
5.2 Installing the New Glass
When installing the new glass, follow the reverse process undertaken during removal. Ensure that any screws or clips are correctly placed and firmly fastened. If adhesive is necessary for securing the glass in place, opt for a weather-resistant glue to maintain the lamp’s functionality outdoors.
COMMON CONSIDERATIONS AND TROUBLESHOOTING
Issues might arise during the glass removal process or post-replacement, affecting the lamp’s operation. Addressing these concerns with specific solutions can improve the overall user experience.
6.1 Checking for Fixture Damage
After replacing the glass, check for damage within the fixture. If the lamp does not turn on after replacing the glass, inspect the solar panel, wiring, and battery to ensure they remain functional and securely connected. Environmental factors, such as exposure to extreme weather conditions, may also compromise the internal parts, resulting in the need for maintenance.
6.2 Maintaining Your Solar Lamp
To prevent issues in the future, regular maintenance is crucial. Keeping the lenses clean enhances light transmission effectiveness. Also, it’s wise to inspect the battery periodically to ensure it retains its charge capacity. Proper maintenance not only extends the life of the product but also improves operation reliability.
7. LONG-TERM MAINTENANCE OF SOLAR LAMPS
Long-term care, post-removal and replacement, contributes to optimal solar lamp performance. Adhering to maintenance tips helps sustain functionality, ensuring efficient operation.
7.1 Seasonal Preparations
During harsh weather conditions, consider bringing solar lamps indoors. This precaution protects them from damage caused by heavy rains or snow, extending their lifespan significantly. Additionally, proper storage during winter months aids in maintaining optimal performance for the following season.
7.2 Regular Cleaning
Periodically clean both the solar panel and glass cover. Dust and debris can diminish solar energy absorption, leading to reduced light output. Employing standard cleaning solvents on glass surfaces enhances brightness while preventing scaling from external dirt, ensuring a functional unit year-round.
8. FREQUENTLY ENCOUNTERED ISSUES
Even with proper care and maintenance, users might encounter occasional challenges with solar lamps. Understanding these problems, paired with solutions, can contribute to enhanced user experience.
8.1 SOLAR LAMP NOT TURNING ON
If the solar lamp remains unresponsive, multiple factors could cause this issue. Firstly, ensure that the solar panel has received adequate sunlight. If the environment is excessively cloudy or the unit has been placed in shade, energy accumulation may be insufficient. Another possibility might be a defective battery; inspect to determine if recharging is necessary or if a replacement is in order.
8.2 DIM LIGHT OUTPUT
The light output quality may diminish over time, leading to dim illumination. This scenario could be linked to a declining battery, which cannot store sufficient energy. Furthermore, accumulated dirt on the solar panel can impede sunlight absorption, leading to diminished performance. Regular cleaning can remedy this issue, ensuring the solar panel remains efficient.
8.3 GLASS REPLACEMENT CHALLENGES
Challenges might also arise during glass replacement, particularly with achieving a proper fit. If the replacement glass appears too loose or tight, minor adjustments may be necessary. Consider utilizing weather-resistant sealants if gaps are present to ensure a tight seal, preventing moisture intrusion and optimizing overall durability.
**Successfully removing and replacing the glass of a solar lamp is crucial for maintaining an aesthetic and functional outdoor lighting fixture. By following appropriate strategies and guidelines, individuals can navigate the complexities involved in this process effectively. Essential knowledge about tools, handling glass safely, troubleshooting potential issues, and understanding long-term maintenance practices empowers users to retain not only the functionality of their solar lamps but also their enjoyment of outdoor ambiance throughout various seasons. Investing time and effort into proper care significantly enhances the longevity and efficiency of solar-powered lighting, establishing a reliable source for illuminating outdoor spaces while embracing an eco-friendly lifestyle. The education and experience gained through this process foster confidence, enabling individuals to approach future challenges associated with solar lamp maintenance with ease and assurance.
Original article by NenPower, If reposted, please credit the source: https://nenpower.com/blog/how-to-remove-the-glass-of-solar-lamp-2/
