
Removing the circuit board of a wall-mounted solar panel requires careful consideration and methodical execution due to both the delicate nature of electronic components and the potential for electrical hazards. 1. Safety Precautions, 2. Tools Required, 3. Step-by-Step Guide, 4. Effective Techniques. Safety precautions are crucial as one must be aware of the risks involved in handling electrical parts. Proper tools should be gathered beforehand to ensure efficiency during the process. Each step of the disassembly procedure should be conducted with precision and care to avoid damaging other components.
1. SAFETY PRECAUTIONS
Understanding how to approach this task safely is a fundamental aspect. First, ensure that the solar panel is disconnected from any power source. This minimizes the risk of electric shock or short circuits during the removal process. Disconnecting the system requires locating the circuit breaker or fuse connected to the solar panel, as well as turning off any associated batteries. Second, wearing personal protective equipment (PPE) is crucial. At a minimum, this should include safety glasses to protect the eyes from dust and debris, gloves to prevent cuts, and possibly, ear protection if power tools are used. These simple precautions can significantly reduce the chances of injury.
Third, working in a well-ventilated area is recommended. If the solar panel or its components contain any hazardous materials, such as cadmium or lead, proper ventilation can help disperse any harmful particles that may be released. Fourth, maintain a clean workspace. Keeping the area organized prevents accidents caused by misplaced tools or components, ensuring a smoother operation overall.
To aid in preparation, it’s beneficial to read the user manual of the solar panel or consult with the manufacturer’s guidelines for specific safety alerts and necessary precautions. Familiarizing oneself with these materials can yield invaluable insights into the specifics of the model.
2. TOOLS REQUIRED
Proper tools significantly enhance the efficiency and safety of the removal process when handling the circuit board. First, gathering basic hand tools is essential. A Phillips and flathead screwdriver are necessary for unscrewing the panel and disconnecting the circuit board securely. A wrench or socket set might also be needed to detach any bolts securing the solar panel to its mounting structure. Second, a multimeter is a highly recommended tool. This device is critical for checking voltage levels and confirming that the solar panel is indeed de-energized before initiating any work.
Third, specialty tools may be required depending on the model of the solar panel. For instance, some units have tamper-proof screws that necessitate a specific type of driver. Hence, it is prudent to have a set of these specialized tools on hand. Fourth, consider using a plastic pry tool. This non-conductive tool can protect delicate components from damage during the removal of the circuit board.
Ideally, the organizer should have a small container to place screws and small parts directly after removal. This prevents loss and ensures that everything is easily accessible for reassembly later. Beyond practical tools, a camera may prove useful for documenting the initial configuration, thus aiding in the reconstruction phase.
3. STEP-BY-STEP GUIDE
Understanding a comprehensive guide on how to remove the circuit board from a wall-mounted solar panel is imperative for a successful operation. Careful execution of steps ensures that all parts remain in optimal condition.
3.1 DISCONNECTING THE POWER SUPPLY
Initially, the foremost step involves disconnecting the power source from the solar panel. Ensure the system is completely isolated from the electrical grid. Locate the main circuit breaker and turn it off, ensuring that power is completely cut off to the panel. This step cannot be overstated, as neglecting to properly disconnect the power might result in serious electrical hazards.
3.2 REMOVING THE SOLAR PANEL
Once the power is disconnected, the subsequent procedure involves the physical removal of the solar panel itself. Utilize the appropriate screwdriver or wrench to remove the fasteners holding the panel. Care must be taken not to apply excessive force, as this can cause damage to both the panel and its supporting structure. After loosening the screws or bolts, gently remove the panel from its mount.
Ensure to have a helper when lifting the panel, as they can provide support and assist in managing the sheer bulk of the solar unit. Lay the panel on a flat, protective surface, such as a mat or covered workbench, to avoid scratches or damage.
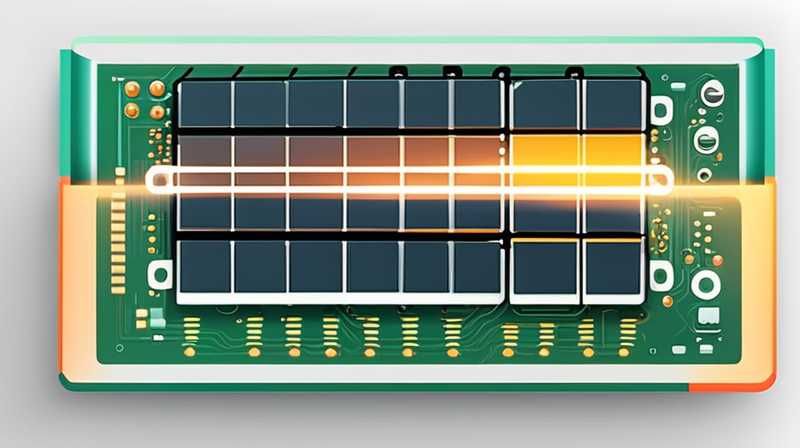
3.3 LOCATING THE CIRCUIT BOARD
The next action is to identify the circuit board within the solar panel. Typically, this board is located on the rear side of the panel. Carefully turn the panel over to inspect the component layout. Detailed observation reveals how the circuit board connects to various wires and connectors.
At this point, examining the circuit board for any visible damage is crucial. If any burnt connections or physical impairments are present, documentation via photographs can aid in troubleshooting down the line. This inspection should also guide the disassembly process, as damaged components might need addressing sooner.
3.4 DISCONNECTING WIRING HARNESS AND CABLES
Subsequently, focus shifts to detaching the wiring harness and cables connected to the circuit board. Make annotations or take pictures of the wiring configuration before disconnection. This visual reference helps during reassembly and avoids confusion.
Carefully disconnect the wire connectors without pulling on the wires themselves to prevent breakage. Ensure each connection is clearly marked if they are not color-coded, thus simplifying the reconnection process once the board is replaced or serviced.
3.5 REMOVING THE CIRCUIT BOARD
Finally, the circuit board can now be extracted from the solar panel housing. Locate the screws securing the board to the panel and remove them. After unscrewing, gently pry the board away from the housing, being cautious of any remaining connectors attached to the panel.
Upon successful removal, inspect the circuit board for any abnormalities. This step is imperative, particularly if the objective is repair rather than complete replacement. If repair is the goal, identify which specific components are damaged and potentially require substitution.
4. EFFECTIVE TECHNIQUES
In approaching the task of circuit board removal in wall-mounted solar panels, employing effective techniques can optimize the process. A mixture of patience and meticulous attention to detail pays dividends.
4.1 USING MAGNETIC TRAYS
One approach involves the use of magnetic trays to hold screws and small parts during disassembly. This not only minimizes the risk of loss but also organizes components by category. This system can be particularly useful when dealing with multiple types of fasteners, as it allows for easier reassembly without confusion.
4.2 LABELING CONNECTORS
As wires and connectors are detached, taking the time to label each one proves advantageous. By using small pieces of tape or a labeling machine, one can ensure each connector is easily identifiable upon reconnection. This technique, while time-consuming, simplifies the reassembly process and minimizes potential errors.
4.3 CAREFUL HANDLING OF COMPONENTS
When handling both the panel and circuit board, employing care is vital. Voltage sensitivity in the components implies they can easily be damaged. Always handle the circuit board by its edges, avoiding contact with soldered connections which may lead to malfunction or misalignment upon reinstallation.
By following these techniques, individuals can enhance both effectiveness and safety during the removal and replacement processes.
5. FAQs
WHAT SAFETY EQUIPMENT IS NECESSARY WHEN REMOVING A SOLAR PANEL CIRCUIT BOARD?
When removing a solar panel’s circuit board, the use of specific safety equipment is highly advisable to mitigate risks associated with electrical hazards and physical injuries. Essential items include safety goggles, which protect the eyes from flying debris or dust while disassembling components. Wearing gloves is equally crucial; not only do they provide protection against cuts from sharp edges, but insulated gloves can also prevent electric shocks when handling potentially live parts.
Additionally, consider having a hard hat if working at heights where falling debris could pose a danger. A pair of steel-toed boots with slip-resistant soles can enhance stability when standing on less secure surfaces during the removal process. Moreover, utilizing a good-quality dust mask can prevent inhalation of any particulates that may become airborne.
By assembling adequate safety equipment, one greatly reduces the chances of injury while ensuring a smoother removal operation. Taking these precautions seriously fosters a secure environment for handling electrical components.
IS IT POSSIBLE TO REPAIR A DAMAGED CIRCUIT BOARD RATHER THAN REPLACE IT?
Indeed, repairing a damaged circuit board is a viable option and can be more cost-effective compared to a full replacement, depending on the nature and extent of the damage. In many instances, minor issues such as burnt-out resistors or capacitors can be efficiently replaced by a skilled technician. Oftentimes, these repairs can prolong the life of the solar panel and prevent unnecessary waste, aligning with sustainability practices widely advocated today.
Before deciding to repair, it’s essential to assess the overall condition of the board. Signs of severe damage, such as extensive corrosion or burnt traces, may indicate that replacement is the more practical option. Should one opt to perform repairs, ensuring that the correct components are used is crucial; mismatched specifications can lead to further functional impairment.
If lacking in practical soldering experience, seeking professional assistance is recommended. Many electronic repair shops specialize in such services and can provide a thorough diagnosis. Ultimately, the choice between repair and replacement should carefully consider both the financial and environmental implications.
HOW LONG DOES THE REMOVAL AND REPLACEMENT PROCESS TAKE?
The duration of the removal and replacement process for a circuit board in a wall-mounted solar panel can vary significantly based on several factors. Primarily, the complexity of the panel design and the individual’s experience level play crucial roles in determining timelines.
On average, an inexperienced person may need approximately two to three hours for disassembly, inspection, and replacement of the circuit board. Factors such as ensuring that all safety protocols are adhered to as well as identifying and labeling various connectors can extend the duration. Similarly, for those with hands-on familiarity with solar panels, the task may be completed in a shorter timeframe, perhaps under one hour.
Additional time should be factored in for potential troubleshooting, particularly if complications arise during the process. Should one encounter unexpected issues or challenges, patience is essential, as rushing might result in further errors. Ultimately, thoroughness is prioritized over speed, contributing to a successful and safe removal and replacement experience.
FINAL REMARKS
The extraction of a circuit board from a wall-mounted solar panel necessitates a methodical approach for not only safety but also optimal functionality during reinstallation. Preceding the operation, a comprehensive understanding of safety precautions and necessary tools acts as a vital first step to mitigate risks. The procedure involves carefully disconnecting power, removing the panel, and systematically detaching the circuit board while remaining cognizant of wiring configurations. Each component’s status upon removal should be meticulously recorded, enabling informed decisions on repairs if necessary.
Employing effective techniques, such as the use of magnetic trays and labeling connectors, can vastly improve the process’s overall efficiency. Moreover, addressing FAQs concerning safety equipment, repair options, and anticipated time frames reinforces a holistic understanding of what needs to be addressed prior to embarking on such a task. Recognizing the importance of following precise steps while taking the time necessary for each phase leads to successful outcomes. With this knowledge, individuals are aptly equipped to handle their solar panel maintenance and improvements confidently.
Original article by NenPower, If reposted, please credit the source: https://nenpower.com/blog/how-to-remove-the-circuit-board-of-wall-mounted-solar-panel/
