
To successfully detach the bulb from a solar light, you may undergo several systematic steps. 1. Assess the solar light’s components, ensuring that you have a comprehensive understanding of how the bulb is secured. 2. Identify any locking mechanisms, as some designs feature clips or screws holding the bulb in place. 3. Gather the appropriate tools, which might include a screwdriver or pliers based on the light’s assembly. 4. Gently twist or lift the bulb, taking care not to damage any surrounding elements. 5. Replace the bulb with a new one, ensuring it’s compatible with the existing solar light model. Detailed attention to these points will guarantee a seamless replacement process.
1. UNDERSTANDING SOLAR LIGHT DESIGN
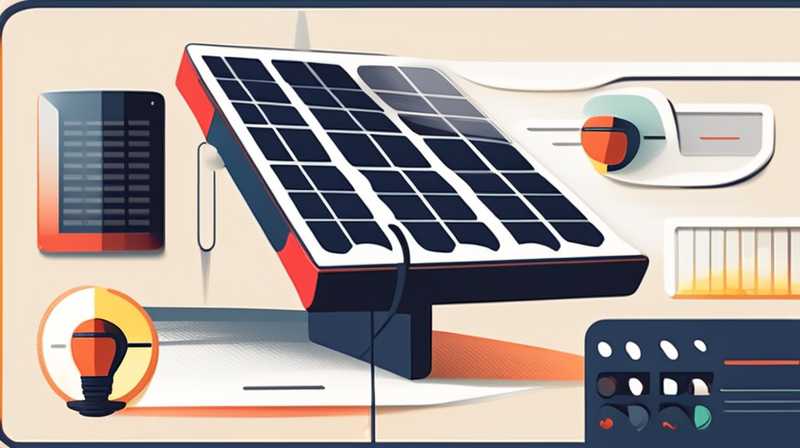
Solar lights are ingenious devices designed to function autonomously, harnessing solar energy to illuminate spaces effectively. At the core of these systems lies a solar panel, which absorbs sunlight and converts it into electricity. This electricity is stored in an internal battery, powering an LED bulb. The design may appear simple, but it embodies significant engineering innovation to produce light without the need for external power sources.
Central to the effectiveness of solar lights is the LED bulb, which serves as the light-emitting component. LED technology has advanced significantly, providing brighter illumination while consuming minimal energy. This efficiency extends the operational lifespan of both the bulb and the solar light system. A well-designed solar light typically includes features such as durability against outdoor elements and enhanced battery management systems, which optimize performance based on varying light conditions.
The integration of these components allows solar lights not only to serve their primary function of illumination but also to be environmentally friendly. As the world increasingly prioritizes sustainability, solar lights present an excellent solution, reducing reliance on grid electricity. A comprehensive understanding of these design aspects is crucial before diving into the bulb removal process.
2. PREPARING FOR BULB REMOVAL
Before attempting to detach the bulb from the solar light, preparation is paramount to circumvent potential complications. Safety precautions should be the first consideration; it is wise to ensure that the solar light is turned off. This precaution prevents any electric shocks or malfunctions during the bulb removal. If the device incorporates a sensitive solar panel, consider covering it to avoid any unintended power fluctuations that may affect your work.
Once the solar light is deactivated, examine the specific model you are working with. Researching the solar light type can offer insights into the specific assembly and how the bulb is secured. Manufacturers often provide user manuals with instructions tailored to the model’s design. If accessible, review this information to familiarize yourself with the lock mechanisms or clips that may hold the bulb in place. Understanding these specifications can save time and eliminate frustration during the removal process.
Gathering the necessary tools is the next vital step in the preparation phase. Depending on the design, you may require a screwdriver, pliers, or even a specialized tool for specific tasks. Have these instruments readily available to ensure a smooth and efficient operation. Proper preparation not only simplifies the bulb removal but also increases the likelihood of successfully replacing it without damaging the solar light system.
3. THE BULB REMOVAL PROCESS
With the preparation steps completed, attention can now shift to the actual detachment of the bulb. Depending on the solar light model, the removal process will vary, but most follow a standard procedure. Begin by assessing the bulb’s attachment, which might involve unscrewing it or releasing a clip. Gently twisting or pulling straight out are common methods to remove the bulb, but caution is advisable to avoid breaking the bulb or damaging the fixture.
If the bulb secures using screws, utilize the appropriate screwdriver to carefully remove the screws. Keep them stored in a safe location to prevent losing them. Once the screws are removed, gently lift or twist the bulb out of its socket. Patience is essential in this step; forcing the bulb can lead to unintended damage. If the bulb feels stuck, it may be beneficial to inspect for any unseen locks or clips that may need attention.
Once the bulb has been successfully removed, take a moment to inspect the socket for signs of wear or corrosion. This inspection can indicate if any additional maintenance is necessary before installing a new bulb. Cleaning the socket may enhance the performance of the new light component and prolong the life of the solar light system. Ensuring that you handle the bulb and fixture carefully throughout the removal process will lead to an uncomplicated switch.
4. INSTALLING A NEW BULB
After successfully detaching the old bulb, the next step revolves around the installation of a new one. Selecting the right bulb is crucial, as compatibility directly affects the performance of the solar light. Most solar light systems are designed to work with specific types or wattages of bulbs. Hence, consult the user manual to confirm the appropriate replacement bulb specifications.
When acquiring a new bulb, consider energy efficiency and luminosity. Many modern options provide superior brightness with lower energy consumption. Once the new bulb has been obtained, ensure that the socket is clean and free of debris before initiating the installation. This meticulous attention will enhance contact between the bulb and the socket, thereby maximizing functionality.
Inserting the new bulb is generally a reverse of the removal process. Carefully align the bulb with the socket and gently twist or push it into place as required. If the design necessitated screws, be sure to reattach them securely. After the installation is complete, re-activate the solar light and test its functionality. Adequate sunlight should charge the new bulb, initiating the illumination process once darkness falls. Confirming the light’s operation reinforces the success of the bulb replacement endeavor.
5. POST-INSTALLATION MAINTENANCE
Beyond the immediate task of bulb replacement resides the crucial aspect of ongoing maintenance. Regular cleanings of the solar panel will enhance electrical efficiency and prolong the life of the entire system. Dust, dirt, and other obstructions can inhibit the solar panel’s ability to absorb sunlight effectively. Depending on environmental factors, developing a cleaning schedule can ensure optimal performance over time.
Furthermore, monitoring the battery condition is another fundamental maintenance practice. Different solar lights utilize varied battery types, each with distinct lifespans. Inspecting the battery for wear and ensuring proper charging can prevent unexpected outages. Should the battery exhibit signs of decreased performance, replacement may be necessary to restore efficiency.
In addition, be observant of the solar light’s external conditions. If the unit has experienced extreme weather or physical damage, it’s important to address these issues promptly. Routine checks help identify potential problems before they escalate, ensuring the solar light remains functional and reliable. Such practices are essential for achieving the best results from your solar lights.
FAQs
HOW OFTEN SHOULD I REPLACE THE BULB IN MY SOLAR LIGHT?
The frequency of bulb replacement can vary based on several factors, including the type of solar light, usage, and environmental conditions. Typically, LED bulbs can last anywhere from 25,000 to 50,000 hours under optimal conditions. However, if a solar light is subject to harsh weather, excessive sun exposure, or frequent use, the lifespan could be significantly lower. Regular inspections can help identify diminished brightness or inconsistencies in performance, indicating a need for replacement. Also, dirt accumulation on the solar panel can impair charging efficiency, leading to the battery exhausting quickly, which might affect the bulb’s lifespan. It’s advisable to keep an eye on both the bulb and the solar panel cleanliness regularly. Thus, properly maintaining and monitoring these components will extend their life effectively.
IS IT SAFE TO REMOVE A BULB FROM A SOLAR LIGHT?
Yes, it is generally safe to remove a bulb from a solar light, provided certain precautions are taken. It is crucial to ensure the solar light is turned off before initiating bulb removal. This action protects against any electrical hazards. Additionally, handling the bulb with care is essential, particularly due to the fragility of LED components. If the bulb snaps during removal, there may be sharp edges that can pose a risk. Utilizing appropriate tools can further enhance safety during the unscrewing or lifting process. Familiarizing oneself with the solar light’s construction by consulting the owner’s manual provides guidance specific to the model being used. Following these safety measures will ensure that bulb removal can be executed with minimal risk.
WHAT CAN I DO IF THE BULB GETS STUCK DURING REMOVAL?
Encountering a stuck bulb during removal is not uncommon but should be approached with caution. Applying gentle pressure and twisting the bulb carefully can often release it from the socket. If it remains resistant, inspect the surrounding area for clips or screws that may require attention. Forcing the bulb can lead to damage, which is why patience is key. A light lubricant around the connecting points may help ease the bulb out. Tools such as pliers can be employed but should be used gently to avoid breaking the bulb. If these attempts are unsuccessful, consulting the manufacturer or a professional for alternative methods may be advisable. Ensuring careful handling throughout this process will reduce the risk of damage and ensure successful removal.
Engaging in the task of removing and replacing a bulb from a solar light, when conducted diligently, is relatively straightforward and manageable. However, the choice to involve oneself in such activities should be predicated on a solid understanding of the system’s design. In-depth knowledge of the unit enhances the assurance that actions taken will yield effective results without causing damage. The sundry design features and characteristics of solar lights necessitate approaching maintenance and repairs with care. Thus, safeguarding effective performance should be a priority when working with technological systems like solar lights, promoting longevity and efficiency. The continuous evolution of solar technology underscores the relevance of keeping abreast with advancements and best practices related to maintenance, ensuring the sustainability of energy-saving solutions. Each component, from solar panels to bulbs, plays a vital role in the overall efficacy of the lighting system, making informed management beneficial for all users. Maintaining awareness of these factors can significantly enhance the life cycle and effectiveness of your solar lighting system, contributing to both aesthetic pleasure and environmental stewardship.
Original article by NenPower, If reposted, please credit the source: https://nenpower.com/blog/how-to-remove-the-bulb-on-the-solar-light/
