
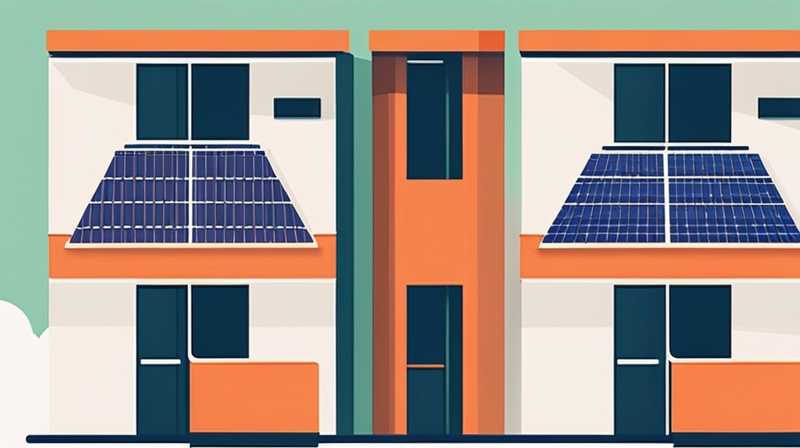
To create solar panels suitable for a two-story residence, several crucial steps must be taken. 1. Planning and Design, 2. Material Acquisition, 3. Construction Process, 4. Installation and Setup. Each of these stages plays a pivotal role in ensuring that the solar panels are both efficient and effective in harnessing solar energy for residential use.
1. PLANNING AND DESIGN
One of the initial stages involves careful planning and design. Establishing the energy requirements of the household necessitates understanding how much power is utilized on a daily basis. This includes calculating the total wattage needed, considering appliances, lighting systems, heating, and other electrical devices within the home. Solar panels are typically rated based on their output, so determining the energy needs will guide how many panels are necessary. This assessment will ideally indicate how much roof space is available since the size of the solar array will be directly tied to the surface area.
The directional orientation and tilt of the roof play a pivotal role in solar panel efficiency. Ideally, the panels should face south in the Northern Hemisphere and north in the Southern Hemisphere to maximize sunlight capture. An analysis of local climate conditions, such as the average number of sunny days, seasonal variations, and any potential obstructions like trees or buildings, is also vital for optimal panel placement.
Additionally, determining the type of solar panel technology—monocrystalline, polycrystalline, or thin-film—requires evaluation of each technology’s efficiency, cost, and performance in various conditions. Monocrystalline panels, for example, tend to be more space-efficient and perform better in low-light situations compared to their counterparts.
2. MATERIAL ACQUISITION
Once the planning phase has been meticulously handled, the subsequent step is acquiring the necessary materials. Solar panels can be manufactured from various components, with the primary element being photovoltaic cells. For a DIY initiative, sourcing high-quality photovoltaics is critical. A common choice includes polycrystalline or monocrystalline cells, which can often be purchased through various suppliers or online marketplaces.
Besides solar cells, additional materials are essential for constructing the panels. This includes protective glass for the top layer, a sturdy and weather-resistant backing, and a frame to support the setup. The framing material can be aluminum or galvanized steel, both known for their durability and resistance to corrosion. Additionally, wiring, connectors, and junction boxes will be required for proper electrical installation and safety.
Another consideration is the inverter, a device that converts DC electricity, produced by the solar cells, into AC electricity suitable for household use. Evaluating inverter types (string inverters, microinverters, or power optimizers) and their efficiencies is crucial, as they can significantly affect the overall energy production and system performance.
3. CONSTRUCTION PROCESS
When the materials are on hand, the construction of the solar panel units can commence. A detailed guide to fabricating the panels would begin with assembling the photovoltaic cells onto the backing material. The alignment and correct spacing of these cells are vital to ensure optimal performance. They should be connected electrically, typically in a series or parallel arrangement, depending on the desired output voltage and current.
Next comes the crucial step of securing the protective glass layer. This not only shields the cells from environmental hazards but also contributes to the efficiency of the panels through proper light transmittance. A sealant may be employed to ensure a water-tight structure, protecting against moisture damage. This waterproofing is vital, especially for installations exposed to varying weather conditions.
After constructing the panels, rigorous testing should be performed. It’s important to measure voltage and current output to ensure the panels meet the expected performance metrics. Conducting these tests closely resembles quality assurance in the manufacturing process, confirming that each panel achieves its design specifications. Any anomalies can then be addressed immediately, ensuring the system’s reliability.
4. INSTALLATION AND SETUP
The final phase involves the actual installation of the panels onto the two-story house. Initial tasks include ensuring the structural integrity of the roof, as solar panels can add significant weight. Reinforcements may be necessary to safely accommodate the new addition.
Mounting options, such as fixed or adjustable mounts, should be chosen based on the roof type and desired tilt angle. Employing mounting brackets and rails offers stability while allowing for precise alignment. Both the mounting and the positioning must account for any potential shading throughout the day, which could significantly impact panel performance.
Following the mechanical installation, electrical connections must be made. Wiring should be carefully routed to the inverter and ultimately to the home’s electrical system while adhering to local code regulations. This process requires a qualified electrician to ensure safe and compliant installations.
Once installed, the solar system can be connected to the local grid or operated independently (off-grid). Monitoring systems can provide real-time feedback on performance, helping homeowners to optimize energy usage and ensure their investment remains worth it.
1. WHAT IS THE COST INVOLVED IN MAKING SOLAR PANELS?
The financial aspect of producing solar panels varies greatly depending on multiple factors such as materials, design complexity, and scale of production. A detailed calculation entails assessing costs for photovoltaic cells, protective materials, wiring components, inverters, and labor. On average, the total cost of DIY solar panel systems can range from $1.50 to $3 per watt. Thus, for a standard residential setup requiring approximately 5kW, total expenses can reach between $7,500 to $15,000 or more. Crafting panels from scratch may save money initially but factors like economy of scale and technological efficiencies should also be considered. Furthermore, ongoing costs associated with the monitoring and maintenance of the solar panel systems can add to the long-term financial commitment.
2. HOW LONG DOES A DIY SOLAR PANEL INSTALLATION TAKE?
The time frame for constructing and installing solar panels can vary extensively based on experience and available resources. Building individual panels may take several days to a few weeks, especially if undertaken by novice builders or if unique designs are implemented. Installation might require an additional few days, wherein professionals ensure proper mounting and connectivity, adhering to safety and regulatory standards. Overall, one can anticipate a complete DIY solar panel setup to take between two weeks to over a month, depending on the project size and the efficiency of the working team. It is essential to start planning well in advance to address potential delays caused by weather conditions or unforeseen complications during the installation process.
3. ARE DIY SOLAR PANELS EFFECTIVE COMPARED TO COMMERCIAL ONES?
The efficacy of DIY solar panels compared to commercially available ones is a nuanced subject. While individual elements used in both can be similar, commercial options benefit from advanced manufacturing technology, quality control, and warranties. The assembly methods employed in DIY panels can often lead to variability in efficiency and output. DIY systems may yield lower return on investment due to potential inefficiencies and lack of expert installation. Additionally, commercial panels often possess longer lifespans and better overall durability. Thus, while the allure of crafting one’s own solar panels exists, the performance reliability and long-term benefits of commercially produced panels often outweigh the DIY alternatives.
WORKING WITH SOLAR ENERGY IN A TWO-STORY HOUSE CAN BE A REWARDING INITIATIVE by not only reducing energy costs but also contributing to a sustainable future. The journey begins with understanding energy needs and making appropriate design decisions, followed by procuring quality materials and ensuring a robust construction process. The installation phase requires meticulous attention, as it ensures the system functions correctly and safely.
Building solar panels for a two-story house encourages individuals to take charge of their energy consumption, fostering an environment where renewable energy is celebrated. This experience can also spark a deeper interest in sustainable living, promoting environmentally friendly practices within communities.
As society continues to face the ramifications of climate change and rising energy costs, investing in solar technology becomes an imperative pursuit. Exploring renewable energy options, such as solar power for residential use, leads to substantial financial savings in the long term, contributing to environmental conservation efforts. Through diligence and informed choice, homeowners can embark on the rewarding venture of solar panel creation and installation.
Original article by NenPower, If reposted, please credit the source: https://nenpower.com/blog/how-to-make-solar-panels-for-a-two-story-house/
