
How to Make a Solar Crystal Panel Lamp
Creating a solar crystal panel lamp involves several key steps that lead to an environmentally friendly and aesthetically pleasing light source. 1. Gather essential materials, 2. Assemble the solar panel, 3. Construct the lamp structure, 4. Integrate the lighting mechanism. One critical aspect is the integration of the solar panel with the lamp structure, allowing it to harness sunlight effectively during the day and illuminate the surroundings at night.
- GATHERING ESSENTIAL MATERIALS
Before embarking on constructing a solar crystal panel lamp, it’s vital to compile all necessary components to ensure a smooth assembly process. This venture requires specific items that will bring the concept to fruition. Essential elements include a solar panel, LED bulbs, a rechargeable battery, wires, a lamp housing, and a base for stability.
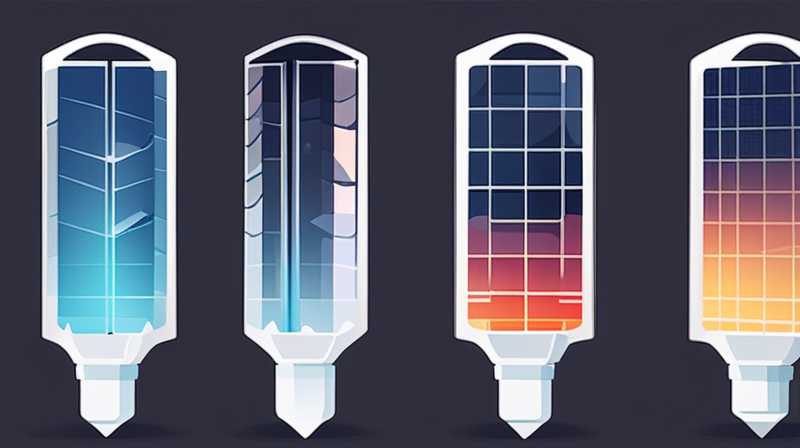
SOLAR PANEL
The solar panel is a fundamental component of this project, primarily responsible for converting sunlight into electrical energy. When selecting a solar panel, factors such as wattage and size should be considered. A panel with at least 5 watts is generally suitable for powering LED lights. Additionally, photovoltaic technology should be researched to identify which type of solar cells will offer the highest efficiency and durability.
Care should also be taken regarding the orientation and placement of the panel. Undoubtedly, optimal positioning in relation to sunlight exposure is crucial for maximizing solar energy generation. Proper angles and locations will ensure that the solar panel remains unobstructed, enhancing its ability to harness sunlight effectively.
LED BULBS
LED bulbs are preferred for this project due to their energy efficiency and longevity. Utilizing LED technology reduces energy consumption and provides significant illumination compared to traditional incandescent bulbs. When selecting LED bulbs, consider their brightness in lumens and color temperature, as these characteristics will dictate the ambiance created by the lamp.
Incorporating multiple LED bulbs can amplify the lamp’s brightness, serving various decorative purposes beyond mere functionality. Different colors and wattage options allow customization according to personal preferences, making the lamp an attractive addition to any environment.
RECHARGEABLE BATTERY
A rechargeable battery acts as the storage unit for the electricity generated by the solar panel. When choosing a battery, it is essential to understand its capacity, measured in amp-hours (Ah), which determines how long the lamp can emit light after sunset. Lithium-ion batteries are favored for their efficiency and durability, with varying capacities available based on usage requirements.
Additionally, proper battery management is vital to prolong its lifespan. Implementing charge controllers and ensuring the battery does not over-discharge are essential practices that will enhance overall functioning.
WIRING AND CONNECTORS
Wiring is a pivotal element that connects the solar panel, battery, and LED bulbs. Selecting the appropriate gauge of wire is crucial for reducing resistance and ensuring optimal energy flow. Moreover, connectors must be durable and weather-resistant if the lamp is intended for outdoor use, as exposure to the elements can lead to corrosion and decreased functionality.
Proper insulation of wires contributes not only to safety but also to the efficiency of the electrical circuit. Careful planning and neat assembly will reduce the risk of short circuits and ensure a longer-lasting lamp.
LAMP HOUSING AND BASE
The lamp housing serves both aesthetic and protective functions. Various materials can be utilized, such as glass, plastic, or metal, based on the desired style and location of the lamp. If transparency is a preference, glass can showcase the light beautifully, while materials like plastic provide durability.
A stable base is equally important to prevent the lamp from tipping over. Including weighted elements or anchoring systems will enhance stability, especially in outdoor settings exposed to wind.
- ASSEMBLING THE SOLAR PANEL
Once all components are gathered, the next step is assembling the solar panel to the lamp structure. This requires precision and careful handling to ensure the panel is securely attached and oriented correctly.
SECURING THE SOLAR PANEL
To enable the solar panel to function effectively, it should be securely attached to the top of the lamp housing, ensuring it can catch sunlight at maximum efficiency. Employing screws or adhesive materials can help secure the panel. Make sure the connections are weatherproofed to prevent moisture damage, particularly in outdoor setups.
WIRING TO THE BATTERY
After the solar panel is firmly in place, the next stage involves wiring it to the rechargeable battery. Careful attention should be paid to the polarity of the connections, as incorrect wiring can result in inefficiency or damage. Utilize solder or connectors to create a robust electrical connection between the solar panel and the battery.
It is crucial to include a fuse in the circuit to protect against overload and short circuits. By following appropriate electrical safety protocols, the assembly will yield a functional and safe solar lamp.
- CONSTRUCTING THE LAMP STRUCTURE
With the solar panel in place and the wiring connected, attention turns to constructing the overall lamp structure. This is where creativity thrives, allowing the builder to design a lamp that reflects personal style.
CHOOSING A DESIGN
The aesthetic design of the lamp is a substantial element that contributes to its functionality and visual appeal. Whether opting for a modern aesthetic or a more vintage look, the chosen design should harmonize with its surroundings.
Consideration of factors such as height, width, and shape will significantly affect how the lamp integrates into the space. Adding decorative elements like crystals or colored lenses can also enhance the lamp’s beauty while diffusing the light in interesting ways.
LIGHTING MECHANISM
Once the housing is complete, the integration of the LED lights should occur. The correct placement of bulbs must be evaluated to maximize light distribution throughout the desired area. Consideration for heat dissipation is also vital, as LEDs, while efficient, can still generate warmth.
Incorporating diffusers can enhance the quality of light emitted, creating a soft glow that is inviting and comfortable for viewers.
- INTEGRATING THE LIGHTING MECHANISM
Integrating the lighting mechanism requires a thorough understanding of how different components interact within the lamp system. The connection between the LED lights and the battery is critical, enabling the lamp to operate autonomously based on solar power.
CONFIGURING LIGHTING CONTROLS
Establishing an automatic lighting control system can significantly enhance the user experience. This involves installing sensors that detect ambient light levels and automatically switch on the lamp at dusk, turning off at dawn.
These smart systems optimize energy use, ensuring that the lamp remains off during daylight and operates only when necessary. Additional components, such as timers or programmable systems, can add further sophistication to the lighting experience.
TESTING AND ADJUSTMENTS
After the initial setup is complete, it is essential to conduct tests to evaluate the lamp’s performance. Make adjustments to the angles of the solar panel for optimal sunlight exposure and ensure that the LEDs emit the expected brightness.
Regular maintenance checks for wiring and battery health will ensure longevity and enhance the overall functionality of the solar crystal panel lamp.
- FREQUENTLY ASKED QUESTIONS
WHAT TYPE OF SOLAR PANEL IS BEST FOR DIY LAMPS?
When considering solar panel options for DIY lamps, several factors emerge that influence the choice of model. A panel with at least 10 watts capacity is generally recommended for optimal performance in a variety of lighting conditions. Monocrystalline panels are heralded for their high efficiency and compact size, making them excellent for limited spaces.
Furthermore, durability is paramount. Panels designed for outdoor use often contain protective coatings and sturdy materials that resist weather damage. Availability of mounting brackets should also be taken into account, as ease of installation plays a significant role in the overall experience.
Beyond the specifics of size and wattage, proper orientation and maintenance of solar panels directly impact their efficiency. Cleaning debris and positioning them to capture maximum sunlight enhances energy generation and ensures that the lamp remains functional throughout varying seasons and conditions.
HOW LONG DOES A SOLAR PANEL LAMP LAST ON A FULL CHARGE?
The duration a solar panel lamp lasts on a full charge is contingent upon several variables, including the capacity of the rechargeable battery, the output of the LED bulbs, and the intensity of sunlight received during the day. Typically, a fully charged solar lamp will illuminate for anywhere between 5 to 12 hours, dependent on these factors.
Rechargeable batteries come in varying capacities, usually measured in amp-hours (Ah). The higher the capacity, the longer the lamp will shine at full brightness. Additionally, light output plays a vital role; brighter LED bulbs will consume more power, diminishing the time factor.
Environmental conditions also affect performance. During winter months or overcast days, solar panels are less efficient, which may impact battery charge levels and subsequently reduce lighting duration.
CAN SOLAR LAMPS WORK DURING WINTER?
Yes, solar lamps can function during winter, although their performance may be diminished due to shorter days and lower intensity sunlight. Nonetheless, solar technology continues to evolve, and many modern solar panels are designed to capture ambient light even in less-than-ideal weather conditions.
To optimize the effectiveness of solar lamps in winter, it is crucial to place them in areas that receive maximum sunlight exposure throughout the day. Regular cleaning of the solar panels to remove snow, dirt, or other debris can significantly impact energy collection and ensure that they continue to operate effectively.
Moreover, consider using higher-capacity batteries that retain energy longer, allowing the lamp to shine through extended winter nights. Investing in models designed for colder climates will enhance performance, ensuring that solar lamps remain functional even during challenging seasons.
In summation, crafting a solar crystal panel lamp represents a harmonious blend of functionality and creativity, resulting in a unique, eco-friendly lighting solution. An in-depth understanding of necessary components, systematic assembly, and ongoing maintenance practices ensures the lamp serves its purpose effectively. The integration of solar technology into everyday life not only contributes to sustainability but also enhances the visual appeal of personal spaces. Making informed choices throughout the process will lead to satisfying and lasting results.
Original article by NenPower, If reposted, please credit the source: https://nenpower.com/blog/how-to-make-a-solar-crystal-panel-lamp/
