
To create a grid on a solar panel, it’s essential to follow a systematic approach that includes five critical steps: 1. Understand your solar panel’s characteristics, 2. Define the desired grid layout, 3. Utilize the appropriate software tools, 4. Apply the grid pattern on the panel using graphical editing software, 5. Ensure adherence to safety standards and electrical specifications. Among these, understanding solar panel characteristics is crucial as it influences how effective the grid will be in contributing to energy production. The dimensions, type of solar cells, and other specifications will dictate the optimal grid size and layout that maximize energy capture while maintaining safety protocols.
1. UNDERSTANDING SOLAR PANEL CHARACTERISTICS
Solar panels, typically made up of numerous photovoltaic cells, transform sunlight into electricity. Each solar panel’s efficiency and output are influenced by its characteristics. To design an impactful grid, familiarity with the specifications is necessary. For instance, most panels come in standard sizes, usually around 65 inches by 39 inches for residential models, while commercial panels may be larger.
The type of solar cells—Monocrystalline, Polycrystalline, or Thin-Film—also affects how a grid should be designed. Monocrystalline panels are often more efficient and require less space per watt than their counterparts. In contrast, thin-film panels are lighter and more flexible but have lower efficiency levels, which may lead to a more intricate grid layout. Additionally, factors such as shading, orientation, and angle of installation must be considered, as these parameters directly impact the panel’s performance. Thus, understanding these attributes plays a pivotal role in devising a suitable grid.
2. DEFINING THE DESIRED GRID LAYOUT
Defining how the grid will segment the solar panel is critical for maximizing its functionality. Decisions on the grid’s dimensions should revolve around multiple factors. The layout must account for the output targets, the size of the panel, and the mounting mechanism.
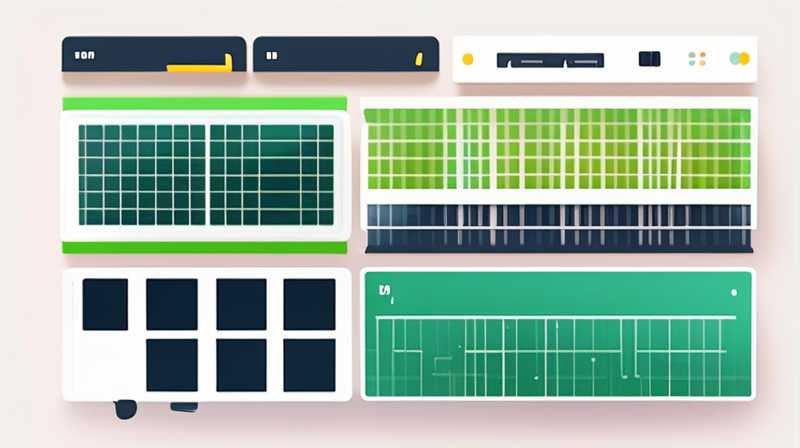
One common strategy involves creating a grid that divides the panel into rectangular or square sections, thus producing uniform segments that can showcase performance variations across the surface. If a panel has ten rows and ten columns, it might be beneficial to designate specific areas for individual monitoring. This layout helps identify which sections might be underperforming, thus facilitating maintenance or upgrades. It’s vital to ensure that the grid doesn’t obstruct solar cell output; therefore, testing various configurations before finalizing the design is judicious.
Moreover, practical considerations such as ease of installation and compatibility with other system components—like inverters and batteries—cannot be overlooked. Ultimately, the aim is to create a grid that fulfills efficiency needs while ensuring safety and integrability within the entire solar power system.
3. UTILIZING APPROPRIATE SOFTWARE TOOLS
Once the grid layout has been established, selecting the right software tools for implementation becomes paramount. Several specialized programs can assist in this part of the project. CAD software originating from platforms such as AutoCAD allows users to create precise designs with high levels of accuracy, ensuring that the grid aligns perfectly with the solar cells.
For those who prefer a less technical approach, graphics editing software like Adobe Illustrator or GIMP can be utilized. Using these tools, one can design the grid based on established dimensions, played out against the panel’s actual image. These applications include features that enable the user to layer designs, ensuring real-time adjustments can maintain an optimal configuration.
Acquainting oneself with these software tools not only streamlines the design process but also instills confidence in the grid layout process, a fundamental step when transitioning from concept to actual implementation. As you embark on this phase, staying organized is crucial. File management plays a key role as numerous iterations may emerge during design development, and maintaining clarity ensures iterations do not confuse later stages.
4. APPLYING THE GRID PATTERN
After you have designed the grid layout, translating this design onto the solar panel involves a careful selection and application of materials. The application process can significantly impact the overall effectiveness and durability of the grid.
Using high-quality adhesive materials is essential to ensure that the grid pattern remains intact over the lifetime of the solar panel. Many professionals recommend using durable vinyl or similar materials that can withstand various environmental factors, such as UV exposure, moisture, and extreme temperature variations. These materials not only preserve the integrity of the grid but will also help in maintaining the performance of the solar cells.
Once you’ve chosen the material, precise cutting based on your designed template is required. A steady hand is key to ensure the grid is both visually appealing and functional. It’s advisable to be meticulous when placing the segments onto the solar panel, considering aspects of alignment and spacing.
Furthermore, electrical wiring must be adequately insulated and arranged to prevent accidental contact with the grid. Recognizing the fine details in this process is critical in ensuring long-lasting effectiveness, ultimately allowing for maximum energy generation and minimal maintenance issues.
5. ENSURING ADHERENCE TO SAFETY STANDARDS
Maintaining compliance with safety standards throughout the entire process cannot be overstated. The installation of a solar panel grid should follow rigorous safety protocols to ensure functionality and protection.
Before commencing with the grid application, a thorough assessment of the environment must be done. It’s essential to identify potential hazards such as proximity to overhead electrical lines or unstable surfaces that could interfere with energy absorption or cause accidental disturbances. Additionally, during installation, using appropriate safety gear is fundamental—gloves, goggles, and non-slip footwear ensure personal safety while working at heights.
Furthermore, post-installation inspections should include checks for structural integrity and electrical connections. A qualified electrician should conduct these assessments, especially considering the complexities inherent with solar energy systems. These protocols not only enhance safety standards but also foster confidence among users and stakeholders that the installation meets industry benchmarks.
FAQs
WHAT TYPES OF GRID DESIGNS ARE AVAILABLE FOR SOLAR PANELS?
Various grid designs exist based on specific needs and panel types. Common configurations include rectangular grids, square grids, or more complex geometric shapes that can accommodate performance monitoring. The choice is influenced by the solar panel’s dimensions, output targets, and aesthetics. For instance, some properties may prefer a colored or illustrative grid to align with their branding. Ultimately, the design must enhance energy capture without compromising efficiency.
HOW CAN I TEST MY GRID DESIGNS FOR EFFICIENCY BEFORE INSTALLATION?
Testing grid designs prior to actual installation can be accomplished through simulation software that models sunlight exposure and power output. Programs like PVSyst and PV*SOL allow users to input specific data parameters for virtual testing. Alternatively, creating a small prototype grid on a similar panel section will enable practical testing under real-world conditions. This not only aids in refining designs but ensures optimal performance is achieved, ultimately supporting the project’s success.
WHAT SAFETY PROTOCOLS SHOULD I FOLLOW WHEN INSTALLING A GRID ON A SOLAR PANEL?
A myriad of safety protocols exists for solar panel installations. Key guidelines include performing thorough site assessments prior to installation and ensuring all workers wear protective gear. During installation, avoid electrical hazards by staying away from live wires and maintaining a safe work environment. Additionally, conducting post-installation inspections to verify structural and electrical integrity should be mandatory. Adhering to local, state, and national electrical codes will safeguard the installation and protect everyone involved in the project.
In crafting an effective grid on a solar panel, diligent consideration of various factors is essential for optimal energy capture. Understanding specifications of the solar panel, adequately defining the grid layout, employing suitable software tools, and ensuring precise application significantly contribute to an efficient system. Rigorous adherence to safety protocols throughout adds another layer of security. Through this multifaceted approach, an effective solar grid can be installed, maximizing energy production potential while maintaining safety and operational efficiency. Continuous monitoring and optimization of the grid design must not be overlooked, as this ongoing attention to detail ensures the solar energy system yields maximum benefits throughout its lifespan. Therefore, investing effort into the initial steps can greatly enhance the performance and reliability of the solar energy system, paving the way for renewable energy advancements in various applications.
Original article by NenPower, If reposted, please credit the source: https://nenpower.com/blog/how-to-make-a-grid-on-a-solar-panel/
