
To install a silicone pad in a solar panel, one must follow several precise steps to ensure the pad is applied correctly for optimal performance and durability. 1. Preparation of the Surface, 2. Application of Silicone Pad, 3. Securing with Fasteners, 4. Final Inspection and Testing. To elaborate, the preparation of the surface involves thoroughly cleaning the area where the silicone pad will be applied to ensure strong adhesion. This step is critical to achieving long-lasting results as any dirt or grease can significantly reduce the bonding effectiveness of the silicone. Proper installation enhances the longevity and efficiency of the solar panel, minimizing the risk of damage from external elements.
1. PREPARATION OF THE SURFACE
Before applying a silicone pad, proper surface preparation is essential. A well-prepped surface will allow for a secure bond between the silicone pad and the solar panel, preventing future issues. This stage involves cleaning the area rigorously. Any dust, debris, or residues must be removed, as imperfections can hinder adhesion.
Using specific cleaning agents can improve effectiveness. Solutions that evaporate quickly without leaving residues are preferable. Pay special attention to corners and edges, and ensure that cleaning is consistent across the surface. After cleaning, inspect the surface for imperfections that may need addressing.
Once cleaned, inspect for moisture. Humidity can greatly impact the curing process of silicone. If moisture is present, allow ample drying time, as applying a silicone pad over a damp surface can compromise the bond and lead to mold or mildew growth, affecting panel efficiency.
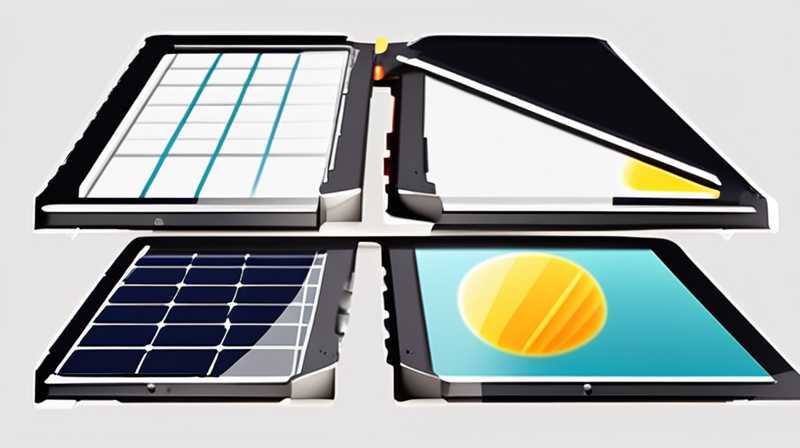
2. APPLICATION OF SILICONE PAD
Once the surface is adequately prepared, the next step is the actual application of the silicone pad. It is critical to select the right silicone pad based on the dimensions and intended use on the solar panel. Using appropriate silicone material guarantees compatibility with both the solar panel and environmental conditions.
Position the pad carefully, ensuring it is aligned with the designated area. It is vital to avoid stretching or compressing the pad excessively, as it can affect its performance. Once positioned, gently press down to initiate adhesion, but be careful not to apply too much force initially, as this could lead to misalignment.
Follow this with trimming if necessary. Precise trimming ensures a snug fit around edge edges. A well-fitted silicone pad offers better protection against environmental challenges, such as water infiltration and temperature fluctuations. Take great care during this process, as imperfections can impede the effectiveness of the installation.
3. SECURING WITH FASTENERS
Following application, the next step involves securing the silicone pad in place. Although silicone pads are designed to adhere without additional fasteners, using them can enhance stability and longevity. Select fasteners that are corrosion-resistant to ensure they withstand harsh environmental conditions.
Position the fasteners strategically, typically in corners or along edges where pressure may be greatest. Ensure not to over-tighten, as this can compress the pad excessively and lead to premature wear. Proper pressure distribution is vital to maintain the integrity of the insulation and protective capabilities of the silicone pad.
Additionally, monitor for any signs of looseness after installation. Sonic tests or other methods can ascertain that the pad remains securely fastened. If any irregularities are detected, it is prudent to revisit the fastening step to guarantee complete adhesion and prevent future issues.
4. FINAL INSPECTION AND TESTING
Post-installation, thorough inspection and testing are critical to verifying the effectiveness of the silicone pad and the integrity of the solar panel. Inspect visually, ensuring that all edges are tightly sealed and that the silicone pad is uniformly applied.
Following the visual inspection, conduct performance tests. This phase may involve checking for any water infiltration or thermal issues, ensuring the silicone pad is functioning as intended. It is advisable to utilize professional testing equipment to yield accurate results.
Evaluate the outcomes diligently. Address any problematic areas immediately to secure the performance of the solar panel. The longevity of the system relies significantly on the effectiveness of the silicone pad installation, making this step indispensable for success.
FREQUENTLY ASKED QUESTIONS
WHAT TYPE OF SILICONE IS BEST FOR SOLAR PANELS?
Selecting the right type of silicone is crucial for effective installation in solar applications. Silicone designed specifically for outdoor use, with UV and weather-resistant properties, is most advisable. Choose a product that is rated for extended exposure to environmental stressors such as sunlight, rain, and varying temperatures. Review the specifications provided by manufacturers to ensure compatibility with both the silicone pad and the materials in the solar panel itself.
Additionally, consider the curing time stated on the product label. A fast-curing silicone can minimize downtime after installation, allowing for quicker return to service for the solar panel. Assessing the thermal properties is also essential; select a silicone that can withstand temperature fluctuations commonly encountered in your geographical region.
In summary, prefer silicone pads specifically formulated for solar applications, with an emphasis on durability, weather resistance, and appropriate thermal management.
HOW CAN I ENSURE A PROPER BOND WITH THE SILICONE PAD?
Achieving a proper bond with a silicone pad directly relates to the steps taken during installation. Surface preparation is paramount; meticulous cleaning to eliminate contaminants such as oils, dirt, and moisture will facilitate strong adhesion. Employing cleaning agents that evaporate completely without leaving residues can enhance the likelihood of a secure bond.
Apply the silicone pad following the manufacturer’s guidelines. Pay special attention to environmental conditions, as high humidity or extreme temperatures can affect adhesion and curing. It is best practice to wait until conditions are optimal before installation to avoid problems later on.
Additionally, if using fasteners, ensure they are correctly positioned without excessive tightening; this can help maintain silicone’s proper function and prolong the life of the bond. Conducting thorough inspections post-installation allows identification of any failures before they escalate.
HOW OFTEN SHOULD I REPLACE THE SILICONE PADS ON SOLAR PANELS?
The replacement schedule for silicone pads on solar panels varies based on several factors. Consider environmental factors such as geographical location, exposure to weather extremes, and the overall quality of the silicone used during installation. Under harsh conditions, replacement may be necessary more frequently, perhaps every few years, while more stable environments may extend the interval.
Routine inspections are crucial for determining maintenance needs. Visual checks every six months should reveal any cracks, wear or degradation that necessitates immediate attention. If any strain or visible damage is found, timely replacement is essential to prevent further damage to the solar panels themselves.
Documentation from the manufacturer regarding pad life expectancy can provide a guiding framework, yet personal observation of performance will offer the best insight into when replacements are warranted.
FINAL THOUGHTS
In the realm of solar technology, the application of silicone pads may appear straightforward, yet it is laden with attention to detail that greatly enhances performance and durability. Each phase of the installation process, from surface preparation to final inspections, plays an integral role in ensuring the effectiveness of the silicone pad. Failure to adhere to best practices may result in diminished panel efficiency and potentially costly repairs.
Understanding the significance of using the appropriate silicone material can exponentially affect longevity. Initially, a well-selected product will provide a foundation for exceptional adhesion, while continuous inspections allow for proactive maintenance. Adapting installation processes in varying environmental conditions is equally important, ensuring that the chosen methods remain effective irrespective of changing weather patterns.
Ultimately, the investment made into proper silicone pad installation offers significant returns over time, enhancing the solar system’s performance while helping to avoid repair costs. By paying attention to meticulously executing each step, one can achieve a high-quality installation that contributes positively to solar energy harnessing. Increasing this efficiency is not only economically beneficial but also bolsters a commitment to sustainable energy practices. Therefore, whether one is a seasoned professional or a novice in the field, prioritizing quality in every stage of silicone pad installation establishes a solid foundation for future success.
Original article by NenPower, If reposted, please credit the source: https://nenpower.com/blog/how-to-install-the-silicone-pad-in-the-solar-panel/
