
To install the joint of a solar tube, follow these key steps: 1. Gather tools and materials necessary for installation, 2. Carefully position the solar tube and select the appropriate joint, 3. Properly seal all connections to prevent leaks, 4. Ensure that the installation is level and securely fastened. Among these steps, proper sealing is crucial to maintain system efficiency and prevent water ingress, ultimately ensuring long-term functionality and performance of the solar tube system.
1. INTRODUCTION TO SOLAR TUBES
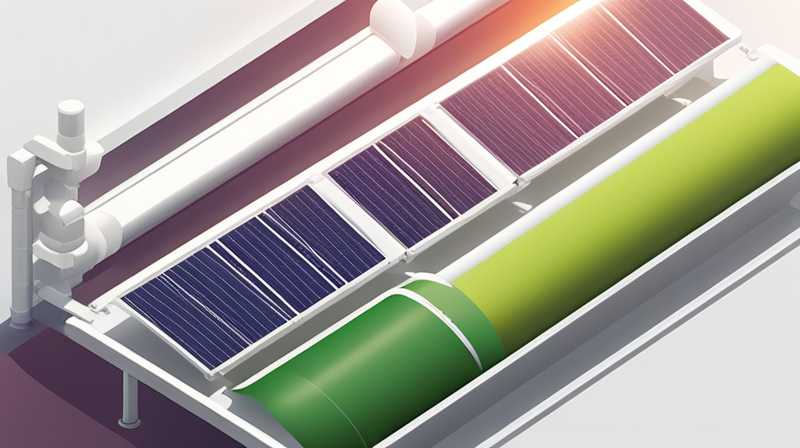
Solar tubes, also known as solar tubes or tubular skylights, have revolutionized the way natural light enters buildings while conserving energy. These glazed tubes channel sunlight from the roof into living spaces, enhancing energy efficiency and reducing dependence on artificial lighting. The installation of these tubes hinges significantly on proper joint connection methods, which facilitate effective light transmission and minimize potential failure points in the system.
Understanding the intricacies of solar tube joint installation is fundamental for homeowners, contractors, and builders alike. Additionally, exploring the advantages of these systems allows one to appreciate their value fully. Thus, elucidating how one can proficiently install these joints effectively becomes paramount in ensuring durability and optimal performance over time.
2. UNDERSTAND THE COMPONENTS INVOLVED
Before one can proceed to joint installation, it is vital to familiarize oneself with the specific components of a solar tube system. This involves understanding the various parts, such as the solar collector, the tube itself, and the ceiling mounting piece. Each of these components plays a crucial role in the overall efficacy of the installation.
2.1 SOLAR COLLECTOR COMPONENT
The solar collector, often placed on the roof, absorbs sunlight and reflects it through the tube using reflective materials. Understanding how this component interacts with the joint is critical, as it directly affects how sunlight is distributed inside the building. A well-installed joint helps maintain the integrity of the sunlight channel, preventing any obstruction or reflection loss.
2.2 TUBULAR DESIGN SIGNIFICANCE
The tubular design of solar tubes allows for efficient light transfer. As such, selecting the right joint material and positioning is necessary to achieve the best results. Avoiding bends or kinks in the tube ensures maximum light is transmitted down the tube, reinforcing the importance of a meticulous installation process.
3. PREPARATION FOR INSTALLATION
Prior to initiating installation, several preparatory steps must be taken to ensure that everything progresses smoothly. This phase includes gathering tools, assessing structural compatibility, and maintaining clean work conditions.
3.1 TOOL AND MATERIAL GATHERING
Gathering the correct tools facilitates a streamlined installation process. Common tools required include a saw, level, adhesive sealants, screws, and safety gear. Selecting materials such as high-quality joints specifically designed for solar tubes further enhances reliability and longevity.
3.2 ASSESSING STRUCTURAL INTEGRITY
It is also crucial to evaluate the roof structure for any potential obstacles that might hinder the installation. Careful consideration of roof slopes and materials affects the overall success. One must ensure the roof can support the solar tube, providing solid mounting points to secure the joint effectively.
4. INSTALLATION PROCESS
Having completed the preparatory phase, one can proceed to the actual joint installation. The process necessitates precision and attention to detail to ensure a leak-free and effective system.
4.1 POSITIONING THE TUBE
Position the tube at the chosen angle for optimal sun exposure before securing it. Ensure it is clear of any obstructions, which may hinder sunlight entry. Attach the solar collector tightly to the roof using the appropriate joints, allowing maximum sunlight absorption.
4.2 SEALING THE JOINTS
Sealing the joints correctly is incredibly important. Utilizing silicone sealant or other weatherproofing materials will prevent water ingress, maintaining the integrity of the installation. It is advisable to use a continuous bead of sealant around the joint to achieve superior waterproofing.
5. ENSURING PROPER ALIGNMENT
Once the solar tube is in place, the alignment becomes pivotal. Misalignment can lead to decreased efficiency and issues with light transmission within the space.
5.1 LEVELING
Utilizing a level tool, ensure that the tube and its joints are perfectly aligned both horizontally and vertically. Misaligned components will lead to uneven light distribution, which could defeat the purpose of solar tubes. Taking time to adjust before securing everything down will pay dividends.
5.2 FINALIZATION OF INSTALLATION
Once alignment is verified, finalize the installation by securing all screws and adhesive. An additional inspection of the installed joint will ensure everything is sealed and leveled. Regular checks after initial installation can help spot any potential issues before they escalate.
6. MAINTENANCE POST-INSTALLATION
After the installation of solar tube joints, regular maintenance is crucial to ensure the continued efficiency and longevity of panels. Routine checks and cleaning are necessary to prevent degradation and inefficiency over time.
6.1 INSPECTING SEALS AND JOINTS
Perform regular inspections on the joints and seals, especially after severe weather conditions. Look for signs of wear or damage, and replace sealants when necessary to maintain waterproof connectivity.
6.2 CLEANING TUBES
Over time, the internal reflective surfaces of the tube assembly may become dirty or adversely affected by environmental factors. Routine cleaning will preserve optimal light reflection characteristics, thus maximizing efficiency within the home.
FREQUENTLY ASKED QUESTIONS
WHAT ARE THE BENEFITS OF SOLAR TUBES?
Solar tubes boast numerous benefits, fundamentally transforming the way natural light penetrates dwellings. They provide an effective solution to enhancing ambient lighting while reducing energy consumption substantially. Their unique tubular design allows continuous light flow even on cloudy days, making them an aesthetically pleasing and energy-efficient home improvement.
Additionally, 1. They reduce reliance on artificial lighting, leading to decreased electricity costs, 2. They are relatively easy to install compared to traditional skylights, requiring less structural modification, 3. They contribute to improved mental health by enhancing natural light exposure within homes, 4. They are versatile and can be fitted in various spaces, from living rooms to hallways. Misleading concerns regarding energy loss or light degradation are generally unfounded, provided they are installed correctly and maintained over time, thereby underscoring their various benefits.
HOW DO SOLAR TUBES WORK IN WINTER?
Even in winter months, solar tubes maintain efficacy, allowing light to penetrate through their systems. They are designed with insulating materials that minimize heat loss, effectively channeling natural light into living spaces.
1. Solar collectors mounted on the roof absorb daylight, while the subsequent reflective surface ensures light travels down the tube, 2. The angle of installation is crucial; a proper angle enables the tube to capture low-angle sunlight typical during winter months. However, it is necessary to consider factors such as snow accumulation. Snow can obstruct sunlight entry, so regular checks during harsh weather conditions can prevent light availability issues. Having experienced professionals can help further mitigate cons associated with winter performance, ensuring solar tubes function optimally throughout the year.
CAN SOLAR TUBES BE INSTALLED IN EXISTING HOMES?
Indeed, solar tubes can be retrofitted into existing structures, thus providing an effective means of incorporating natural lighting into spaces without extensive renovations. The adaptable nature of solar tubes shows their compatibility with various home designs and features.
1. Installation adaptability allows customization of the entry point, depending on pre-existing roof structures, thus retaining structural integrity, 2. Homeowners should consult with specialists to determine feasible placements that optimize light access while adhering to building regulations. Overall, the ease of installation renders solar tubes a popular choice among those wishing to enhance their living spaces without significant investment or disruption, making them an appealing option for many homeowners.
In summary, the installation process for solar tube joints requires meticulous preparation and execution to ensure efficiency throughout its operational life. By understanding each component, preparing adequately, following installation protocols, and maintaining the system, a homeowner can enjoy the benefits of natural light without the concerns of leaks or inefficiencies. The long-term value of solar tubes combines environmental performance with aesthetic advantages, promoting happier and healthier living spaces. Thus, investing time in careful installation processes pays off significantly by enhancing the overall quality of life.
Original article by NenPower, If reposted, please credit the source: https://nenpower.com/blog/how-to-install-the-joint-of-solar-tube/
