
To effectively install the base of a solar desk lamp, follow these steps: 1. Select an appropriate location, ensuring it receives ample sunlight throughout the day, 2. Gather necessary tools and materials, including a screwdriver and mounting hardware, 3. Prepare the surface, cleaning it for proper adhesion, and 4. Secure the base, following manufacturer instructions for durability and stability.
1. UNDERSTANDING SOLAR DESK LAMPS
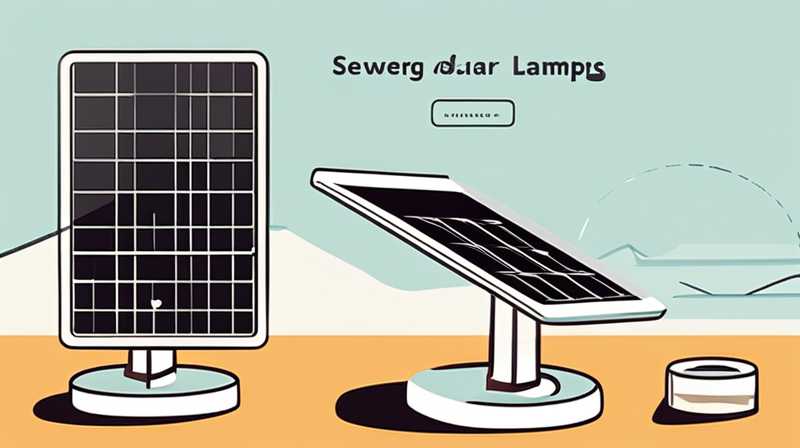
Solar desk lamps are innovative devices that harness sunlight for energy. They offer an eco-friendly lighting solution that reduces electricity consumption and provides outdoor illumination efficiently. Understanding the components of a solar desk lamp is crucial for a proper installation process.
The base plays a pivotal role in ensuring the stability and functionality of the lamp. Typically made from durable materials, it must be secured appropriately to withstand external conditions. Additionally, recognizing the interplay between the base design and the lamp’s solar panel is essential, as improper installation can hinder the solar panel’s ability to absorb sunlight, affecting the lamp’s efficiency.
Moreover, familiarizing oneself with different types of bases available in the market is beneficial. Some bases might require specific installation techniques depending on whether they are designed for permanent outdoor setups or temporary indoor usage. A harmonious balance between aesthetic appeal and functionality is crucial for long-term satisfaction with the product.
2. TOOLS AND MATERIALS REQUIRED
Before starting the installation, it’s necessary to gather all essential tools and materials. A well-prepared workspace significantly streamlines the installation process and enhances the overall efficiency.
Tools required typically include a screwdriver – either Phillips or flathead depending on the screws provided. A level can also come in handy to ensure that the base is mounted evenly. In cases where additional stability is required, consider having anchors or stakes available; this is especially important for outdoor installations in windy areas.
The materials needed will include the solar desk lamp kit, which should come with the necessary screws and brackets. Additionally, having a suitable adhesive or sealant can be beneficial for enhancing the water-resistant properties of the installation. It’s wise to have a clean, flat surface for your setup, as this factor can dramatically influence the installation’s success.
3. SELECTING AN IDEAL LOCATION
The placement of the solar desk lamp is of utmost importance. Opting for a location that receives relentless sunlight is critical for maximizing solar energy absorption. When considering placement, take note of surrounding trees, buildings, or other obstructions that could cast shadows on the lamp throughout the day.
Furthermore, the orientation of the lamp itself should be taken into account. Ideally, it should face south in the northern hemisphere and north in the southern hemisphere, which helps capture the most sunlight. If the desk lamp is intended for garden or yard use, nature’s elements such as tall shrubs should be evaluated, as they could inadvertently block sunlight.
In addition to sunlight exposure, consider the intended purpose of the lamp. If it’s meant for reading or working outdoors, its location should be convenient for access to a desk or seating area. Taking these factors into consideration ensures you benefit fully from the solar capabilities of the lamp while enjoying its illumination.
4. PREPARING THE SURFACE
Preparing the surface for the base installation is a task that should not be overlooked. The sturdiness of the base depends significantly on the surface to which it is affixed. If the lamp is going outdoors, look for a location on concrete, stone, or well-compacted soil.
Begin by cleaning the area to be used for mounting. Remove any debris, dirt, or moisture, as a clean surface promotes better adhesion if using adhesives and ensures that screws or anchors bite securely into the material. If the surface is uneven, consider leveling it before proceeding. Certain lamp models may call for drilling into the surface, making it essential to check local regulations regarding outdoor installations.
For surfaces like wood or composite, be sure to apply a weather-resistant finish to enhance longevity. Different mounting techniques may apply, and understanding manufacturer guidelines is crucial. Preparing the base properly can enhance the durability of the installation and is a vital step towards enjoying the benefits of solar lighting.
5. MOUNTING THE BASE
Once the surface has been prepared, the next step is to secure the lamp’s base correctly. Following precise instructions is crucial, as most manufacturers provide detailed guidance tailored to their specific products.
Begin by positioning the base where it will be mounted, ensuring it is level. If using screws, mark the locations where they must be inserted using a pencil or marker. Drill holes carefully if required, ensuring not to go too deep or damage any underlying materials. Once all the holes align, place anchors if necessary, particularly for larger lamps or in sandy soil.
With all components in place, it’s time to secure the base using screws. Tighten them firmly but take care not to strip the screws; they should hold the unit securely while allowing somewhat of a give for natural expansion and contraction caused by temperature changes.
6. CONNECTING WIRING OR SOLAR PANELS
For many solar desk lamps, connecting wiring may not be necessary, especially those designed for straightforward installations. However, understanding any wiring specifications is beneficial for more complex models. Typically, these will involve connecting the solar panel to the lamp unit, which may come pre-connected in simpler designs.
If manual connection is required, refer to the included instructions closely. Ensure that any connections are secure and sealed against moisture to prevent short-circuiting. In instances where the solar panel itself is detachable, ensure that it is directed appropriately towards sunlight and secure it using the provided hardware.
Additionally, make sure that exposed wires are insulated properly and do not pose a safety hazard. This step is vital not only for protective measures but also for maximizing the efficiency of the solar lamp. A well-connected unit will function optimally, providing the desired light output.
7. TESTING FUNCTIONALITY
Once the base has been mounted and any needed wiring connected, it’s essential to check that the lamp operates correctly. The solar desk lamp should have an integrated test feature or a manual switch to check functionality.
If the lamp is designed to operate automatically, ensure that it receives ample sunlight throughout the day so that it can charge effectively. During the initial test period, monitor how the light performs during the evening; it should illuminate appropriately if adequately charged.
If there are issues with brightness or operation, double-check connections, ensure the solar panel had unobstructed access to sunlight, and verify that the batteries are functioning. These tests are imperative for confirming that the installation was conducted properly and that the lamp serves its intended purpose.
8. MAINTAINING THE SOLAR DESK LAMP
After a successful installation, maintenance becomes the next priority to ensure longevity and optimal performance. Regular inspections should be part of your routine, keeping an eye on the solar panel’s cleanliness. Dust and debris can accumulate, reducing its ability to absorb sunlight.
Furthermore, examine the condition of the cables and connectors periodically. If any signs of wear or corrosion appear, addressing them promptly can prevent further damage. Seasonal changes can pose different maintenance challenges; for example, removing snow or ice in winter climates is necessary to maintain solstice exposure.
Lastly, as the batteries age, they may need replacement after several cycles, generally every couple of years for most models. Consult the user manual for specifications regarding battery management and replacement, ensuring the lamp continues to function effectively for years to come.
FREQUENTLY ASKED QUESTIONS
WHAT IS A SOLAR DESK LAMP?
A solar desk lamp is a lighting fixture designed to use solar energy as its power source. Equipped with a built-in solar panel, it captures sunlight during the day, converting it into electrical energy stored in rechargeable batteries. Once the ambient light decreases, the lamp automatically turns on, providing illumination as needed. The advantages of solar desk lamps include their eco-friendliness, cost-effectiveness due to zero electricity bills, and portability, allowing users to position them in the best lit areas.
Typically, these lamps are utilized for outdoor purposes, like gardens or patios, but can also serve indoor areas, particularly where natural light is ample. With designs ranging from simplistic to modern aesthetics, solar desk lamps have gained popularity as sustainable solutions for various lighting needs.
HOW DO I CHOOSE A LOCATION FOR MY SOLAR DESK LAMP?
The selection of a location for a solar desk lamp is crucial to its functionality. An ideal location must receive sunlight for a substantial portion of the day, typically between 4 to 8 hours. To maximize energy absorption, avoid placing the lamp in areas that have structures or trees casting shadows, obstructing sunlight.
Evaluating usage is also essential; for instance, if the lamp is meant for reading or outdoor activities, position it conveniently within reach of seating or desk placements. Weather-related factors should also come into consideration; windy areas may require more secure mounting to prevent displacement. Choosing the right spot ensures that the solar lamp operates at its full potential.
WHAT ARE SOME COMMON MISTAKES TO AVOID DURING INSTALLATION?
During the installation of a solar desk lamp, awareness of common pitfalls can enhance the success of the process. One frequent mistake is improper surface preparation, which can lead to instability over time. Insufficient cleaning or failing to level the surface rightly may result in the base shifting or becoming loose.
Another common error is overlooking the positioning of the solar panel. If not oriented correctly, it might fail to capture adequate sunlight, diminishing the lamp’s performance. Additionally, neglecting to follow manufacturer instructions can lead to various functional issues. Therefore, taking time to read the guidelines thoroughly and making adjustments are essential steps toward a successful installation.
IN SUMMARY, understanding how to successfully install the base of a solar desk lamp involves careful consideration of multiple elements, including location selection, surface preparation, and proper mounting. By following the outlined steps, anyone can ensure that their solar desk lamp operates efficiently and stands the test of time. Regular maintenance and monitoring further enhance the lamp’s lifespan and overall performance. Embracing solar technology not only contributes to a greener environment but also enriches outdoor living experiences by providing convenient illumination options.
Original article by NenPower, If reposted, please credit the source: https://nenpower.com/blog/how-to-install-the-base-of-a-solar-desk-lamp/
