
To install solar tube mats, follow these essential steps: 1. Choose an appropriate location, 2. Prepare the ground, 3. Install the solar tubes properly, 4. Connect the system to a heat exchanger. An elaboration on the first point reveals that selecting a location is crucial; it should receive maximum sunlight exposure throughout the day, ideally free from obstructions like trees or buildings. Conducting a survey of the area can help identify the most effective placement, ensuring optimal energy absorption and efficiency. A well-thought-out installation facilitates greater performance and longevity of solar tube mats.
1. INTRODUCTION TO SOLAR TUBE MATS
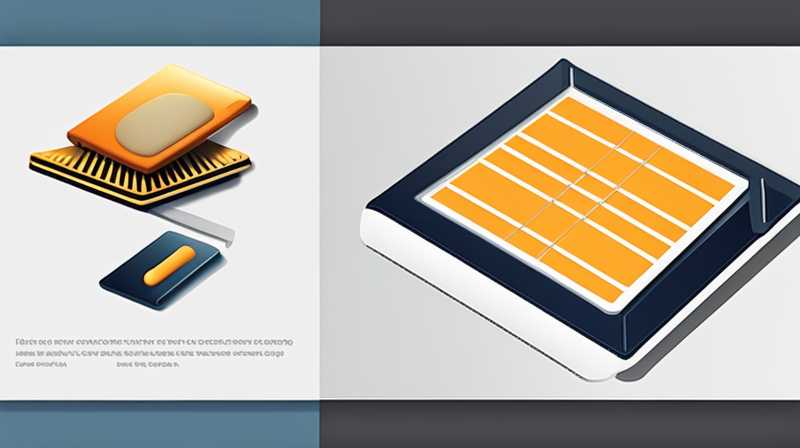
Solar tube mats represent an innovative advancement in harnessing solar energy by integrating advanced materials and fluid dynamics for enhanced thermal efficiency. These systems utilize various tubes filled with liquid or gas, designed to absorb sunlight and convert it into heat energy. Such technology is particularly effective in residential heating, warming swimming pools, or assisting with domestic hot water systems. The growing concern for sustainability and the environment has propelled the necessity for efficient energy solutions, making solar tube mats a lucrative option.
Understanding the technology behind these systems is fundamental to their use. Solar tube mats comprise multiple interconnected tubes, typically with a dark outer coating that maximizes heat absorption. The design ensures optimal airflow and fluid circulation, essential for maintaining thermal efficiency. Their adaptability to various settings enables homeowners and businesses to reduce energy costs significantly while contributing to a more sustainable future.
2. SELECTING AN OPTIMAL LOCATION
Choosing the most suitable site for solar tube mats involves careful consideration of several factors, including sunlight exposure, geographical location, and seasonal variations. The preferred area must receive unobstructed sunlight for the majority of the day, especially during peak hours from noon to late afternoon. Trees, buildings, or any other obstructions can hinder the performance by casting shadows over the solar mats; therefore, a meticulous analysis of the surroundings is crucial.
In addition, assessing climate and local weather patterns allows for more informed decisions regarding placement. Regions with consistent sunshine levels will produce better outcomes for solar energy systems. Further, understanding seasonal variations can lead to strategically elevating or angling mats during specific seasons, enhancing exposure and harnessing the sun’s rays more effectively throughout the year.
3. PREPARING THE GROUND
Once a location has been chosen, preparing the ground is the next pivotal task, which involves clearing away debris, leveling the area, and ensuring proper drainage. The preparation phase is critical as it sets the foundation for optimal mat installation. The selected area should be free from any obstructions that might interfere with water flow or sunlight exposure.
Subsequently, leveling the ground facilitates uniform heat distribution across the solar tube mats. Any depression or unevenness can lead to water pooling, which may ultimately affect the system’s heat efficiency. Ensuring appropriate drainage is vital to avoid stagnation, which can cause deterioration of the materials and reduce longevity. A well-prepared ground establishes the conditions necessary for a successful and effective installation of solar tube mats.
4. INSTALLING THE SOLAR TUBES
The installation of solar tubes requires precision and adherence to guidelines to ensure an efficient operation. First, the solar tubes need to be laid out in accordance with the design specifications of the system. Following the instructions provided by the manufacturer is essential to avoid any mishaps. Each tube should be connected in such a way that allows for optimal flow of liquid, maximizing heat exchange potential.
Moreover, proper sealing of joints and connections is necessary to prevent leakage, which can severely impact overall efficiency. Using the appropriate materials enhances durability and sustainability, allowing the system to withstand varying temperatures and conditions over time. This phase is critical; the effectiveness of the entire solar heating system hinges on a proper installation of each component.
5. CONNECTING TO A HEAT EXCHANGER
Connecting solar tube mats to a heat exchanger marks the culmination of the installation process, facilitating the transfer of heat from the solar tubes to a usable source for heating water or air. The heat exchanger acts as an interface between the captured solar energy and the heating system serving the home or establishment.
There are various types of heat exchangers, including plate and shell models, and the selection depends on specific heating needs and configurations. Proper connections and fittings are necessary to maintain efficiency, ensuring that heated fluid adequately flows for maximum energy transfer. Moreover, regular maintenance checks of this connection prevent potential leaks and ensure the system’s longevity and effectiveness.
6. MAINTENANCE AND EFFICIENCY ENHANCEMENT
To ensure solar tube mats operate at optimal capacity, consistent maintenance is essential. Regular inspections can identify any leaks, wear, or environmental issues affecting performance. Checking the fluid levels and ensuring the tubes remain clear of dirt, debris, and blockages will help prolong lifespan and effectiveness.
Moreover, upgrading system components over time can drastically enhance efficiency. Innovations in materials and technology are continuously developing, providing more effective options for solar energy systems. Keeping the system updated ensures adaptability to new advancements, ultimately leading to greater energy savings and reduced environmental impact.
FREQUENTLY ASKED QUESTIONS
WHAT TYPES OF SOLAR TUBE MATS EXIST?
Solar tube mats come in several varieties, each catering to different applications. Common types include evacuated tube collectors, flat plate collectors, and hybrid systems. Evacuated tube collectors utilize glass tubes to create a vacuum, minimizing heat loss while maximizing efficiency. Conversely, flat plate collectors feature a flat panel design and are often simpler to install but may be less efficient in colder climates. Hybrid systems combine aspects of both, offering versatility across a range of settings and temperatures. It’s crucial to assess the intended use, climate, and efficiency ratings when selecting the right type for your specific needs.
HOW LONG DOES INSTALLING SOLAR TUBE MATS TAKE?
The time required for installing solar tube mats varies based on system size, location, and complexity of the setup. On average, a well-coordinated installation can range between one to three days. Initial preparation work, such as ground leveling and clearing, may take additional time before installation begins. Moreover, ensure sufficient time for proper connection to a heat exchanger and any landscaping needs post-installation. Delays can arise from weather conditions, material availability, or required permits, highlighting the importance of a detailed plan and timeline.
WHAT IS THE AVERAGE COST OF SOLAR TUBE MATS INSTALLATION?
The average expenditure for solar tube mats installation can fluctuate greatly depending on several variables, including system size, material quality, and required labor. Generally, costs can range from $2,000 to $7,000 for a typical residential installation. Additional factors such as location, specific system requirements, and if you opt for professional installation versus a DIY project can greatly impact total costs. It is advisable to obtain multiple quotations from licensed contractors to ensure competitive pricing while also taking into account long-term savings on energy bills and potential tax credits.
In summary, successfully installing solar tube mats involves several crucial steps, including selecting an appropriate location, preparing the ground, properly installing the solar tubes, and connecting the system to a heat exchanger. Each phase requires careful planning and execution. As this technology advances and more homeowners seek energy-efficient solutions, understanding these steps enhances the potential for effective, sustainable energy use in every household. Choosing the correct type of system, maintaining it regularly, and ensuring it’s well integrated into your home can lead to substantial cost reductions and environmental benefits. Additionally, being informed about potential costs and timelines helps in planning this investment more effectively. The benefits of solar tube mats extend beyond mere energy savings; they contribute to a larger goal of promoting sustainable living practices and utilizing renewable resources.
Original article by NenPower, If reposted, please credit the source: https://nenpower.com/blog/how-to-install-solar-tube-mats/
