
To successfully install solar power in an RV, one must follow an organized approach: 1. Assess the power needs, 2. Select appropriate solar components, 3. Properly install the solar panels, and 4. Finalize connections and system testing. Thoroughly evaluating the power needs ensures that the solar setup can efficiently support all electrical requirements in the RV. For a meticulous installation, choosing components such as solar panels, charge controllers, batteries, and inverters is crucial, as each plays a significant role in system performance. The installation process involves specific techniques for securing panels and routing wiring, which are vital for safe operations. After installation, comprehensive testing of the system will confirm its readiness for use.
1. UNDERSTANDING POWER NEEDS
Determining the energy requirements in an RV is the cornerstone of setting up a solar power system. Without this knowledge, one might either overspend on unnecessary equipment or fail to provide sufficient energy for essential devices. To start, list all electrical appliances and devices that will require power. Each device typically has a wattage rating, indicating how much power it consumes.
To calculate total energy needs, multiply the wattage of each appliance by the number of hours it will be used daily. A simple example would be a refrigerator that operates at 100 watts and runs for approximately 8 hours a day. The energy consumption would be 100 watts x 8 hours, resulting in 800 watt-hours consumed daily. Identifying these figures is critical, as it allows for a tailored solar system size that can effectively meet energy demands.
2. SELECTING SOLAR COMPONENTS
Once the energy requirements are established, the next step involves selecting compatible solar components. Key components include solar panels, a charge controller, batteries, and an inverter. The task of choosing the right panel involves understanding their efficiency and space requirements. Typically, larger panels generate more energy, but smaller options can be more practical for compact RV setups.
Charge controllers play an essential role in regulating the charging of batteries, preventing overcharging and deep discharging. There are different types, such as PWM (Pulse Width Modulation) and MPPT (Maximum Power Point Tracking). While PWM is generally less expensive, MPPT controllers offer better efficiency, especially in lower sunlight conditions. Selecting the most appropriate type hinges on budget and performance expectations, as the correct controller enhances overall system longevity.
When it comes to batteries, several types are available, including lead-acid, AGM, and lithium-ion. Lead-acid batteries are the most traditional but can be heavy and less efficient. Conversely, lithium-ion batteries, while more expensive, boast higher efficiency, faster charging rates, and a longer lifespan, making them an attractive choice for those who can allocate additional funds for a robust system.
3. INSTALLING SOLAR PANELS
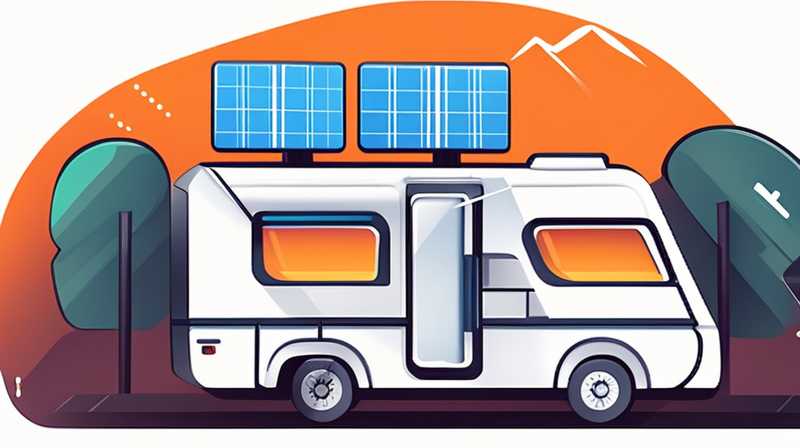
Proper installation of solar panels is crucial for optimal operation and longevity. Initially, assess the roof space of the RV, ensuring that it has adequate sunlight exposure without obstructions like vents or air conditioning units. Depending on the type of mounting systems available, either a flat or tilting install may be beneficial. Flat installations often utilize adhesives or brackets, while tilted setups require more robust mounts to accommodate the angle.
Adequate sealing and insulation of joints and connections are paramount to prevent water intrusion, which can damage the electrical systems. Prior to securing panels, a quick dry run to visualize the arrangement can save time and help viewers to ensure maximum sunlight exposure throughout the day. After preliminary arrangements are confirmed, secure the panels to the roof using the chosen mounting system, ensuring that they are tightly affixed to withstand wind and motion from travel.
Following panel installation, next comes the routing of wiring. Ensure connections are weatherproof and secured properly to prevent unwanted disconnections or damage during transit. Utilizing wire management techniques keeps everything organized and reduces the risk of hazards from loose wires during travel. Once all connections are made, proper testing should be scheduled to evaluate the integrity of the installation before fully utilizing the solar power system.
4. FINALIZING CONNECTIONS AND TESTING
With the solar panels securely in place, the time comes to make the final connections and conduct comprehensive testing. Begin by connecting the charge controller to the solar panels and batteries. This connection must be performed carefully, as incorrect configurations could lead to system failure. Follow the manufacturer’s guidelines to ensure that positive and negative terminals are correctly aligned.
After connecting the charge controller, integrate the inverter and link it to the battery bank. This component will convert the direct current (DC) produced by the solar panels into the alternating current (AC), which is commonly required for regular appliances within the RV. The inverter placement is critical; it should be installed in a proper vented area to prevent overheating during operation.
Once all connections are established, perform a detailed system evaluation. Check for any error codes on the charge controller, and ensure that the batteries are accepting charge correctly from the solar panels. Moreover, assess the inverter output to confirm that it produces the intended voltage and current levels. Finally, host a thorough check on circuitry within the RV to guarantee everything functions seamlessly, creating a reliable and efficient solar energy system for life on the road.
FREQUENTLY ASKED QUESTIONS
WHAT TYPE OF SOLAR PANELS ARE BEST FOR RVs?
Choosing the right solar panels for an RV depends on several factors, including efficiency, weight, and installation ease. There are two dominant technologies: monocrystalline and polycrystalline solar panels. Monocrystalline panels are typically more efficient and produce more power per square foot, making them suitable for RVs with limited rooftop space. They can perform better in low-light conditions as well, ensuring energy production during cloudy weather.
On the other hand, polycrystalline panels tend to be less expensive and are slightly less efficient but can still serve well in less demanding applications. When selecting solar panels, consider the available roof space and the energy demands of the RV. Regardless of the option selected, ensure the panels are of high quality and designed for mobile applications to withstand movement and varying weather conditions.
HOW DO I MAINTAIN MY RV SOLAR POWER SYSTEM?
Maintaining a solar power system is essential to ensure longevity and efficiency. Regular inspections play a significant role in identifying potential issues before they escalate. Inspect the solar panels periodically for dirt and debris buildup, which can reduce their efficiency. Use a gentle soap solution and a soft cloth to clean the panels, ensuring that they remain clear for optimal sunlight absorption.
Furthermore, it’s vital to regularly check battery levels and ensure the charge controller is functioning correctly. Monitor the state of charge and the health indicators provided by the controller, which can alert to any safety concerns or operational issues. Additionally, ensure that all connections remain secure and free from corrosion. Implementing these maintenance practices can enhance the lifespan and performance of the solar system while offering peace of mind while on the road.
WHAT IS THE AVERAGE COST OF INSTALLING SOLAR IN AN RV?
The cost of installing a solar power system in an RV can vary significantly depending on the components chosen, the size of the system, and whether the installation is performed professionally or self-installed. On average, the cost can range from $1,500 to $3,500 for a basic setup, including solar panels, charge controller, inverter, and battery storage.
Higher-end systems, particularly those utilizing lithium-ion batteries and advanced solar technology, can exceed $5,000. Self-installation can significantly reduce labor costs. However, it is critical to factor in the price of tools and any additional materials that may be needed for the installation process. For those an exprienced individual or willing to acquire knowledge through research, investing in DIY solutions may yield substantial savings while also providing satisfaction from creating a reliable energy source for RV adventures.
Establishing a solar power system in an RV is both an art and a science, requiring meticulous planning and execution to achieve energy independence and self-sufficiency. Understanding specific energy requirements and selecting appropriate components ensures that the system will efficiently meet daily demands. Following best practices during installation and maintenance will not only enhance efficiency but prolong the lifespan of the investment. For RV travelers seeking freedom in mobility, harnessing solar energy transforms adventures, allowing for extended periods off the grid while minimizing dependency on traditional power sources. Embracing solar technology in an RV can significantly enhance the overall travel experience, making it a preferred choice for many outdoor enthusiasts.
Original article by NenPower, If reposted, please credit the source: https://nenpower.com/blog/how-to-install-solar-power-in-rv/
