
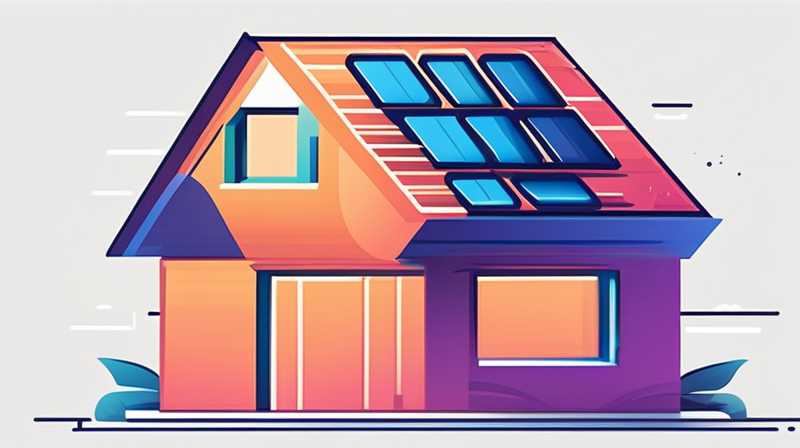
1. Installing solar panels on a roof involves several key steps: 1. Assessing the roof’s suitability, 2. Selecting the right solar panel system, 3. Securing permits and approvals, 4. Installing mounting hardware, 5. Placing the solar panels, 6. Connecting electrical components, 7. Performing inspections and testing. A thorough evaluation of the roof is critical in determining its strength, angle, and exposure to sunlight. It is essential to consider these factors in order to maximize the efficiency of the solar energy system. Engaging with professionals for both installation and design can significantly enhance the performance and output of the system.
1. ROOF ASSESSMENT
Evaluating the roof is a fundamental step in the installation of solar energy systems. A detailed inspection should begin with determining the size and type of the roof, as these factors dictate not only the available space for solar panels but also the effectiveness of capturing solar energy.
Structural integrity is crucial; roofs must be able to withstand the added weight of solar panels without the risk of structural failure. It’s imperative to examine the roof’s condition, looking for any existing damage, rot, or other structural issues that may need addressing prior to installation. Consulting a licensed structural engineer or a roofing professional can provide insights into whether any reinforcements are necessary, ensuring safety and longevity for both the roof and the solar panels.
Tilt and orientation furthermore play a decisive role in optimizing the solar panels’ performance. Ideally, solar panels should face south in the northern hemisphere to capture the maximum amount of sunlight throughout the day. Angle is also a critical factor; roofs that can accommodate tilting may yield better energy outputs compared to flat roofs. Conducting a sun-path analysis can help in understanding how sunlight interacts with the structure over the changing seasons.
2. SOLAR PANEL SELECTION
Choosing the right solar panel system requires comprehensive research and understanding of available technologies. There are several types of solar panels, predominantly monocrystalline, polycrystalline, and thin-film. Each type presents its unique advantages and efficiencies, thus requiring careful consideration based on individual needs and conditions.
Monocrystalline panels are widely regarded for their high efficiency and space-saving capabilities. Made from single crystal structures, these panels tend to provide a higher power output per square foot. Consequently, for homeowners with limited roof space, this option may emerge as the most viable. However, they usually come at a premium price point.
Polycrystalline panels, while generally less efficient than their monocrystalline counterparts, offer a more budget-friendly alternative. They are made from multiple crystal structures and are often considered a good choice for those with larger roof areas who are looking for more cost-effective solutions.
Thin-film panels represent yet another category and are characterized by their flexibility and lightweight nature. Despite having a lower efficiency rate, advancements in technology continue to improve their viability and application in various circumstances.
Additionally, it’s critical to evaluate the warranty and performance guarantees offered by manufacturers. A standard warranty period typically ranges from 10 to 25 years, with performance guarantees ensuring a certain production level over time. Investing in high-quality panels can translate into long-term savings and energy independence.
3. PERMITS AND APPROVALS
Prior to initiating installation, securing the necessary permits and approvals from local authorities and utility companies becomes imperative. Regulations can vary significantly depending on the region, so thorough research into local building codes and zoning laws is essential. Engaging in this step will help in avoiding potential legal complications that could arise after installation.
Building permits are often required for the installation of solar systems, ensuring that the structure adheres to safety and code requirements. Most municipalities will demand technical specifications regarding the planned system, including diagrams of how the panels will be installed.
Furthermore, interconnection agreements may be necessary to allow the solar system to connect to the electrical grid. Regulations governing net metering programs—where excess electricity generated is sent back to the grid—must also be understood. This connection provides potential savings on electric bills through credits for excess power generation.
Consulting with solar installation professionals who are well-versed in navigating these bureaucratic elements can streamline the permit acquisition process, thus reducing any delays. Proper compliance ensures a smoother project from inception through completion while minimizing risks associated with violations.
4. MOUNTING HARDWARE INSTALLATION
The installation of mounting hardware is a technical phase where accuracy is paramount. Mounting systems provide the framework to securely attach solar panels to the roof. There are various types of mounting systems ranging from roof-integrated solutions to modular rack systems.
Roof-integrated systems are designed to blend seamlessly with the existing roofing material, offering an aesthetically pleasing option. These systems can save installation time and cost while ensuring that the roof’s waterproof integrity is maintained.
Rack-mounted systems, on the other hand, provide flexibility for both flat and pitched roofs. They typically require drilling into the roof structure to secure them firmly. Consequently, ensuring that these mountings are correctly installed is critical to avoid roof leaks or structural damage.
During this process, proper alignment is critical for maximizing efficiency. The use of a leveling tool ensures panels are correctly aligned to achieve optimal sun exposure. Each mounting bracket must be securely anchored, which may involve selecting appropriate screws and hardware materials resistant to corrosion, particularly in coastal areas.
5. SOLAR PANEL INSTALLATION
Following the successful installation of the mounting hardware, the next act is placing the solar panels securely. This process demands a high level of care and focus to avoid damaging the panels during installation.
Lifting and positioning the panels requires the use of safety equipment, and it should ideally involve multiple individuals. Each panel should be carefully positioned to align with the pre-installed mounting brackets. Proper care in handling these components, including avoiding situations that may induce scratches or breaks, is essential.
When the panels are positioned correctly, they can be firmly secured using clamps or additional hardware to ensure stability against wind loads and other environmental factors. The orientation previously assessed must be strictly adhered to, thus allowing for maximum sunlight capture.
Following installation, the entire setup requires thorough inspection to ensure that all panels are properly connected and functioning effectively. Checking connections for any possible loose wiring is crucial to maintaining an electric flow and safety within the system.
6. ELECTRICAL CONNECTIONS
After the solar panels have been successfully mounted on the roof, establishing proper electrical connections is the next crucial step. This phase links the solar array to the home’s electrical system and, if applicable, the grid.
DC wiring is routed from the solar panels to an inverter, which converts the direct current generated by solar panels into alternating current usable by household appliances. This inverter must be chosen wisely based on its efficiency, reliability, and appropriate capacity for the system.
Properly following safety protocols and local electrical codes during this process is non-negotiable. Inconsistent wiring can lead to significant hazards, not only potentially damaging the system but posing risks of electrical fires.
Once the inverter is correctly installed, the wiring connections can be made to transition from the inverter to the electrical panel in the home. This configuration may require the assistance of a licensed electrician to ensure that all local regulations are followed while safeguarding the system’s functionality.
7. INSPECTIONS AND TESTING
The final stages in the solar panel installation process involve inspections and testing to validate that everything operates according to safety and performance standards. Local authorities or designated inspectors may conduct formal inspections but also conducting self-inspections is beneficial.
Performance testing should include verifying the electrical connections, ensuring there are no short circuits, and testing the inverter functionalities. A multimeter can be employed to check voltage and current outputs to ensure they align with expected values.
Documentation of all tests and inspections can serve as evidence of compliance for local authorities and is valuable for warranty purposes. After passing all evaluations, only then should the solar system be fully activated.
Once operational, continuous monitoring can help in identifying potential performance issues over time, ensuring that the system runs efficiently throughout its intended lifespan, typically spanning two to three decades.
COMMON INQUIRIES
WHAT IS THE COST OF INSTALLING SOLAR PANELS?
The cost of installing solar panels can vary widely based on several factors, including system size, panel types, and labor costs specific to the locality. On average, the installation of a residential solar power system in the United States can range from $15,000 to $30,000 before tax credits or incentives. Additionally, the cost can also fluctuate depending on any necessary electrical upgrades or roof modifications.
It is imperative to factor in the long-term savings from reduced electricity bills, which often allow for return on investment over a period of 5 to 10 years. Government incentives, such as tax credits and rebates, can further reduce the initial outlay, making solar energy installation more accessible and appealing for families.
Consulting with local installers can yield personalized quotes and financial assessments tailored to individual situations. Careful consideration of financing options, including leases, loans, or outright purchases, can also impact the overall cost and savings structure through the years.
HOW LONG DOES THE INSTALLATION PROCESS TAKE?
The duration of solar panel installation can vary depending on several elements including the type of system, home size, and installer experience. Generally, the entire process—from the initial assessment to the final connection—can take anywhere from a few days to several weeks.
The preliminary phase, including the assessment and permits, can often take the longest due to the time required for bureaucratic approvals. Once all permits are secured, the physical installation typically spans one to three days for standard residential systems, factoring in the roof preparation, mounting, wiring, and panel placement.
Post-installation inspections and testing can take an additional few hours or days. Engaging with experienced professionals can streamline the process, ultimately reducing installation time while adhering to safety and quality standards.
WHAT MAINTENANCE DO SOLAR PANELS REQUIRE?
Maintaining solar panels is essential for ensuring optimal performance and preserving lifespan. Routine checks for dirt, debris, or shading from trees or neighboring structures should be regularly performed as these can block sunlight and diminish efficiency.
Cleaning panels typically once or twice a year can help remove particles that may hinder sunlight absorption. Depending on geographic locations, natural rainfall may suffice in keeping the panels clean, but in drier regions, a soft brush or cloth with water is advisable.
Moreover, periodic monitoring of the entire solar system’s performance through online monitoring tools ensures that any performance discrepancies can be addressed timely. Coordination with solar professionals for annual checks can also aid in identifying potential issues before they escalate, ensuring the system operates efficiently for years to come.
In summary, installing solar panels on a roof requires meticulous planning and execution. Each stage, from assessing the roof’s condition to selecting the right type of panels, securing necessary permits, installing hardware and electrical connections, and ensuring proper inspections, plays a pivotal role in achieving a successful solar energy system. Careful attention to detail and professional guidance throughout the entire process can yield significant long-term benefits in energy savings and environmental impact. A commitment to understanding the complexities of each phase leads to better outcomes and maximized returns on both financial investment and sustainability goals. Engaging reputable professionals, regularly monitoring the system, and maintaining clear communication throughout installation are key components to ensure the longevity and efficiency of solar panels, paving the way for an energy-efficient future.
Original article by NenPower, If reposted, please credit the source: https://nenpower.com/blog/how-to-install-solar-panels-on-the-roof-6/
