
To install a solar panel bracket, 1. Begin by selecting an appropriate location on the roof, 2. Ensure the bracket mounts are installed securely, 3. Position the solar panels correctly on the brackets, 4. Test the stability of the entire setup. Detailed installation instructions can vary depending on the type of solar panel and roof configuration, but these foundational steps outline the essential process.
1. UNDERSTANDING SOLAR PANEL BRACKETS
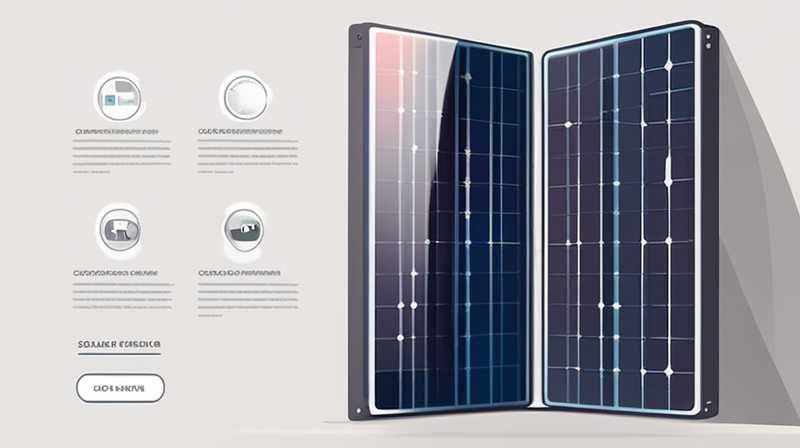
Solar panel brackets are crucial components for securing solar panels to a rooftop or other surfaces. They serve not only as support but also as anchoring systems that withstand environmental stresses such as wind and precipitation. These brackets come in various shapes and materials, specifically designed to accommodate different types of solar panels and roofing structures.
The primary function of solar panel brackets is to ensure that solar panels are installed at an optimal angle. This positioning allows for maximum sunlight exposure, enhancing the efficiency of solar energy capture. Furthermore, properly installed brackets can significantly extend the lifespan of the solar panel system by minimizing the risk of damage from environmental factors or structural movement.
2. SELECTING THE RIGHT BRACKET TYPE
Choosing the appropriate type of bracket is crucial in ensuring both the functionality and durability of your solar energy system. There are primarily two types of brackets: fixed brackets and adjustable brackets. Fixed brackets are designed for straightforward installations where the angle is predetermined, while adjustable brackets offer flexibility for varying angles.
When selecting the right type of bracket, it is essential to consider factors such as the geographical location, roof type, and the specific solar panel model being used. For instance, regions with heavier snowfall may require more robust and secure mounting systems to handle the additional weight. In addition, certain roofing materials, such as tile or metal, may have specific bracket options tailored to prevent damage during installation.
3. GATHERING REQUIRED TOOLS AND MATERIALS
Before initiating the installation process, compiling a comprehensive list of necessary tools and materials is fundamental. Common tools include a drill, level, measuring tape, and wrenches. Additionally, safety equipment such as goggles and gloves should not be neglected to ensure the protection of the installer.
In terms of materials, aside from the solar panel brackets themselves, you will need screws, bolts, and possibly specific adhesives depending on the roof structure and bracket type. Each component plays a vital role in achieving a secure and functional installation. Therefore, it’s critical to select high-quality materials that can withstand local weather conditions.
4. SECURING THE ROOF USING BRACKETS
An integral step in the installation process involves mounting the brackets securely onto the rooftop. This usually begins with identifying structural points on the roof where the brackets can be anchored effectively. These points might include rafters or trusses, as these areas provide the necessary support needed for stability.
After identifying these structural points, use a drill to make pilot holes before fixing the brackets into place. Anchoring the brackets in this manner is essential for preventing them from pulling away due to wind or weight from the panels. Proper sealing around the holes with weather-resistant materials will ensure that the integrity of the roof is maintained, preventing leaks and further structural issues.
5. ALIGNING SOLAR PANELS TO THE BRACKETS
Once the brackets have been secured, the next phase is to position the solar panels on them. Aligning the panels correctly is essential not only for aesthetic appeal but also for maximizing their exposure to sunlight. This alignment process often involves utilizing a level to ensure that each panel is placed evenly.
After positioning the panels, they should be fixed securely to the brackets using the recommended screws or bolts. It is critical to follow manufacturer guidelines during this step to avoid potential damage. Additional enhancements, such as applying anti-slip materials or securing straps, may offer further stability, particularly in regions prone to high winds.
6. TESTING YOUR INSTALLATION
Post-installation, testing is a crucial step that ensures everything operates correctly. Start by examining the alignment and stability of both the brackets and panels; any misalignment can affect efficiency and safety. Utilize a level to confirm that all panels are positioned correctly and make any necessary adjustments.
Furthermore, a thorough inspection of the electrical connections is required before the system is activated. Testing the electrical output with specialized tools can help confirm that the system is functioning as intended. Only after confirming these critical aspects should the solar energy system be connected to the grid or utilized for personal consumption.
7. MAINTAINING SOLAR PANEL BRACKETS
Maintenance is an often-overlooked aspect of solar panel systems. Regular inspections of the brackets and panels are essential for ensuring longevity and efficiency. Over time, various weather factors may affect the integrity of the installation, calling for periodic checks.
Cleaning the panels is also essential; dirt, debris, or snow can significantly reduce efficiency by obstructing sunlight. A gentle wash with water and mild soap, when necessary, can help keep the panels clean. Additionally, checking the brackets for any signs of rust or wear ensures that the entire structure remains secure and functional.
FREQUENTLY ASKED QUESTIONS
1. HOW LONG DOES IT TAKE TO INSTALL SOLAR PANEL BRACKETS?
The duration of solar panel bracket installation can vary based on several factors, including the number of panels being installed, the type of roofing, and the bracket design. On average, a basic installation can take anywhere from a few hours to a full day.
The process generally becomes more complex if the installation is on a steep or high roof, or if there are obstacles such as chimneys and vents. Additional time may also be needed for planning, gathering tools, and preparing the site. Those who are inexperienced may require extra time to ensure the installation is done correctly, potentially extending the timeline significantly.
2. WHAT DO I DO IF MY ROOF IS NOT LEVEL?
If a roof is not level, several solutions can accommodate this issue when installing brackets. Utilizing adjustable brackets is one viable approach; these types of brackets can compensate for any structural inconsistencies by allowing the mounting angle to be altered as necessary.
Alternatively, shimming may be used to level the brackets despite the roof’s uneven surface. Shims—thin, wedge-like materials—can be inserted where gaps appear, enabling a smooth and stable mounting surface for solar panels. However, it is crucial to ensure that any adjustments made do not compromise the security and stability of the entire installation.
3. CAN SOLAR PANEL BRACKETS BE USED ON ALL ROOF TYPES?
Solar panel brackets are designed to be versatile and can generally be adapted for many different roof types, including asphalt shingles, slate, metal, and flat roofs. However, specific installation techniques and bracket types are tailored to accommodate various materials.
For instance, flat roofs may require ballasted systems that do not penetrate the roofing material, whereas pitched roofs can utilize penetrating mounts. Understanding the specific requirements based on roof material is essential for achieving a secure and durable installation. Consulting with professionals for complex roofing types can also provide clarity in ensuring that the chosen bracket system suits the roof effectively.
Every aspect of solar panel bracket installation demands precision and care. Proper planning, secure mounting, and regular maintenance collectively contribute to the overall success and efficiency of solar energy systems. The myriad of brackets available caters to various installation needs, and understanding how to leverage these tools effectively can enhance energy capture and sustainability.
Ultimately, the investment in solar panel technology is not just about immediate benefits; it reflects a commitment to renewable energy and environmentally conscious solutions. As the world increasingly shifts towards sustainability, integrating solar solutions into residential and commercial settings symbolizes a step forward. Therefore, engaging in meticulous research, employing professional assistance when necessary, and adhering to guidelines ensures that this transition is as seamless and successful as possible.
Original article by NenPower, If reposted, please credit the source: https://nenpower.com/blog/how-to-install-solar-panel-bracket/
