
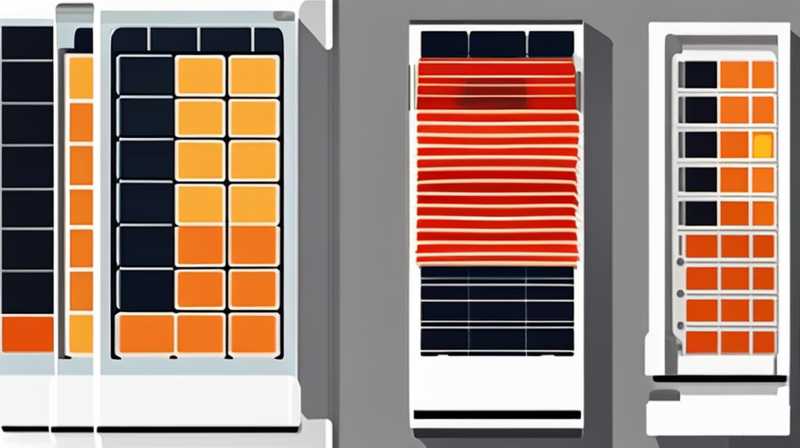
To successfully install solar glass lip, adhere to the following key steps: 1. Prepare the installation site, 2. Gather essential tools and materials, 3. Install the solar glass lip, 4. Connect the glass to the solar system. Detailed preparation is crucial because selecting the right location impacts the efficiency of the solar panels, ensuring optimal energy capture due to maximum sun exposure. Understanding the specific attributes of your glass lip and its fixtures ensures a secure installation aligned with manufacturer guidelines.
1. PREPARING THE INSTALLATION SITE
The initial part of this endeavor involves meticulously selecting the right location for the installation. The area should be free from obstructions such as trees, buildings, or any other elements that can cast shadows on the solar glass. Proper shading analysis is indispensable, which entails using tools like solar pathfinders to evaluate how sunlight interacts with potential installation sites throughout different seasons. This step assures that the captured solar energy is maximized.
Given the specific type of solar glass lip being used, surface characteristics and structural integrity of the mounting location must also be assessed. If the surface on which the glass will rest is uneven or unstable, it can lead to complications that undermine the whole system’s performance. A firm, flat area not only ensures safety during installation but also enhances efficiency post-installation. Thoroughly cleaning the selected site to remove any debris or oils enhances the adhesive’s effectiveness, which is pivotal if the installation involves any form of sealing.
2. GATHERING ESSENTIAL TOOLS AND MATERIALS
Before proceeding with the installation, assembling all necessary tools and materials is essential to facilitate a smooth process. Typical tools include screwdrivers, a level, tape measure, utility knife, and safety gear, such as gloves and goggles. Having a well-stocked toolkit at hand minimizes interruptions, allowing for seamless work progression. Additionally, confirming that the tools are in good condition enhances safety and effectiveness during the installation process.
In terms of materials, it is crucial to source high-quality items specifically designed for solar glass installation. This often involves silicone sealants, brackets, or compatible mounting systems that provide an appropriate fit for the solar glass lip. The quality of materials plays a substantial role in durability and overall performance, ensuring that installations can withstand environmental factors such as wind or snow loads. Arbitrary material choices might lead to premature system failures or inefficiencies, emphasizing the importance of selecting components tailored for solar energy applications.
3. INSTALLING THE SOLAR GLASS LIP
With the site prepared and materials gathered successfully, the installation of the solar glass lip can commence. This process requires careful handling to maintain the integrity of the solar glass. Begin by placing the solar glass lip at the designated location, ensuring alignment according to the previously determined measurements and that it is leveled correctly using the measuring tool. Fixing the brackets securely ensures stability and provides a foundation that can hold the glass against varying weather conditions.
Following the alignment, it is important to employ the appropriate adhesive as per the manufacturer’s specifications. When applying sealant, a steady and even layer will prevent gaps that might allow moisture infiltration or air leakage. These gaps can lead to inefficiencies in energy production, thus compromising the system’s overall performance. After securing the lip in place, double-check the alignment again before allowing the adhesive to set according to the recommended curing time. This careful attention to detail ensures long-term reliability and functionality of the solar glass installation.
4. CONNECTING THE GLASS TO THE SOLAR SYSTEM
Once the solar glass lip is securely in position, the next stage involves connecting it to the solar system. This step varies greatly based on the specific setup and system architecture. For some installations, this might entail wiring the glass lip to corresponding solar panels or inverters, facilitating integration into the electrical system in place. Understanding the electrical requirements of the solar system is paramount, as improper connections can lead to short circuits or inefficiencies, hence light electric work experience is beneficial.
Additionally, ensuring that the connections are waterproof and secure is vital. Utilizing weatherproof connectors and enclosures guarantees that environmental factors do not affect the system adversely. Thorough risk assessment at this stage can prevent significant future trouble. Once all systems are interconnected effectively, conducting performance tests will help ascertain that the solar glass lip is functioning correctly, setting the foundation for optimized energy capture and utilization.
5. MAINTAINING AND MONITORING SYSTEM PERFORMANCE
After successful installation, the responsibility transitions towards routine maintenance and monitoring of the solar glass lip and associated systems. Regular inspections are necessary to verify that all components function optimally. This includes checking for cracks, ensuring that no debris accumulates on the surface of the glass, and confirming that all electrical connections remain intact. Proactive identification of issues can save significant costs versus addressing problems post-failure.
Furthermore, utilizing performance monitoring systems that track energy output is advantageous. These systems can signal early warnings if the energy yield drops below expected levels, prompting an evaluation of the system’s functioning. Maintenance schedules should be adhered to diligently, ensuring that the solar glass lip continues to operate effectively over its expected lifespan. By investing time and resources in ongoing care, one can sustain the efficiency and performance derived from the initial installation.
FAQs
WHAT IS A SOLAR GLASS LIP?
A solar glass lip functions as a pivotal component in solar energy installations, particularly in solar panels and systems that harness sunlight’s power. It typically comprises tempered or specialized glass, designed to enhance the efficiency and aesthetic appeal of solar energy systems. The shape and design of a solar glass lip vary based on the particular installation requirements, but its primary role is to protect the internal photovoltaic cells while maximizing exposure to solar radiation. This glass layer allows sunlight to pass through while providing structural integrity to the solar assembly, ensuring longevity and durability under different environmental conditions. Furthermore, solar glass lips can be engineered to be self-cleaning or anti-reflective, thereby optimizing solar energy absorption while minimizing maintenance. Understanding its functionality and benefits is crucial for those considering solar installations.
HOW LONG DOES IT TAKE TO INSTALL SOLAR GLASS LIP?
The duration for installing a solar glass lip can vary significantly based on several factors, such as the complexity of the installation, the expertise of the personnel involved, and the specific characteristics of the site. On average, a well-prepared installation can be completed within a few hours to a full day. Initial preparations, such as site assessment and material gathering, may take additional time but are vital for a successful outcome. This preparatory stage can last anywhere from several hours to a few days, depending on the site’s readiness. Once installation begins, key tasks like placing the solar glass lip, affixing it securely, and connecting it to the solar system typically take several hours. After the installation, additional time should be allocated for proper curing of adhesive materials, which depends on manufacturer specifications but generally spans several hours to complete fully. Therefore, planning accordingly can lead to efficiency during installation.
WHAT MAINTENANCE IS REQUIRED AFTER INSTALLATION?
Proper upkeep of a solar glass lip following installation is essential to ensure long-term performance and efficiency in energy capture. Regular inspections play a significant role in maintenance, which typically involves checking for damage or wear on the glass surface, ensuring that there are no cracks, chips, or signs of water intrusion. If debris, such as leaves or dust, accumulates on the glass, it may hinder sunlight absorption, thus necessitating periodic cleaning. This is particularly crucial in regions with frequent rainfall or high pollen counts. Additionally, the integrity of the connections made during the installation must be periodically inspected, ensuring that electrical systems operate efficiently and that weatherproofing components remain intact. Many owners find it beneficial to develop a seasonal maintenance routine, adjusting for specific environmental factors such as local climate patterns. Investing time in systematic maintenance can yield considerable energy savings and prolong the functional lifespan of solar installations.
In summary, installing a solar glass lip requires careful planning, precise execution, and ongoing maintenance to ensure maximum efficiency and performance. Prep work includes selecting an appropriate site free from obstructions and evaluating surface integrity. Essential tools and materials must be assembled beforehand to facilitate a smooth installation process. The actual mounting phase involves meticulous placement and secure attaching methods, where the focus is on achieving optimal energy harnessing. Careful connection to the solar system completes the process, enabling functionality while ensuring durability against environmental stressors. Beyond installation, a commitment to regular inspections and maintenance is critical for sustaining the performance of the solar glass lip, ultimately enhancing its value as a renewable energy solution. Engaging in proactive monitoring and care is fundamental for the continued success of solar installations, ensuring that they deliver reliable energy generation over their intended lifespan. Prioritizing these factors leads to a successful transition towards sustainable energy usage, encompassing both environmental responsibility and economic feasibility.
Original article by NenPower, If reposted, please credit the source: https://nenpower.com/blog/how-to-install-solar-glass-lip/
