
To successfully install mini solar panels, follow these steps: 1. Select an appropriate location, 2. Gather necessary tools and materials, 3. Install mounting hardware securely, 4. Connect wiring correctly, 5. Ensure effective energy management.
Choosing the right spot for placement is essential, as the effectiveness of solar panels largely depends on exposure to sunlight. A sturdy surface that can withstand external conditions will also guarantee longevity and optimal performance. Furthermore, safety should be prioritized throughout the installation to prevent accidents and ensure the functionality of the panels.
1. SOLAR PANEL SELECTION
When venturing into mini solar panel installation, understanding the variety of panel types available is imperative. Mini solar panels can differ in size, output capacity, and suitability for specific applications. Polycrystalline, monocrystalline, and thin-film solar panels are the main categories that one must consider. Each type possesses unique characteristics.
Polycrystalline panels consist of multiple silicon crystals, which makes them less expensive but slightly less efficient than their monocrystalline counterparts. Monocrystalline panels, characterized by their elegant black color, offer higher efficiency and a compact design, making them advantageous in limited spaces. Thin-film panels, while lightweight and flexible, are generally less efficient, rendering them suitable for specific niche applications. Each choice should align with the user’s requirements and energy targets.
Additionally, assessing output ratings is crucial. Mini panels typically range between 5W to 100W. Buyers should consider their power needs before selecting a panel that aligns with their energy consumption requirements. Understanding how these factors interplay is essential for informed decision-making regarding the installed system’s overall efficiency.
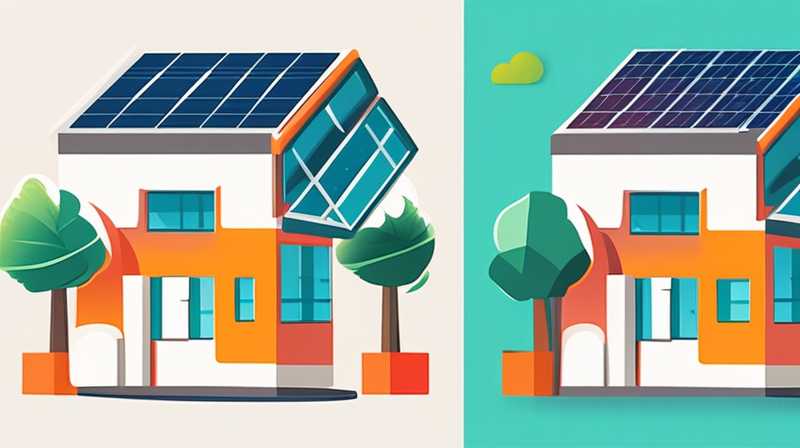
2. LOCATION SELECTION
Identifying the perfect location for installation significantly influences the panel’s productivity. A location that receives ample sunlight without obstructions is key to maximizing solar energy capture. Consider spaces such as rooftops, balconies, or any area with unfiltered access to sunlight.
Environmental factors also impact energy production; areas with frequent shade from trees, tall buildings, or other obstructions can hinder performance. Additionally, the angle of tilt should be factored into the location selection. Solar panels typically perform optimally when positioned at specific angles according to geographical location, which impacts solar exposure throughout the day and seasonally.
It is prudent to assess the roof’s physical structure if opting for rooftop installation. Ensure it can manage the additional weight of the panels and withstand weather conditions. Furthermore, local zoning laws and regulations might dictate installation practices, which necessitate thorough investigation before proceeding.
3. GATHERING ESSENTIAL TOOLS
Preparing for installation involves collecting an arsenal of tools and materials needed for a successful setup. Basic tools include a drill, screwdrivers, pliers, and level, while materials may consist of mounting brackets, wiring, and connectors. Ensuring that all tools are in working order before commencing ensures a seamless project flow.
Safety equipment is equally essential. Using gloves, goggles, and sturdy footwear can protect against potential injuries during the installation process. Depending on the complexity of the setup, other materials such as junction boxes and charge controllers may also be required, enhancing the safety and efficiency of the solar system.
Having a well-structured tool checklist will prevent delays during installation. Planning for potential challenges, such as encountering different surface materials, will help mitigate issues arising during the work. Each piece of equipment should be considered indispensable, and neglecting to gather the necessary items beforehand can lead to unforeseen interruptions.
4. MOUNTING HARDWARE INSTALLATION
Securing the mini solar panels involves installing mounting hardware. Properly installed mounts serve as the backbone of the solar panel system, ensuring stability and safety. Follow the manufacturer’s guidelines regarding the distance between mounting points and suggested mounting angles.
Select the right type of mounting structure based on panel size and weight. Roof mounts, ground mounts, and pole mounts have different requirements, which should align with your unique installation scenario. For instance, a ground mount may necessitate concrete anchors, while a roof mount might require brackets that attach to existing roofing structures.
Before attaching the panels to the mounts, ensure the mounts are level and securely fastened. Testing them for stability is crucial, as improperly mounted panels can lead to system inefficiency or damage. Completing this step thoroughly sets a strong foundation for the subsequent wiring and connection procedures.
5. WIRING CONNECTIONS
After securely installing the mounting hardware, the next phase involves connecting the panels with wiring. This stage requires meticulous attention, as improper connections can lead to system failures or hazards. Begin by assessing the wiring configuration as outlined in the manufacturer’s manual.
When connecting the panels in series or parallel configurations, ensure to match the positive and negative terminals correctly. Utilize suitable gauge wiring to accommodate the expected current flow. Understanding the electrical load is vital because using inappropriate wiring can result in overheating and potential hazards.
After completing all wiring connections, perform an initial test of the system to confirm functionality. Inspect all connection points for stability and ensure that the wiring is neatly organized to prevent hazards. Each connection must be strong and secure to guarantee the efficiency and effectiveness of the solar energy system.
6. ENERGY MANAGEMENT SYSTEMS
Establishing an effective energy management system is crucial for optimizing the benefits of mini solar panels. This aspect entails integrating devices that can regulate, store, and convert solar energy to usable forms. Options such as charge controllers allow for efficient charging of batteries, preventing overcharging and extending battery life.
In addition to charge controllers, utilizing inverters is integral. Inverters convert DC power generated by solar panels into AC power suitable for household appliances and systems. Selecting an inverter that matches the energy output of your installation can significantly impact system performance.
Monitoring tools are equally beneficial. Smart meters and applications for energy tracking provide insights into energy consumption patterns and help users optimize their solar energy use. By analyzing the data collected through monitoring systems, users can efficiently adjust energy consumption strategies, thereby maximizing the advantages of generating renewable energy through mini solar panels.
FAQs
WHAT ARE MINI SOLAR PANELS?
Mini solar panels are compact photovoltaic systems designed to capture sunlight and convert it into electrical energy. These smaller panels are often utilized in applications requiring modest energy outputs, such as powering small devices, outdoor lighting, or charging batteries. Their size makes them easier to install and more affordable than larger systems, while still providing a sustainable energy option. They can be effectively integrated into residential settings, RVs, and even portable deployments, offering versatility in energy generation. Despite their diminutive size, they contribute to reducing reliance on conventional power sources and promote ecological sustainability.
HOW MUCH ENERGY CAN MINI SOLAR PANELS GENERATE?
The energy output of mini solar panels varies significantly based on factors such as size, efficiency ratings, and prevailing environmental conditions. Most mini panels generate between 5 to 100 watts each, which can power small devices, lights, or appliances for extended periods, especially when optimized for sunlight exposure. For example, a 50-watt mini solar panel can produce about 250 Wh per day under optimal conditions. However, the total daily output depends on the length of sunlight exposure. Understanding your power consumption needs is crucial to determine the number of panels required for specific applications and ensure efficient energy supply.
HOW LONG DO MINI SOLAR PANELS LAST?
Mini solar panels have an expected lifespan of 25 to 30 years under optimal conditions. Factors influencing durability include material quality, installation precision, and environmental exposure. High-quality solar panels are often built with robust, weather-resistant materials to endure harsh conditions without significant degradation. Regular maintenance, such as cleaning and inspecting for damage, can also extend their operational longevity. Although performance may gradually decline over the years, most panels maintain adequate efficiency throughout their life, continuing to contribute to energy generation, making them a worthwhile long-term investment for sustainable energy solutions.
To establish a successful mini solar panel installation, prioritizing the selection of panels, site preparation, and thorough installation methods is critical. Understanding the equipment required and executing each step diligently enhances the long-term efficiency and safety of the entire system. By monitoring energy output and maintaining connections, users can ensure their system meets energy consumption needs, contributing to a sustainable energy future. Investing in renewable energy resources is not merely a trend but a stepping stone toward a greener, more efficient way of living. With properly executed mini solar panel installations, individuals can take pride in their reduced carbon footprints while harnessing the power of the sun. Ultimately, the transition to solar energy reflects a conscious effort toward utilizing sustainable resources that benefit both consumers and the environment.
Original article by NenPower, If reposted, please credit the source: https://nenpower.com/blog/how-to-install-mini-solar-panels/
