
To install a solar thermostat effectively, one must follow a series of steps to ensure optimum functionality and efficiency. 1. Gathering Necessary Tools and Materials, includes acquiring the requisite hardware such as a solar thermostat, mounting tools, and wiring supplies; 2. Preparing the Installation Site, which involves identifying suitable locations for solar panels and the thermostat; 3. Mounting the Solar Panels, focusing on angle and direction to maximize exposure to sunlight; 4. Connecting the Thermostat, ensuring correct wiring for energy efficiency; 5. Configuring the Settings, which is critical in optimizing performance and user-friendliness. Detailed attention during installation is pivotal for harnessing solar energy and enhancing energy management.
INSTALLING A SOLAR THERMOSTAT
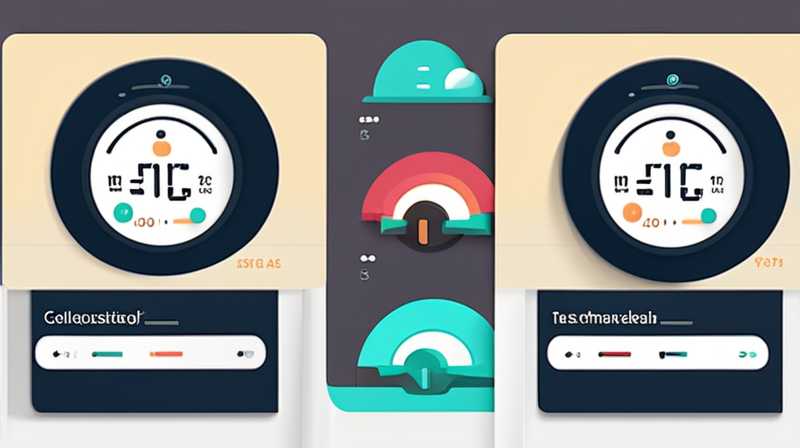
1. UNDERSTANDING SOLAR THERMOSTATS
Solar thermostats represent a leap forward in energy management, offering a sophisticated means to regulate temperature while harnessing solar energy. These devices are strategically engineered to operate in sync with solar heating systems, promoting energy efficiency. The integration of solar technology into thermostats serves as a sustainable solution, reducing reliance on conventional energy sources and contributing to lower utility bills.
By utilizing renewable energy, solar thermostats not only provide substantial cost savings but also alleviate environmental concerns. The dual functionality of these devices enables them to monitor indoor temperatures while adapting to external solar heat variations, ensuring that the indoor climate remains comfortable. Maintaining an optimal environment not only enhances quality of life but contributes to energy conservation efforts in a broader context.
Thorough understanding of the solar thermostat’s components and operating principles is essential for successful integration into existing systems. Familiarity with how solar energy is captured, stored, and utilized can significantly impact the overall efficiency of the heating system and, ultimately, energy savings.
2. GATHERING NECESSARY TOOLS AND MATERIALS
Before embarking on the installation journey, acquiring the right set of tools and materials is fundamental. Essential components include the solar thermostat, which acts as the core control unit, wiring materials, and devices for secure mounting. Proper tools, such as screwdrivers, drills, wire cutters, and pliers, are also necessary to facilitate a seamless installation process.
In addition to basic hardware, obtaining insulation materials and sealants is beneficial to enhance the efficiency of the system. These materials assist in maintaining temperature control within the home, ensuring that any heat captured from solar energy is effectively utilized rather than lost. Taking the time to gather quality materials will not only simplify the installation but also maximize the longevity of the system.
Furthermore, reviewing the manufacturer’s manual for your specific solar thermostat model is recommended. Each model may come with unique characteristics and setup requirements that are crucial to follow for optimal functionality. A comprehensive checklist can be created based on these requirements to ensure nothing is overlooked during the installation phase.
3. PREPARING THE INSTALLATION SITE
Conducting a site assessment to identify the most suitable location for solar panels and the thermostat is vital. This assessment should consider factors such as roof orientation, shading from nearby trees or structures, and local zoning laws that may dictate installation processes. The aim is to locate areas that receive the most sunlight throughout the day to maximize energy absorption.
Once a location is selected, it is essential to ensure that it is structurally sound and suitable for mounting solar panels and a thermostat. Securely attached mounts will prevent damage from wind and other environmental factors, which could disrupt system performance. This preparation involves inspecting the roof’s condition or considering ground-mounted solutions if roof installations are not feasible.
In addition to the physical site considerations, organizing the workspace for convenience and efficiency during installation can greatly enhance the overall process. Ensuring that all tools and materials are within easy access will minimize disruptions and delays, allowing for a smoother workflow as the installation progresses. By meticulously preparing the installation site, it becomes easier to ensure a successful installation outcome.
4. MOUNTING THE SOLAR PANELS
The proper placement of solar panels is crucial for achieving the maximum efficiency of the solar thermostat. Ideally, solar panels should be installed at an angle that enables optimal sunlight capture throughout the day. The angle may vary based on geographical location, so it is important to consult guidelines specific to your region or enlist the help of a professional.
When mounting the panels, the structural integrity of the mounting framework should be prioritized. Using durable, weather-resistant materials will ensure longevity and resistance to environmental impacts. The panels need to be securely fastened to prevent detachment during adverse weather conditions.
Furthermore, periodic maintenance checks should be scheduled after installation to ensure the panels are clean and unobstructed by debris. Regular inspections will help in identifying any potential issues early, ensuring that the solar energy system operates at its peak efficiency. Consistently monitoring the performance of the installed solar panels leads to sustainable energy utilization over time.
5. CONNECTING THE THERMOSTAT
With the solar panels securely mounted, the next phase involves connecting the solar thermostat to the existing heating system. This includes understanding the wiring of both the thermostat and the solar panels, as incorrect connections could lead to system failure or inefficiencies. Familiarity with electrical systems is advantageous, although consulting with a licensed electrician can be a prudent choice for those lacking experience.
Carefully following the wiring diagram provided in the thermostat’s manual simplifies the connection process. This often involves connecting wires from the solar panels to the thermostat and from the thermostat to the heating system. Ensuring all connections are tight and secure is paramount in preventing energy loss and ensuring the system operates efficiently.
Additionally, considering any safety measures during the connection process is important. This may involve turning off power to the heating system while connections are being made. Ensuring safety throughout the installation minimizes risk and protects both the installer and the equipment. Once connected, testing the system to confirm proper operation can be beneficial in ensuring functionality before finalizing the installation.
6. CONFIGURING THE SETTINGS
After all components have been connected successfully, the next crucial step involves configuring the thermostat settings. This process allows for the optimization of energy efficiency and user experience. Most solar thermostats come equipped with programmable features that enable users to set distinct temperature preferences for various times of the day, accommodating different usages throughout the week.
Setting up the schedule according to your daily routine can maximize energy savings by reducing heating during periods when the home is unoccupied. Furthermore, understanding the relationship between solar energy availability and the thermostat’s operation can lead to better energy management. This involves adjusting the thermostat to align with energy capture capabilities throughout the day.
It is also recommended to familiarize oneself with any advanced features that the thermostat may offer. Some modern units provide integration with smart home systems, enabling remote access and monitoring. Learning how to utilize these features can enhance convenience and efficiency, ensuring that the entire system operates cohesively. Proper configuration is essential in making the most out of a solar thermostat installation.
COMMONLY ASKED QUESTIONS
WHAT ARE THE BENEFITS OF A SOLAR THERMOSTAT?
The advantages of employing a solar thermostat are multifaceted, encompassing both environmental and economic aspects. Solar thermostats leverage renewable energy to regulate heating systems, significantly decreasing reliance on grid electricity. Economic benefits include reduced energy bills, which can lead to substantial savings over time. Users may also benefit from various government incentives, rebates, or tax credits designed to encourage renewable energy usage.
From an environmental standpoint, utilizing solar energy contributes to a decrease in carbon footprint, advancing sustainability initiatives. A solar thermostat maximizes the efficiency of solar heating systems, ensuring energy is not wasted. Overall, the integration of solar technology into thermostatic controls fosters a more sustainable way to manage indoor climate, making it a worthwhile consideration for environmentally conscious individuals.
HOW DO I SELECT THE RIGHT SOLAR THERMOSTAT FOR MY NEEDS?
Choosing the appropriate solar thermostat depends on multiple factors, including compatibility with existing systems, user preferences, and specific features. Start by assessing compatibility with your current solar heating system to ensure seamless integration. Research the features offered by various models, such as programmability, remote connectivity, and adaptability to smart home technologies.
Next, evaluate the user interface and ease of use. A user-friendly interface allows for quick adjustments and ensures that even those less knowledgeable about technology can operate the system effectively. Furthermore, reviewing customer feedback and product reviews can provide insights into reliability and performance. Taking the time to select a suitable thermostat attuned to your needs will enhance overall satisfaction with the installation.
HOW CAN I MAINTAIN MY SOLAR THERMOSTAT?
Maintaining a solar thermostat is essential to ensure its longevity and efficient operation. Routine checks on both the thermostat and solar panels should be scheduled to identify any wear or component issues early on. For the thermostat, make sure connections remain tight and free from corrosion, as degradation in contact points could lead to operational inefficiencies.
For the solar panels, keeping them clean and free from debris is vital for maximizing sunlight absorption. Inspect the panels periodically for any blockage by leaves, dirt, or ice, which can impede their performance. Moreover, ensure that the surrounding environment, including trees or nearby structures, does not grow to obstruct solar access, as this can severely limit effectiveness. Regular maintenance is crucial in sustaining a high level of performance over time.
Ultimately, the process of installing a solar thermostat involves careful planning and execution involving numerous steps to ensure maximum efficiency and functionality. By methodically navigating through the gathering of materials, site preparation, mounting of panels, connection of the thermostat, and configuration of settings, one can achieve a seamless integration of solar energy solutions. A solar thermostat not only promotes effective thermal management but also exemplifies a commitment to sustainable living through harnessing renewable energy. Furthermore, ensuring the regular maintenance of these systems guarantees their longevity and performance, fostering a harmonious relationship between modern technology and ecological responsibility. Engaging in a detailed understanding of both the technology and its requirements empowers individuals to successfully implement solar energy in their homes.
Original article by NenPower, If reposted, please credit the source: https://nenpower.com/blog/how-to-install-a-solar-thermostat-2/
