1. How to Install a Solar Sprinkler:
To install a solar sprinkler system, 1. Select a solar sprayer suitable for your garden size, 2. Ensure optimal sunlight exposure for the solar panel, 3. Connect the system to a water source appropriately, 4. Follow the specific installation guidelines provided by the manufacturer. Careful attention to these steps ensures efficient watering while conserving energy. Critical to the process is examining the terrain and layout of the garden to maximize the potential of the solar-powered units effectively.
1. UNDERSTANDING SOLAR SPRINKLER SYSTEMS
Solar sprinkler systems are revolutionary in the domain of irrigation, leveraging sunlight to power watering processes. A solar sprinkler comprises a small solar panel, a pump, and a spray mechanism that activates when sufficient sunlight is available. Solar-powered systems are known for both environmental benefits and cost savings. Utilizing solar energy minimizes reliance on electricity, leading to reduced utility expenses over time. Furthermore, these systems promote sustainable gardening practices by conserving natural resources.
One of the pivotal aspects of choosing a solar sprinkler system involves understanding the requirements or demands of the specific garden. Vegetation requires different levels of moisture depending on type and climate, and proper assessment can influence the type and size of the solar system selected. It is crucial to analyze the sun exposure throughout the day, as this dramatically affects the efficiency of the panels and the overall performance of the system.
2. SELECTING THE RIGHT SYSTEM
When delving into solar sprinkler systems, evaluating the variety available on the market becomes essential. Each system has distinct power ratings, pump types, and coverage areas. Factors that influence selection include the size of the garden, types of plants, and available sunlight. A small garden may benefit from a compact system with lower output, while larger lawns or farms would require robust technology capable of covering expansive areas.
Intriguingly, the choice between fixed or rotating sprinkler heads also plays a vital role. Fixed heads typically deliver water in a concentrated area, making them ideal for flower beds or individual plants. In contrast, rotating heads can cover broader regions, suitable for lawns or gardens with more diverse flora. Finding the right balance of coverage will optimize irrigation without wasting resource. By assessing your specific spatial needs, you can streamline the installation for maximum benefit.
3. PREPARING FOR INSTALLATION
Before initiating the installation of the solar sprinkler system, various preparations can ensure a seamless process. Firstly, gather necessary resources, which include tools necessary for assembly, including wrenches, screwdrivers, and pipe connectors. Additionally, scouting the location is vital; avoid areas with substantial shade, as this will inhibit the efficiency of the solar panel.
Understanding the layout of the garden also provides insight into ensuring the sprinkler adequately covers all intended areas. Design a plan detailing your water source, solar panel placement, and sprinkler head locations. By doing so, it minimizes the need for adjustments once installation is complete. Attention to detail ensures that water flow suits the various plants receiving irrigation. An organized setup helps in visualizing the best strategy to implement and can save time and resources.
4. INSTALLING THE SOLAR PANEL
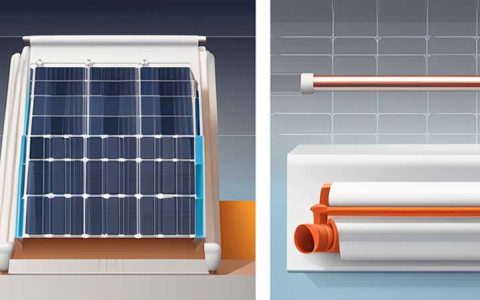
The initial aspect of the installation process involves positioning the solar panel securely. Selecting a location that receives direct sunlight for the maximum number of hours is paramount. It is generally advisable to mount the solar panel at an angle to capture sunlight better; most solar panels have built-in brackets for easy installation.
After establishing the solar panel’s location, the next step involves routing the wires from the panel to the pump. Ensure that all connections are securely attached and protected from the elements. If the installation includes long wire runs, consider investing in extra wire insulation to protect against damage from environmental conditions. Once the wiring is in place, connecting the system using the manufacturer’s instructions allows for proper guarantees of functionality.
5. CONNECTING TO WATER SOURCE
Establishing a secure connection to the water source is integral to the functionality of a solar sprinkler system. This can involve linking to a garden hose, tapping into an outdoor faucet, or utilizing a rainwater harvesting system. Whichever method of water sourcing is chosen, proper sealing and secure connections prevent any leaks from occurring.
In addition, observe the water pressure as it significantly influences the performance of the sprinkler system. Low pressure may hinder the system’s ability to distribute water effectively, while excessively high pressure can damage components. Therefore, implementing a pressure regulator is often beneficial. Once all connections are established, the system should be tested for proper operation ahead of full deployment.
6. CONFIGURING SPRINKLER HEADS
Configuring where the sprinkler heads are placed within the garden is an art in ensuring thorough irrigation coverage. Primarily, place heads with consideration for the type of plant being watered; delicate flowers may require gentler patterns, while grass thrives on more forceful options.
In general, rotate or overlap the coverage areas to avoid dry patches. Adjusting the angle and output of each head allows for a customized irrigation plan. This attention to detail ultimately leads to healthier plants and a more vibrant garden. Understanding the relationship between water distribution and plant health can sharpen irrigation techniques substantially.
7. TESTING AND FINE-TUNING
Upon completing the installation of the solar sprinkler system, testing the unit constitutes an essential step in confirming its operational efficiency. Observe the dispersion pattern of water, monitoring for coverage and potential dry areas. This trial allows for adjustments, whether that involves changing the angle of the spray heads or recalibrating the solar panel’s position.
In some cases, performance deficiencies may arise owing to unexpected shaded areas or improperly set sprinkler heads. By vigilantly assessing these elements, gardeners can ensure that every section of the garden receives adequate hydration. This dedication to detail reinforces positive outcomes and enhances the overall aesthetic of the landscape.
8. MAINTENANCE TIPS FOR OPTIMAL PERFORMANCE
Maintaining a solar sprinkler system is necessary to ensure it operates efficiently over time. Regularly inspect the solar panel for dirt or debris that may inhibit light absorption. Cleaning the panel periodically will enhance energy yield and consequently improve watering efficiency.
Furthermore, the sprinkler heads should also be checked regularly for clogs or blockages caused by debris, algae, or hard water deposits. Manual cleanings or scheduled backflushing can help mitigate this issue. Maintaining the entire system assists in achieving the highest level of performance, thereby prolonging the life of the installation.
FREQUENTLY ASKED QUESTIONS
WHAT IS A SOLAR SPRINKLER SYSTEM?
A solar sprinkler system is an irrigation setup that uses solar energy to power its functionality for watering plants. It comprises a solar panel, a water pump, and spray mechanisms that are activated when adequate sunlight is available. These systems are eco-friendly and cost-effective, making them ideal for gardeners looking to reduce energy consumption while maintaining lush greenery.
HOW MUCH WATER PRESSURE DOES A SOLAR SPRINKLER SYSTEM REQUIRE?
The optimal water pressure for a solar sprinkler system is generally around 40 to 60 psi. This range ensures that water is effectively distributed while preventing damage to the system’s components. Too low a pressure can cause inadequate water coverage, while excessively high pressure can result in leakage or system breakdowns. Employing a pressure regulator can help manage these aspects.
HOW LONG DOES INSTALLATION TAKE?
The installation process for a solar sprinkler system can vary widely depending on several variables, including system complexity and garden size. On average, one can expect to complete installation within a few hours to a full day if all pre-requisite preparations have been efficiently managed. Ensuring a solid plan can greatly reduce the time required from start to finish during the installation.
For individuals looking to embrace sustainable practices, installing a solar sprinkler system offers a plethora of benefits while also enhancing the quality of the garden. The initial steps involve understanding the requirements specific to the garden’s layout, type of plants, and sunlight exposure. Selecting the right system caters to these unique factors and ensures that the installation process runs smoothly. Throughout the entire installation, from positioning solar panels to connecting to a water source, meticulous attention to detail maximizes efficiency and efficacy. Regular maintenance tasks can further bolster the lifespan and operational effectiveness of the installation. The ever-increasing shift towards sustainable gardening practices is not only beneficial for personal gardens but also aligns with broader environmental goals, supporting water conservation. With these systems, combining functionality with eco-friendliness paves the way toward a more harmonious relationship with nature, demonstrating that responsible stewardship of the environment begins on an individual scale.
Original article by NenPower, If reposted, please credit the source: https://nenpower.com/blog/how-to-install-a-solar-sprinkler/


