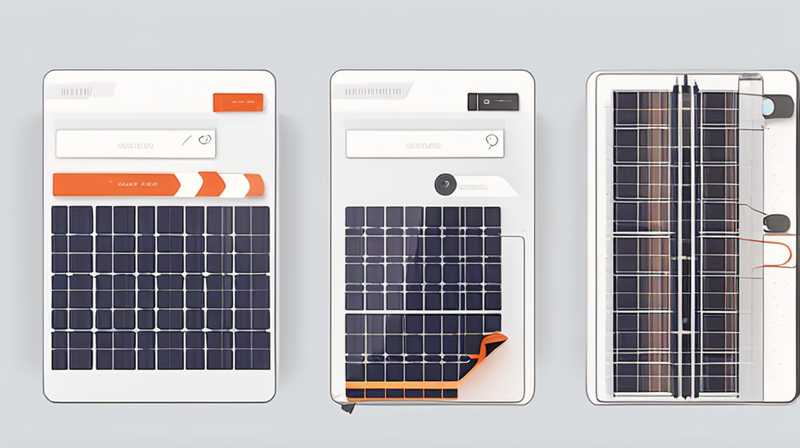
To successfully install a solar mount, start by selecting an appropriate site, gather the necessary tools and materials, ensure compliance with local regulations, and follow the correct installation procedures. 1. Choose the right location for optimal sun exposure, 2. Use high-quality materials for durability, 3. Install the mount securely to resist weather conditions, 4. Follow safety protocols to protect yourself and others during the process. Choosing an ideal location is crucial; it involves assessing the site for shading from trees or buildings and ensuring it has ample sunlight throughout the day. Proper orientation and angle of the solar panels can significantly enhance energy capture, making this initial step critical for the efficiency of your solar energy system.
1: SELECTION OF LOCATION AND SITE PREPARATION
The choice of location for mounting solar panels garners considerable attention, as optimal exposure to sunlight is paramount. When surveying potential sites, one must account for various environmental factors that could hinder solar efficiency. Shading caused by trees, buildings, or other obstructions can drastically reduce sunlight availability, especially during critical daylight hours when energy production peaks. Thus, a careful analysis of sun patterns throughout the seasons can determine the best placement for solar mounts.
After selecting an appropriate site, site preparation comes next. This step involves clearing debris, leveling the ground, and ensuring proper drainage to mitigate issues related to erosion or water accumulation. Proper ground preparation enhances the mounting system’s stability and longevity, facilitating an efficient installation process. Additionally, if soil conditions are unstable, utilizing concrete footings may be advisable to secure the mounts efficiently and prevent shifts due to shifting soil.
2: GATHERING TOOLS AND MATERIALS
Before embarking on the installation journey, assembling the requisite tools and materials is essential. A reliable toolbox should include power drills, wrenches, levels, and safety gear such as gloves and goggles. These tools ensure that installation proceeds smoothly and safety is prioritized. The importance of high-quality materials cannot be overstated, as they contribute to the durability and reliability of the entire solar energy system.
Choosing the correct type of solar mount also requires careful consideration. There are different mount categories, including fixed mounts, adjustable mounts, and tracking mounts, each with advantages and specific applications. Fixed mounts are cost-effective, while adjustable mounts allow for angle adjustments to optimize solar gain. Tracking mounts elevate the technology further by following the sun’s path across the sky, maximizing energy capture. Making informed choices about tools and materials sets a solid foundation for the installation endeavor, thereby enhancing overall success.
3: REGULATORY COMPLIANCE AND PERMITS
Prior to installation, it is essential to familiarize oneself with local regulations and permitting requirements related to solar energy systems. Each locality may have its own guidelines regarding the installation of solar mounts, including zoning laws and height restrictions. Failing to comply with these regulations can result in fines or the requirement to remove the system altogether.
Determining permit necessities may often involve acquiring approval from local government or utility companies. Sometimes, homeowners’ associations may impose additional stipulations. Engaging with professionals who specialize in solar installations or contacting local authorities can simplify this process. Being diligent about regulatory compliance not only smooths the way for installation but also ensures that the system operates within legal boundaries, thus avoiding potential legal complications down the line.
4: INSTALLATION PROCESS
Embarking on the installation process requires strategy and precision. The first step in establishing the solar mount involves anchoring it securely. Depending on the type of mount selected, this may involve concrete footings or driven ground anchors that provide stability against wind and seismic activities. Ensuring the mount is level and properly aligned is critical, as misalignment can negatively affect solar panel efficacy.
Following the securement of the mount, subsequent steps involve the arrangement and attachment of solar panels. This requires meticulous planning to guarantee that panels not only fit well but connect effectively to the electrical system. Employing visual aids like layout diagrams can enhance accuracy in panel arrangement while ensuring that electrical connections comply with local codes. Moreover, diligent inspection of connections and cables assures safety and maximizes energy efficiency.
5: SAFETY PROTOCOLS DURING INSTALLATION
Prioritizing safety during the installation procedure is equally important. A comprehensive risk assessment can identify potential hazards at the worksite, necessitating the use of appropriate personal protective equipment (PPE). This includes goggles, gloves, and fall protection gear, especially when working at heights.
In addition to physical safety, one must also consider electrical safety during and after installation. Properly grounding all components and following electrical codes minimizes risks of electrical shocks or fires. When addressing wiring, it is critical to use high-quality cables and connectors designed for solar applications to ensure long-term reliability and safety. Regular training or refreshers on safety protocols for everyone involved can foster a culture of awareness and precaution.
6: MAINTENANCE AND LONG-TERM CARE OF SOLAR MOUNTS
Once the installation is complete, maintenance plays a crucial role in the longevity and functionality of the solar mount. Regular inspections can identify wear and tear, and this step allows owners to address minor issues before they escalate into larger problems. Cleaning the panels is vital as dirt, debris, or snow can obstruct sunlight and impede energy production. Moreover, routine checks on electrical components ensure that wiring remains intact and that connections are secure.
Long-term care also involves monitoring the performance of the solar energy system through data analysis. Investing in energy monitoring systems allows homeowners to track energy production and consumption patterns actively. Such monitoring can highlight any discrepancies that might suggest equipment malfunction, allowing for timely repairs. Investing time in maintenance not only extends the life of solar mounts but also optimizes energy production, ensuring sustained benefits for homeowners.
7: ENERGY PRODUCTION EFFICIENCY
Optimizing energy production efficiency directly correlates with the initial decisions made regarding site selection, mounting systems, and maintenance practices. Evaluating the angle and orientation of solar panels ensures they capture the maximum amount of solar radiation throughout the day. Adjustable mounts, for instance, permit seasonal repositioning, which can significantly increase energy output during different times of the year.
Additionally, when establishing connections to the electrical grid or storage systems, it is vital to ensure that all components are working seamlessly together. The use of inverters that match the specifications of solar panels can prevent energy loss and enhance efficiency. Successful integration of all components culminates in an effective solar installation that maximizes energy yield while providing substantial environmental and economic benefits.
FAQs
WHAT TYPES OF SOLAR MOUNTS ARE AVAILABLE?
Various categories of solar mounts exist, tailored to meet distinct installation and energy production needs. Fixed mounts are stationary and oriented towards optimal sun exposure, providing reliability and simplicity. They suit regions with consistent sunlight and minimal seasonal variations. Adjustable mounts, on the other hand, afford flexibility, allowing angle adjustments to adapt to changing solar positions through different seasons, thereby improving energy production. Tracking mounts, a more advanced option, follow the sun’s trajectory throughout the day, maximizing solar energy capture. This technology is particularly beneficial in areas with significant solar variation. The choice among these types hinges on factors such as budget, environmental conditions, and energy goals.
HOW DO I DETERMINE IF MY ROOF IS SUITABLE FOR SOLAR INSTALLATION?
To ascertain a roof’s suitability for solar installation, several criteria must be evaluated. First, assess the roof’s orientation, with south-facing surfaces typically maximizing solar energy capture. Additionally, the roof’s pitch should also be considered; steeper roofs may require specialized mounts or adjustments. The integrity and age of the roof play critical roles, as older roofs may need replacements or repairs before solar installations. Moreover, exposure to shading from nearby trees, buildings, or other obstructions can hinder energy production capacity. Conducting a detailed site assessment will provide insights into whether your roof is capable of effectively supporting solar panels and meeting your energy needs.
WHAT IS THE AVERAGE COST OF INSTALLING A SOLAR MOUNT?
The average cost of installing a solar mount varies significantly based on several factors, including the type of system, the complexity of the installation, and local labor rates. Fixed mounts generally represent the most economical choice, while adjustable and tracking systems incur additional costs. Beyond the mounts, expenses include solar panels, inverters, wiring, permits, and labor. The overall investment for a complete solar installation can range from $10,000 to $30,000 for residential systems, dependent on the system size and features. Moreover, analyzing available tax incentives, rebates, and financing options can significantly affect initial costs, ultimately shaping the affordability of solar technology for homeowners.
In summary, successfully installing a solar mount involves a multifaceted approach that encompasses careful planning, adherence to safety protocols, and thorough understanding. To break down the process, choosing an optimal location is essential, as it requires assessing sun exposure and potential obstructions. Gathering the necessary tools and ensuring compliance with local regulations creates a solid foundation for installation. Implementing the installation process demands attention to detail while maintaining safety and monitoring energy production for optimal efficiency. By regularly evaluating and maintaining the system, homeowners can guarantee long-term benefits while reaping the advantages of renewable energy. Overall, the journey towards energy independence through solar technology promises significant rewards and environmental stewardship for conscientious homeowners.
Original article by NenPower, If reposted, please credit the source: https://nenpower.com/blog/how-to-install-a-solar-mount/


