
1. THE PROCESS OF INSTALLING A SOLAR COOLER IS STRAIGHTFORWARD, REQUIRING A FEW ESSENTIAL STEPS. 2. BEGIN BY SELECTING A SUITABLE LOCATION THAT RECEIVES AMPLE SUNLIGHT THROUGHOUT THE DAY. 3. THEN, GATHER ALL NECESSARY COMPONENTS, SUCH AS SOLAR PANELS, A BATTERY, AND THE COOLED UNIT ITSELF. 4. ONCE THE LOCATION IS PREPARED, MOUNT AND POSITION THE SOLAR PANELS SECURELY, FOLLOWED BY PROPERLY CONNECTING THE BATTERY AND COOLER UNIT. 5. FINALLY, CONFIGURE THE SYSTEM SETTINGS AND TEST FOR EFFICACY AND FUNCTIONALITY TO ENSURE OPTIMAL PERFORMANCE.
INSTALLATION REQUIREMENTS FOR A SOLAR COOLER
Installing a solar cooler involves several essential components and steps, each contributing to the ultimate success of the installation process. A solar cooler, primarily using solar energy to provide cooling, requires significant planning and execution for effective use. Exploring each stage of the installation journey illuminates the basic principles behind solar technology and offers insights into practical implementation.
1. UNDERSTANDING THE COMPONENTS
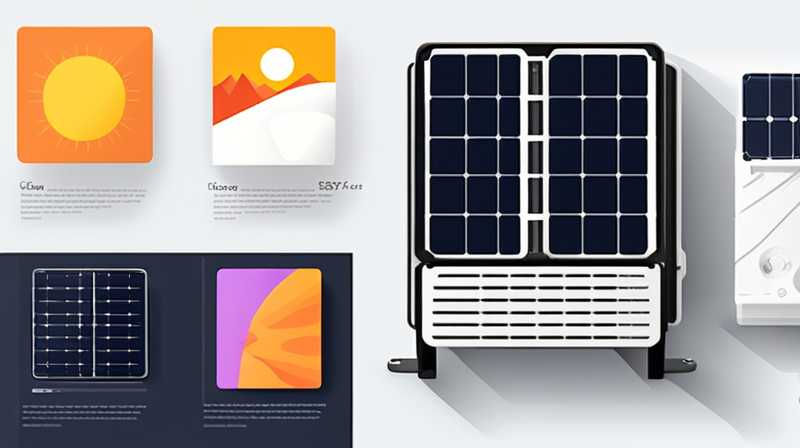
A solar cooler typically consists of a few core components that are vital for its operation. Solar panels serve as the foremost element, converting sunlight into usable electricity that powers the cooling unit. Batteries are also crucial, storing energy generated during peak sunlight hours for later use when the sun is not shining. Finally, the cooling unit itself is designed to chill air or space, providing the desired comfort and refrigeration.
Choosing the appropriate solar panels and batteries is paramount, as they must meet the specific energy demands of the cooling unit. Panels with a higher wattage can generate more power, while batteries with sufficient capacity can store that energy efficiently. Ensuring these components are compatible will lead to a seamless installation and optimal operation.
2. DETERMINING THE INSTALLATION LOCATION
Selecting the installation site requires careful evaluation. Accessibility, sunlight exposure, and building codes must be considered. A site with unobstructed sunlight exposure throughout the day will maximize energy collection and improve the cooler’s effectiveness. It’s also essential to choose a location that allows easy access for maintenance and any potential repairs in the future.
Before finalizing the spot, one should assess any physical structures, trees, or other elements that may cast shadows. Even partial shading can reduce efficiency, thus careful planning can save significant energy losses. Always ensure the space adheres to local building regulations and codes, which may impact the installation process.
3. GATHERING NECESSARY TOOLS AND MATERIALS
Prior to commencing with the installation process, assembling the required tools and materials is crucial for efficiency. Standard tools typically include a drill, screwdriver, multimeter for checking electrical connections, and various mounting hardware. It’s advisable to have a ladder or scaffolding for safely working at heights, especially when installing the solar panels.
It’s also essential to have safety gear such as gloves and goggles. Not only does this protect the installer from potential hazards, but it ensures adherence to safety protocols. Lastly, gathering all components beforehand minimizes interruptions and allows the installation to proceed in a timely manner, promoting a successful outcome.
4. INSTALLING SOLAR PANELS
The next step focuses on the installation of the solar panels. Begin by securing the mounting brackets in place at the chosen site, following the manufacturer’s instructions meticulously. This helps to ensure that the panels remain firmly attached and can withstand environmental factors such as wind and rain. Positioning the panels at an optimal angle relative to the sun’s path is fundamental, as it can significantly impact energy production.
Once the brackets are set, panels can be attached. It’s crucial to connect the panels in a manner that aligns with the system’s overall voltage and amperage requirements to prevent electrical faults. After securely fastening the panels to the brackets, it is necessary to run the wiring to the battery system, ensuring all connections are well insulated to prevent energy loss.
5. CONNECTING THE BATTERY SYSTEM
Following the installation of the solar panels, the next task involves connecting the battery system. Adequate battery storage is essential, allowing for power retention during off-peak hours. Ensure the batteries are positioned safely, as per manufacturers’ design recommendations, ideally sheltered from direct sunlight and adverse weather conditions.
The wiring and connections must align with electrical schematics to maintain compatibility with the solar panels and cooler. Checking voltage and amperage levels with a multimeter confirms proper connectivity and functionality, which is crucial prior to proceeding with powering the cooler unit. Regular testing and verification protect against future operational issues, proving essential for the overall system’s longevity.
6. INSTALLING THE COOLING UNIT
With the solar panels mounted and the battery system connected, attention should now shift to the cooling unit. Its installation should consider space requirements and airflow dynamics to ensure optimal performance. Ideally, the cooler should be placed in a well-ventilated area, allowing adequate air circulation for enhanced cooling efficiency.
Connecting the cooler to the battery system requires adhering to electrical guidelines, ensuring that current flows correctly. Similar to prior steps, double-check all connections, as improper wiring could damage the cooler or lead to energy inefficiencies. Following installation, a comprehensive assessment of unit functionality is necessary, looking for any anomalies that might necessitate further troubleshooting.
7. CONFIGURING SYSTEM SETTINGS
Once everything is set up, configuring the system settings is the next essential task. Depending on the model of the cooler, there might be various operational modes that can be adjusted for optimal energy conservation and cooling performance. Make sure to familiarize yourself with the unit’s control panel or mobile applications, if available, to maximize efficiency.
Fine-tuning these settings ensures the cooler operates within the ideal parameters, effectively balancing energy usage and cooling output. Users should also regularly monitor the system, making adjustments as needed to adapt to changes in environmental conditions or cooling demands.
8. TESTING AND TROUBLESHOOTING
Testing the entire system is vital before complete reliance on the solar cooler. Observations should include energy output from the solar panels, the functionality of the cooler, and the overall efficiency of the battery system. Implementing a systematic approach to testing each component can help identify issues promptly.
In the event of difficulties or underperformance, troubleshooting should focus on all connection points, ensuring there are no loose wires or incorrectly configured settings. It’s also beneficial to consult manufacturer guidelines for specific troubleshooting protocols, empowering users to build confidence in their maintenance abilities.
9. MAINTENANCE FOR LONGEVITY
To ensure prolonged functionality of the solar cooler system, periodic maintenance is essential. Routine checks on the solar panels for dirt or debris accumulation help maintain efficiency, as clean panels will generate more energy. Additionally, battery health assessments ensure that energy stores remain optimal and capable of sustaining power levels during low production periods.
Moreover, evaluating the cooler unit periodically can help identify any potential mechanical or electrical issues before they escalate. Early detection and remedy can save on costly repairs and downtime, ensuring that the investment in solar technology yields maximum returns. Keeping a maintenance log can also assist in tracking performance over time, guiding future adjustments and enhancements.
FREQUENTLY ASKED QUESTIONS
WHAT ARE THE BENEFITS OF USING A SOLAR COOLER?
Utilizing a solar cooler comes with numerous advantages. One of the most significant benefits is the cost efficiency it offers over time. By harnessing solar energy to power the cooling system, users can significantly reduce their dependence on conventional electricity, leading to lower utility bills. Furthermore, solar coolers are eco-friendly, contributing to reduced greenhouse gas emissions and promoting sustainability.
Additionally, solar coolers provide energy independence, especially in areas where power supply may be inconsistent or costly. This enhances reliability, particularly in remote locations. The installation of a solar cooler can lead to an increase in property value, appealing to an environmentally conscious market. Collectively, these benefits make a compelling case for investing in solar cooling technologies.
HOW MUCH SPACE IS REQUIRED FOR INSTALLING A SOLAR COOLER?
The space needed for installing a solar cooler will vary based on several factors, including the type and model of the cooler and the size of solar panels being used. Typically, a well-planned layout considers the placement of solar panels, the battery system, and the cooler unit itself. Allowing for adequate airflow around the cooler is crucial for operational efficacy; thus, ensuring enough clearance is a priority.
To determine the best layout, consult specifications provided by the manufacturer, which often list minimum space requirements for each component. Additionally, assess local zoning laws or regulations regarding solar panel installations, as these may dictate specific distancing or layout arrangements. Overall, meticulous planning ensures optimal functionality while maximizing the use of available space.
CAN THE SOLAR COOLER WORK IN LESS THAN IDEAL WEATHER CONDITIONS?
While solar coolers primarily depend on sunlight for energy, they can indeed operate in less than ideal weather conditions, albeit at a reduced efficiency level. Incident light levels, such as cloud cover and inclement weather, typically affect energy production. Solar panels can still capture ambient light, meaning they may generate some power even on overcast or rainy days.
However, performance during extreme weather conditions will vary based on the specific tech used in the solar cooler. Some advanced models come equipped with solar batteries that store sufficient energy, allowing the unit to function during short periods of low sunlight. Nonetheless, users should prepare for the possibility of decreased cooling capacity during such times and consider supplementary energy sources for sustained performance.
THE INSTALLATION OF A SOLAR COOLER REPRESENTS A SIGNIFICANT ADVANCEMENT TOWARD EMBRACING SUSTAINABLE ENERGY SOLUTIONS. EACH PHASE OF THE INSTALLATION PROCESS REQUIRES ATTENTION TO DETAIL, AIMING TO OPTIMIZE BOTH APPEARANCE AND FUNCTIONALITY. ENSURING THIS PROCESS IS COMPLETED THOROUGHLY WILL ALLOW USERS TO ENJOY THE MULTIFACETED BENEFITS THAT SOLAR COOLING ENTAILS, INCLUDING COST SAVINGS, ENERGY INDEPENDENCE, AND ENVIRONMENTAL RESPONSIBILITY. FURTHERMORE, COLLECTIVE MAINTENANCE EFFORTS ENHANCE LONGEVITY AND PERFORMANCE, MAKING SOLAR COOLERS A HIGHLY DESIRABLE OPTION IN TODAY’S WORLD. INDEED, EMBRACING SOLAR TECHNOLOGY IS NOT JUST AN INVESTMENT IN EQUIPMENT, BUT RATHER A COMMITMENT TO A MORE SUSTAINABLE AND ECONOMIC FUTURE.
Original article by NenPower, If reposted, please credit the source: https://nenpower.com/blog/how-to-install-a-solar-cooler/
