
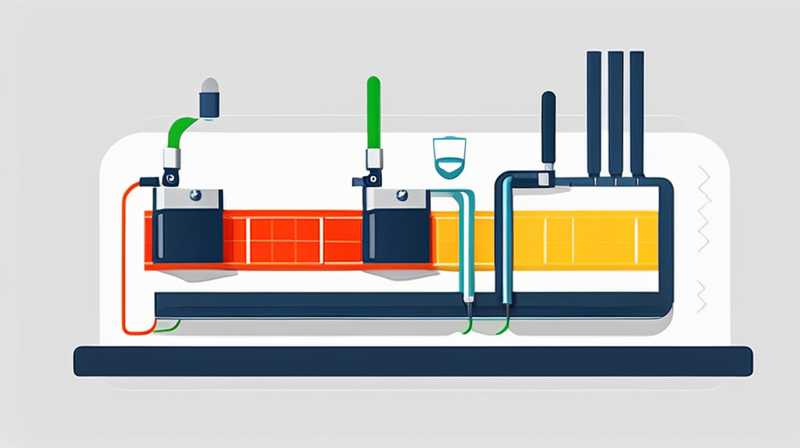
To install a solar check valve, follow these essential steps: 1. Identify the correct location for installation, 2. Gather necessary tools and materials, 3. Properly prepare the valve and plumbing, 4. Ensure secure connections, 5. Test the system for functionality. The installation of a solar check valve is crucial for preventing backflow in solar heating systems and ensuring optimal performance. It is essential to follow manufacturer guidelines and local regulations when doing this. This process requires careful consideration of the valve type suitable for your setup, ensuring it aligns with the specific parameters of your heating system. Using proper tools and techniques will contribute significantly to the longevity and efficiency of the solar system.
1. UNDERSTANDING SOLAR CHECK VALVES
Solar check valves play a fundamental role in the operation of solar heating systems. Their primary function is to prevent the backward flow of fluids, which can lead to inefficiencies and potential damage to the system. In simple terms, the valve operates by allowing fluid to flow in one direction only, thereby maintaining the integrity of the heating mechanism. This is particularly important in systems where temperatures vary significantly, and the risk of backflow increases.
A thorough understanding of how these valves operate can aid in the selection of the appropriate type for specific applications. The materials used in constructing solar check valves typically include durable metals and plastics, which are essential for ensuring a long lifespan and resistance to corrosion. When installing a solar check valve, one must consider not only the operational aspects but also the environmental conditions the valve will face, which can affect its longevity and efficiency.
2. PLANNING FOR INSTALLATION
Prior to installation, meticulous planning is required to ensure effectiveness and compliance with safety standards. Identifying the correct location for the solar check valve is one of the most critical steps. This location should be easily accessible for maintenance while also being strategically positioned to deter backflow from occurring. Factors such as pipe diameter, system pressure, and temperature should all be taken into account during this phase to avoid complications later on.
Furthermore, alongside identifying the location, a comprehensive list of necessary materials and tools will streamline the installation process. Common tools for this task might include wrenches, pipe cutters, thread seal tape, and safety goggles. Having everything ready upfront minimizes downtime during installation and helps in adhering to best practices. Adequate preparation contributes to a quicker installation, reflects professional integrity, and ensures that the solar heating system can achieve optimal performance post-installation.
3. PREPARING THE VALVE AND PLUMBING
Preparation is fundamental to a successful installation. This includes ensuring that the plumbing is clean and free of debris. Before beginning, shut off the water supply and drain the system to avoid accidental spills. Inspect the plumbing fittings for cracks or corrosion, replacing them if necessary to maintain system efficiency and integrity.
Once the plumbing is in suitable condition, the solar check valve itself should also be ready for installation. This involves inspecting the valve for any manufacturing defects and ensuring that it meets the specifications suitable for the solar heating system. Often, fresh Teflon tape should be applied to threaded joints to enhance seal integrity. Moreover, familiarizing oneself with the manufacturer’s guidelines regarding orientation, positioning, and pressure ratings will contribute significantly to the success of the project, ultimately preventing future issues related to inefficiency or system failure.
4. INSTALLATION PROCESS
When the preparation is complete, the actual installation can commence. Begin by securing the valve into the plumbing system where it will maintain directionality of the fluid flow. Proper orientation is essential; many valves have flow direction arrows indicated. Following these guidelines reduces the risk of improper installation that can lead to serious performance issues.
Next, making secure connections is paramount. Ensure that all connections are tightened adequately to prevent leaks. Regular checks during this process to confirm that all components align tightly will save time and resources in the long run. Installing the valve incorrectly or leaving loose fittings can result in leaks or system failures, necessitating further work. After tightening all connections, visually inspect the valve and surrounding plumbing to ensure that everything is installed correctly before proceeding to test the system.
5. TESTING FUNCTIONALITY
After the installation of the solar check valve is complete, the next step involves testing the entire system. Reopen the water supply slowly and monitor the system for leaks. Depending on the complexity of the system, this may involve observing several variables, including temperature and pressure, to ensure all components work cohesively.
Once the system is refilled, observe the flow direction through the check valve. A correct functional check involves manipulating the power to the solar pump or heating system to monitor operational integrity. If any leaks occur, immediate action should be taken to rectify the situation by addressing potential issues with connections or sealing. Continual monitoring after installation is beneficial, as it allows for early detection of any issues that could lead to system failures or reduced efficiency.
6. MAINTAINING YOUR SOLAR CHECK VALVE
For optimal performance, regular maintenance of the solar check valve is necessary. This involves periodic inspections to identify signs of wear, corrosion, or leaks, which might necessitate repairs or replacements. Understanding that solar heating systems can be sensitive to changes in environmental conditions means staying vigilant can prevent larger issues down the line.
Additionally, it is beneficial to consult the manufacturer’s guidelines regarding maintenance intervals. Often, manufacturers provide specific recommendations concerning servicing the valve, which can provide insights into maintaining operational effectiveness and extending the lifespan of the components involved. Overall, proactive maintenance not only safeguards investments but also promotes efficiency in solar heating systems.
SOLAR CHECK VALVE FAQ
WHAT IS A SOLAR CHECK VALVE?
A solar check valve is a specialized device used within solar heating systems to regulate fluid movement. Its primary purpose is to prevent the reverse flow of water, ensuring that heated fluid does not return to the source or cooler areas of the system. This is crucial for maintaining system efficiency, as backward flow can lead to heat loss and reduce the overall performance of solar heating.
Check valves function by allowing fluid to travel in one direction while blocking reverse flow through a mechanism typically comprised of a flap or ball. Such devices are integral to the proper functioning of various solar installations, significantly contributing to energy conservation and reliability.
HOW DO I KNOW IF MY VALVE IS WORKING PROPERLY?
Several signs can indicate whether a solar check valve is functioning as intended. Monitoring changes in system efficiency is often the first clue that may signal an issue with the valve. If there is a noticeable drop in temperature or heating performance, it could suggest a backflow problem caused by a failed check valve.
Additionally, observing physical signs such as leaks or corrosion at the valve or surrounding connections might indicate malfunction. Conducting regular inspections and tests on the heating system can catch issues early, ensuring that the solar setup remains efficient and operates smoothly. If irregularities persist, seeking professional assistance may be prudent to assess the situation accurately.
CAN SOLAR CHECK VALVES BE REPLACED, AND HOW OFTEN?
Yes, solar check valves can be replaced. Replacement typically arises when a valve shows signs of malfunction, such as corrosion, leaks, or reduced effectiveness. The frequency of replacement largely depends on the materials used and the environmental conditions in which the valve operates.
In ideal circumstances, valves may last several years; however, areas with harsh climatic conditions might necessitate more frequent checks and potential replacements. Indeed, regular maintenance can significantly extend the lifespan of these components, delaying the need for replacement. Notably, consulting the manufacturer’s suggestions regarding life expectancy and signs of wear can provide valuable insights into when replacement may be required.
The process of installing a solar check valve demands intentionality and precision. By recognizing the valve’s importance within the solar heating system and understanding its function effectively, individuals will yield optimal performance from their setup. The initial phase of preparation—elaborating on identifying suitable locations and the required tools—is pivotal to a successful installation experience. Proper valve and plumbing preparation also play a critical role in this procedure, as ensuring all materials are ready promotes a seamless transition into implementation. Furthermore, taking meticulous care during the installation process and fully testing the system afterward allows for great peace of mind regarding operational integrity.
Maintaining a solar check valve is not merely about initial installation; it is about developing a proactive strategy that encompasses regular inspections and maintenance commitments. By adhering to diligent monitoring and using manufacturer guidelines, one can ensure the value within the solar heating system is sustained over time. Additionally, staying informed through frequently asked questions can provide greater clarity on challenges that one may face and actions that should be taken. Engaging with this material on a deeper level will not only provide an ideal understanding for owners but also allow professionals to navigate maintenance with heightened precision, ensuring the solar heating system remains a reliable and efficient source of energy. The proper installation and continuous upkeep of the solar check valve ultimately contribute decisively to the performance and longevity of solar technologies.
Original article by NenPower, If reposted, please credit the source: https://nenpower.com/blog/how-to-install-a-solar-check-valve/
