
1. INSTALLATION PROCESS OVERVIEW: To properly install a rechargeable solar LED light, follow these steps: 1. Select an Ideal Location, 2. Prepare the Ground, 3. Assemble the Light, 4. Secure the Light, 5. Test the Functionality. Each of these steps is crucial for ensuring optimal performance and longevity of the solar light.
The location selection is paramount because the solar panel needs adequate sunlight exposure throughout the day. This ensures the rechargeable battery accumulates enough energy for evening use. Furthermore, choosing a sturdy and level surface for mounting the light plays an essential role in stability and functionality. For gauging the total time required for installation, it usually takes about 30 minutes to an hour, depending on the complexity of the model and the site conditions. Solar lights are designed for convenience, and undertaking this installation can often empower users to appreciate renewable energy solutions in everyday life more fully.
1. SELECT AN IDEAL LOCATION
The choice of location is fundamental when installing rechargeable solar LED lights. Choosing the right spot is critical due to the solar panel’s need for uninterrupted sunlight. A sunny area, free from obstructions such as trees or buildings, will ensure maximum exposure. Ideally, the solar panel should be directly facing the sun, allowing it to capture solar rays effectively during the day.
Additionally, consider the purpose of the light when selecting the installation area. If the intention is to illuminate a pathway or garden, positioning the light strategically can enhance safety and aesthetics. Deciding on height is also significant; lights should typically be at eye level or a bit higher to maximize visibility but not obstruct their operational capability. Conducting a brief survey of the site during different times of the day can assist in determining the best position as the angle and intensity of sunlight can vary.
2. PREPARE THE GROUND
Once an ideal location has been identified, preparing the ground is the next step for proper installation. Ground preparation is vital for ensuring the stability and functionality of the light. This might involve clearing debris, removing stones, or leveling the ground to avoid any inclination that could affect the fixture’s performance. It is advisable to check the manufacturer’s instructions, as many solar lights require specific mounting procedures based on their design.
If the selected area has loose soil or sand, consider adding gravel or a dedicated base to enhance the durability of the structure. Having a solid foundation is crucial to withstand harsh weather conditions. Additionally, ensure that there’s no ongoing construction or mechanical activity nearby that could disrupt the installation process. Taking these preliminary steps sets the stage for a successful installation outcome.
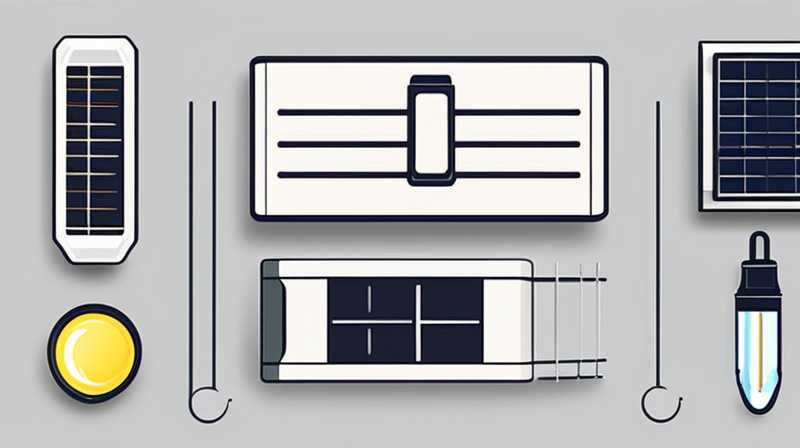
3. ASSEMBLE THE LIGHT
Proper assembly of the solar LED light is crucial for optimal operation. Depending on the model, various components may require assembly, including the light fixture, solar panel, and battery unit. Make sure to read through the instruction manual thoroughly before proceeding, as each model may have distinct assembly requirements.
Begin by connecting the solar panel to the light body. Most units come with pre-wired connections, making the task simpler. Ensure all connections are secure to avoid dysfunctional parts in the future. If the model comes with screws, use suitable tools for tightening them, avoiding excessive force to prevent damage to any components. Following proper assembly protocols enhances the product’s longevity and ensures efficient energy conversion and illumination.
4. SECURE THE LIGHT
Securing the light in place is an essential step to prevent damage from wind, rain, or accidental bumps. Use appropriate fixtures and tools to secure the light firmly. Many solar LED lights are equipped with spikes that can be driven into the ground. If the ground is particularly hard or rocky, pre-drilling holes may be necessary.
Additionally, some models offer the option to affix the light to a solid surface like a wall or post. If this is the case, use screws and anchors compatible with your chosen material. Thoroughly review the installation guidelines provided with the kit to avoid improper installations that could lead to malfunction. This may also involve adjusting the angle of the solar panel for optimal sun exposure, ensuring a conducive alignment.
5. TEST THE FUNCTIONALITY
After securing everything in place, it is crucial to test the functionality of the solar LED light. This step determines whether the installation was successful. Check for proper illumination; it should preferably light up in low ambient light conditions. If the light does not turn on after dusk, confirm if the panels have garnered enough sunlight.
Check the product’s battery performance by allowing it to charge for a full day before evaluation. If issues persist, refer to troubleshooting sections in the user manual. Often, solar lights may need tweaking or adjustments to settings, or there could be an underlying issue with the battery or connections. A thorough evaluation allows for addressing any concerns that might detract from the user experience.
FREQUENTLY ASKED QUESTIONS
HOW LONG DO SOLAR LED LIGHTS LAST?
Solar LED lights have a varying lifespan, generally ranging from 2 to 5 years, depending on the quality of the materials and components used. The battery will typically last between 1 to 2 years, while the LED bulbs can last much longer, often exceeding 25,000 hours of operational use if regularly maintained. Regular cleaning and ensuring the solar panel is free from debris can significantly increase the lifetime of the lights.
In addition, exposure to extreme weather conditions, including intense heat, heavy rain, or snow, might lessen their lifespan. Users should consider investing in models specifically designed to withstand harsh conditions if they live in such environments. Maintaining the lights with necessary replacements as required and ensuring they remain clean will enhance their durability and performance.
CAN I USE SOLAR LED LIGHTS IN WINTER?
The functionality of solar LED lights during winter depends on several conditions. While they can technically operate in cold weather, their performance may diminish due to fewer sunlight hours and potential snow coverage on solar panels. Users can use operational techniques to ensure effective performance during this season. It is advisable to clear snow off the solar panels regularly to maximize sunlight absorption.
Additionally, opting for models specifically rated for colder climates can prove beneficial for functionality. Offering the solar lights some degree of protection from the elements is also wise. Many models are designed with materials that withstand the cold, but checking user reviews can give insights into their winter performance.
HOW DO I MAINTAIN MY SOLAR LED LIGHTS?
Maintaining solar LED lights is relatively straightforward yet vital for optimal performance. Regular cleaning of the solar panel is essential, as dirt, dust, or bird droppings can impede the sunlight from reaching the solar cells effectively. Using a soft damp cloth and mild detergent will typically suffice; avoid harsh chemicals that could damage the panels.
Battery maintenance is also indispensable; occasionally check the battery’s condition and replace it if it shows signs of wear or diminished capacity. Ensuring that the lights are securely mounted and that no parts are loose will assist with long-term functionality. Additionally, an annual inspection of the wiring and connections can preemptively address issues that may arise over time, contributing to the lights’ longevity.
As such, installing rechargeable solar LED lights involves careful planning and execution, from selecting an appropriate location to securing the fixture and maintaining its performance. Each stage is pivotal for ensuring that the system operates effectively and sustainably. By following adequately defined installation steps and being proactive in maintenance, users can maximize their investment in renewable energy. Investing the time upfront for installation allows for long-term benefits in terms of energy efficiency and reduced utility bills. Lastly, it contributes positively to the environment by promoting the use of renewable energy sources.
Original article by NenPower, If reposted, please credit the source: https://nenpower.com/blog/how-to-install-a-rechargeable-solar-led-light/
