
To effectively hang solar lights on thermal insulation walls, follow these steps: 1. Choose the right anchors for insulation, as traditional methods may not suffice, 2. Opt for light fixtures designed for insulation compatibility, ensuring proper thermal resistance, and 3. Ensure wiring if any, is adequately insulated to prevent heat loss. Among these, selecting the right anchors is crucial for stability and ensuring longevity, as improper anchoring may lead to accidental falls or malfunctioning of lights.
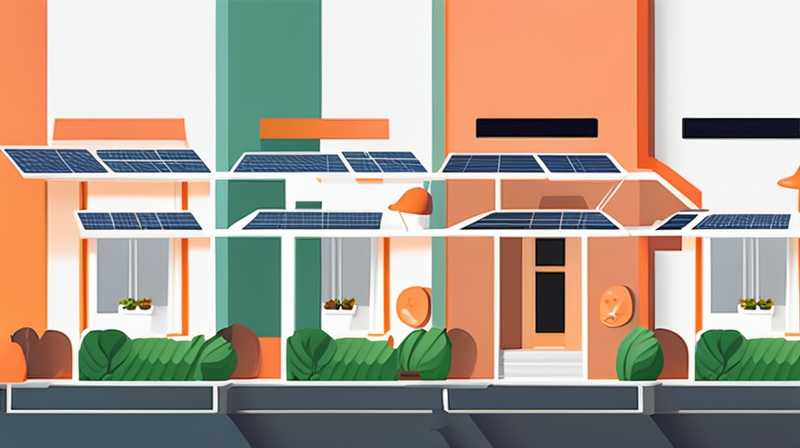
1. UNDERSTANDING THERMAL INSULATION WALLS
Thermal insulation walls serve a vital role in energy efficiency by reducing the amount of heat transfer between the interior and exterior environments. These structures can vary in composition, materials, and thickness, influencing how solar lights can be securely installed. Typically, they consist of materials such as foam, fiberglass, or cellulose designed to maintain a stable temperature while minimizing energy costs. Understanding the characteristics of these walls is instrumental in determining the best installation methods for solar lights.
The specifics of thermal insulation walls often present challenges for traditional mounting fixtures. Conventional methods, such as screws and nails, may not fasten adequately in insulation materials due to their lightweight and compressible nature. This aspect emphasizes the necessity of employing specialized anchoring techniques to ensure solar lights remain securely affixed without compromising the wall’s integrity.
2. SELECTING APPROPRIATE MOUNTING HARDWARE
Choosing suitable mounting hardware is paramount in achieving a successful installation of solar lights on thermal insulation walls. The selection process begins with identifying anchors that can deliver adequate support despite the peculiarities of the wall material. Specialized insulation anchors, such as toggle bolts, are designed explicitly for this purpose, providing a secure fit without damaging the surface. These anchors expand or spread out behind the wall surface, distributing weight effectively.
In addition to anchors, the choice of screws and brackets also plays a significant role in ensuring stability. Stainless steel screws are recommended due to their resistance to rust and corrosion, which is particularly important for outdoor installations subjected to varying weather conditions. Furthermore, utilizing brackets that can adjust to the specific type of solar light being installed allows for enhanced adaptability, ensuring that lights can be positioned correctly to maximize sunlight exposure and illumination capacity during the night.
3. ENSURING THE LIGHTING DESIGN IS ADEQUATE
Considering the overall design of the lighting system is essential to achieving favorable outcomes when hanging solar lights. The positioning of lights not only impacts aesthetic appeal but also affects efficiency and functionality. For instance, strategically placing lights at varying heights can create a layered lighting effect, enhancing the outdoor environment while ensuring thorough illumination across the desired area.
Moreover, the choice of solar lights must align with the purpose they serve. For decorative purposes, string lights or lantern-style fixtures might be preferred, while more utilitarian spaces may require brighter flood or pathway lights. Assessing the brightness level and how it complements the existing surroundings provides insight into the most effective installation approach. It is crucial to consider factors such as the type of solar collector used, ensuring that lights receive maximum sunlight exposure during the day for optimal performance during nighttime.
4. PREPARING THE INSTALLATION SPACE
Prior to affixing the solar lights, thoroughly preparing the installation area ensures optimal results. This preparation involves clearing any obstructions that could block sunlight or impede the installation process. Additionally, it is vital to check for moisture issues around insulation walls. Dampness can compromise both the insulation’s performance and the integrity of the solar lights’ electronic components, leading to disappointing results.
During this phase, a detailed assessment of the surroundings should be performed to determine the ideal positioning of solar lights. Factors such as proximity to pathways, height above the ground, and potential shading from trees or structures significantly influence lighting efficiency. Engaging in meticulous planning guarantees that solar lights will not merely serve as functional elements, but also enhance the visual appeal of the space, creating an inviting atmosphere for residents and visitors alike.
5. EXECUTING THE INSTALLATION PROCESS
Embarking upon the installation process mandates a meticulous approach to ensure every aspect is covered for a successful outcome. Begin by marking the desired locations for the lights on the thermal insulation wall, utilizing a level to maintain consistency. When operating with multiple fixtures, ensuring an even layout fosters a balanced visual appearance.
Once the locations are clearly marked, proceed to drill holes based on the specifications and instructions provided with the chosen anchors. Opt for a drill bit that corresponds precisely to the size of the anchors to guarantee a snug fit. Inserting the anchors with care is essential, as exerting too much force can compromise the insulation material, creating loose fittings. Following this, attach the mounting brackets before securing the solar lights firmly in place. Lastly, ensure all components are functioning correctly prior to any extensive use, adjusting as necessary based on solar light positioning and available sunlight paths.
FAQ 1: WHAT TYPES OF SOLAR LIGHTS ARE BEST FOR INSULATION WALLS?
When selecting solar lights for thermal insulation walls, it is crucial to choose fixtures compatible with insulated surfaces. LED solar lights are typically effective due to their energy efficiency, durability, and lower heat emission. Opting for products specifically designed for outdoor and insulated applications ensures maximum performance, as these fixtures often incorporate weatherproof features that prolong their lifespan.
Additionally, various styles are available, including wall-mounted lanterns, stake lights, and string lights. Lantern-style fixtures excel in decorative settings, providing illumination while enhancing the aesthetics of outdoor spaces. For functional needs, floodlights provide ample brightness across larger areas and ensure maximum visibility. Matching the desired style and functionality to best serve the space contributes to satisfying and effective installations.
FAQ 2: HOW CAN I ENSURE THAT SOLAR LIGHTS RECEIVE ADEQUATE SUNLIGHT?
To guarantee that solar lights receive sufficient sunlight for optimal performance, sufficient attention must be given to positioning. Avoid locating lights in shaded areas caused by structures, trees, or other obstructions that may block sunlight. Positioning solar lights south-facing can also optimize sunlight absorption, as this orientation captures the sun’s rays throughout the day.
Furthermore, regular maintenance plays a crucial role in ensuring functionality. Periodically checking for dirt, dust, or debris on the solar panels reduces hindered absorption capabilities. Additionally, trimming surrounding vegetation that could cast shadows will further enhance light exposure. Creating a clear line of sight to sunlight is instrumental in maximizing the efficiency and longevity of solar light systems.
FAQ 3: CAN I HANG SOLAR LIGHTS WITHOUT DRILLING?
While drilling provides a secure method for hanging solar lights, various alternatives exist for those seeking non-permanent installation methods. Adhesive mounts or hook-and-loop fasteners offer quick solutions that avoid drilling, particularly suitable for renters or temporary setups. These mounts feature robust adhesives that can withstand outdoor conditions, allowing fixtures to be affixed without damaging insulation walls.
However, it is crucial to assess the weight of the solar lights and ensure that the adhesive solution used can support their mass. For heavier lights, larger clips or sturdy hooks may be necessary to maintain stability without the need for extensive drilling. Additionally, securing solar lights in positions that allow for easy removal will facilitate adjustments and maintenance efforts in the future.
Installing solar lights on thermal insulation walls presents unique challenges and considerations that require a strategic approach for effective outcomes. By carefully selecting appropriate anchors, ensuring adequate solar exposure, utilizing integrative design principles, and preparing the installation area, homeowners can achieve optimal lighting solutions that enhance both functionality and aesthetics. Proper execution during the installation process ensures lasting performance while addressing any particularities related to insulation structures. Moreover, understanding suitable product selections, maintenance practices, and alternative mounting methods further empowers individuals to embrace solar technology effectively. With a comprehensive understanding of these dynamics, one can maximize the benefits of solar lights, creating vibrant and well-lit outdoor spaces that are sustainable and efficient. Consistent evaluation and adjustment of the systems installed will ensure that they continue to serve their purpose effectively over time, providing energy savings while enhancing the ambiance of outdoor environments.
Original article by NenPower, If reposted, please credit the source: https://nenpower.com/blog/how-to-hang-solar-lights-on-thermal-insulation-walls/
