
To dismantle the Good Neighbor solar lighting, follow these steps: 1. Gather necessary tools, including a screwdriver and pliers, 2. Identify and remove any securing screws or fasteners, 3. Carefully detach the solar panel and battery compartment, 4. Separate the light fixture from its base or mounting bracket, 5. Store all components safely for either reuse or disposal. Ensure that you follow safety practices during the dismantling process to avoid breakage or injury.
1. UNDERSTANDING THE COMPONENTS OF GOOD NEIGHBOR SOLAR LIGHTING
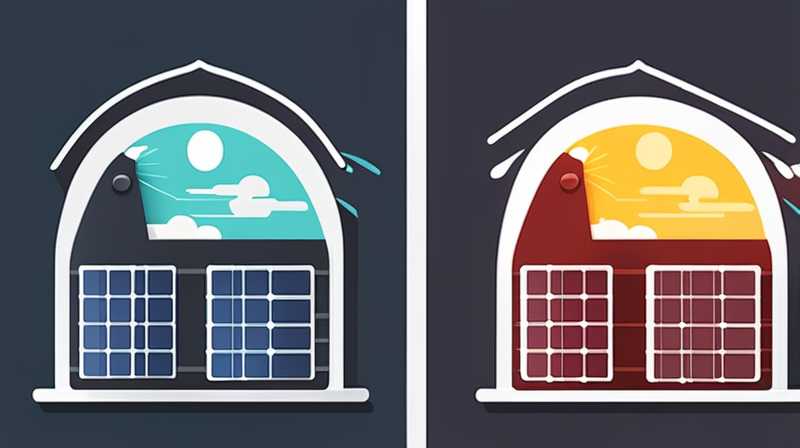
Solar lighting systems, specifically designed for neighborhood aesthetics and safety, are increasingly popular. Good Neighbor solar lighting systems typically encompass several integral components: solar panels, batteries, LED bulbs, light fixtures, and mounting hardware. Each part serves a specific function that contributes to the overall efficiency and effectiveness of the lighting system.
Solar panels are often made from photovoltaic materials that convert sunlight into electricity. This electricity is subsequently stored in batteries, making lights operational even after dusk. LED bulbs, known for their longevity and energy efficiency, illuminate outdoor spaces. The light fixtures, often designed to blend seamlessly into landscaping, provide a protective housing for the bulbs. Last but not least, the mounting hardware ensures that these components remain securely attached and positioned for optimal performance.
To successfully dismantle the Good Neighbor solar lighting, it is essential to become familiar with these components. An understanding of how each part fits and operates together will facilitate a safe and efficient disassembly process. As every component is interlinked, the transition from operational to non-operational highlights the importance of careful handling to avoid damage.
2. PREPARATION FOR DISMANTLING
Before embarking on the dismantling process, adequate preparation is paramount. First, ensure you have all the necessary tools at hand, which typically include a screwdriver (either Phillips or flathead, depending on the screws used), pliers, and perhaps a small hammer. Having a workspace that is free from clutter will help in organizing the components once they are detached, simplifying the process for potential reuse or recycling.
Second, consider protective gear appropriate for the task, such as gloves and safety glasses. Although working with solar lights is generally straightforward, shards of broken plastic or glass can occur if any components are mishandled. Wearing gloves will protect hands from scratches, while safety glasses keep eyes shielded from any potential debris.
With tools and safety gear prepared, locate the lighting units to be dismantled. Ensure that the units are free from obstructions, as this will make the process smoother. If applicable, note down the orientation and arrangement of the system to assist with any potential reassembly or replacement of components later on.
3. DISMANTLING THE LIGHT FIXTURE
The light fixture forms the protective shell of the Good Neighbor solar lighting unit. Begin by examining the fixture carefully for screws or clips that may be holding it in place. Most fixtures have either Phillips screws or clip fasteners that need to be addressed before any further disassembly can take place.
Once the screws or clips are identified, use the appropriate screwdriver to loosen and remove them. Take care to keep screws together as they can be easily misplaced during the process. If clips are present, gently press or pry them with pliers to avoid damaging the fixture during removal. Upon removing these fasteners, gently lift or slide the light fixture away from its mounting bracket to which it is attached.
With the fixture detached, you will have access to the internal components, including the LED bulb. At this stage, handle all components with care to avoid damaging any parts. If the bulb itself is replaceable, carefully unscrew or detach it following the manufacturer’s guidelines. Store removed parts in a designated container to keep them organized.
4. REMOVING THE SOLAR PANEL AND BATTERY
Following the removal of the light fixture, the next phase is to address the solar panel and battery compartment. The solar panel, typically located on the top of the light fixture, plays a crucial role in harnessing sunlight and converting it into energy. Start by locating the connections between the solar panel and the battery compartment, which are often composed of wires that can be either plugged or clipped into place.
To effectively detach the solar panel, use a screwdriver or pliers to either unscrew or unclip the panel from its mounting points. Be cautious not to apply excessive force, as the solar panel is made of glass or delicate material that may break upon rough handling. Once the panel is separated, gently pull the wires free, ensuring that no damage incurs to the connections.
Next, turn your attention to the battery compartment. Batteries in solar lights are usually secured by screws or a sliding door mechanism. If screws are present, use the appropriate screwdriver to remove them. For sliding doors, gently press down and slide to open the compartment. Carefully extract the batteries, taking note of any orientation markings indicating how the batteries were installed. Proper disposal of old batteries is important, as they can be harmful to the environment.
5. SECURING AND ORGANIZING COMPONENTS
Once all components are removed from the Good Neighbor solar lighting system, the next logical step involves organizing and securing these parts. An organized workspace helps in tracking parts for future use or disposal, making it easier to determine what may be salvageable and what should be discarded.
Use clearly labeled containers or bags to separate different components such as the light fixture, solar panel, batteries, and screws. For any components intended for reuse, ensure they are cleaned and stored in a dry location to prevent corrosion. If any of the parts are broken or unusable, investigate options for recycling or safe disposal in accordance with local regulations.
Documenting the assembly of the lighting system might also be beneficial should reassembly or repair be desired in the future. Taking photos of each stage can serve as a handy reference point later on, saving time and effort while reassembling or refurbishing the unit.
6. CONSIDERATIONS POST-DISMANTLING
After the disassembly of the Good Neighbor solar lighting system, one must consider the future of both the components and the overall system. Reusing certain parts can be highly beneficial, thus contributing to sustainability efforts and resource conservation. Components like solar panels and LED bulbs can often be repurposed for DIY projects, lighting alternatives, or even integrated into new solar lighting systems.
Assess the condition of all severed components diligently. Notably, if battery life appears diminished, consider replacing them with fresh options that provide reliable performance. If only one part of the lighting system is defunct, it might be more economical to replace that specific part rather than the entire system.
If storage or disposal is necessary, ensuring that parts are set aside responsibly is vital. Batteries should be taken to designated recycling centers, as improper disposal can pose environmental hazards. The plastic or metal fixtures can often be recycled as well, depending on local guidelines for materials.
FREQUENTLY ASKED QUESTIONS
WHAT TOOLS ARE REQUIRED FOR DISMANTLING GOOD NEIGHBOR SOLAR LIGHTING?
To effectively dismantle Good Neighbor solar lighting, a few specific tools are essential. The primary tool needed is a screwdriver, with either a Phillips or flathead head depending on the screws used in your lighting model. A set of pliers may also be beneficial for gripping or prying components apart if they are tightly secured or clipped together. Additional tools like a small hammer could assist in loosening stubborn parts. It’s also recommended to have a flashlight or headlamp on hand, especially if the task is performed in less well-lit positions such as corners of gardens or yards. Organizing these tools before starting the disassembly will streamline the process and minimize frustration.
IS IT SAFE TO DISMANTLE SOLAR LIGHTING BY MYSELF?
Dismantling solar lighting can generally be a safe endeavor, provided proper precautions are taken. When working with electrical components such as batteries, it is essential to follow safety guidelines. Wear protective gear such as gloves and safety glasses to safeguard against possible injuries from sharp edges or broken pieces. If the lighting system is solar-powered, ensure it is turned off and disconnected before commencing work. Familiarizing yourself with the components, as well as the manufacturer’s instructions, can minimize risks substantially. Should any complications arise during the dismantling process, such as difficulty with the electrical components or unfamiliar setups, don’t hesitate to seek assistance from professionals who possess expertise in this area.
CAN THE COMPONENTS BE RECYCLED AFTER DISMANTLING?
Yes, most components of Good Neighbor solar lighting systems can be recycled, contributing positively to environmental conservation efforts. Solar panels are often recyclable, although specific recycling programs may vary by region. If the panels are still functional, consider repurposing or donating them to someone who can use them. Batteries, depending on their type, should never be thrown away in the regular trash since they may contain hazardous materials. Therefore, take them to designated recycling facilities that specialize in battery disposal. Metal and plastic fixtures can also typically be recycled, but again, confirm with local regulations regarding material types and instructions. Recycling these components benefits the planet and reduces waste while also supporting a more sustainable future.
FINAL THOUGHTS
The process of dismantling Good Neighbor solar lighting, while methodical and requiring attention to detail, can be rewarding and practical. Ensuring you are well-prepared with the right tools and equipped with knowledge about each component allows for a seamless disassembly process. Managing the removal with care protects your investment in lighting systems and provides opportunities for reuse or recycling. Being mindful of the condition of each component will allow for the maximum utility of materials, whether reused in new projects or disposed of responsibly. In the end, not only does dismantling enhance the understanding of solar lighting systems, but it also fosters resourcefulness through adaptation and environmental consciousness, aligning with the growing need for sustainable practices. As such, taking careful steps during dismantling enables a more conscious consumption of resources and reduces potential waste—encouraging a greener lifestyle. Each step taken reflects an informed approach to not only repairing and maintaining lighting systems but ultimately contributes to environmental stewardship and community beautification, enhancing the good neighbor spirit through careful planning and thoughtful actions regarding outdoor lighting solutions.
Original article by NenPower, If reposted, please credit the source: https://nenpower.com/blog/how-to-dismantle-the-good-neighbor-solar-lighting/
