
Dismantling outdoor fixed solar lights involves several crucial steps: 1. Identify the type of solar light, 2. Gather the necessary tools, 3. Follow a methodical approach to disassemble, and 4. Reassemble if required for maintenance or replacements. To elaborate further, the type of solar light is essential, as various models may have distinct assembly methods. Understanding the specific model aids in the recognition of connection points and locking mechanisms, ensuring a smoother dismantling process. The importance of gathering the appropriate tools cannot be overstated; having the right equipment on hand will help prevent damage and streamline the procedure.
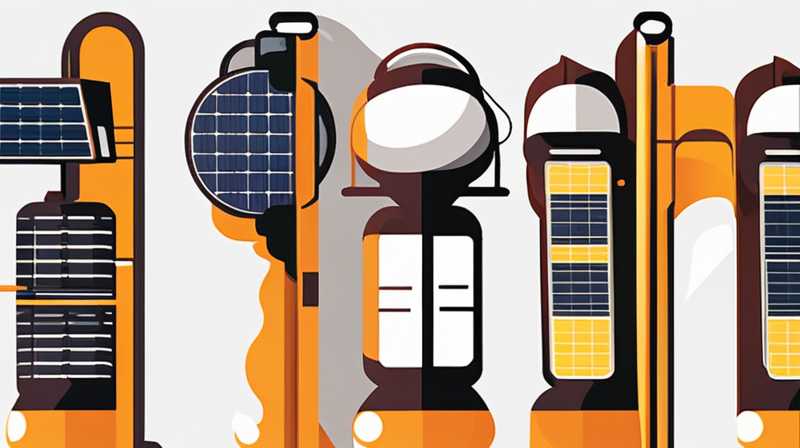
1. UNDERSTANDING THE COMPONENTS OF OUTDOOR FIXED SOLAR LIGHTS
Outdoor fixed solar lights typically consist of several main components, such as the solar panel, LED bulb, battery, and housing. The solar panel plays a crucial role in absorbing sunlight during the day and converting it into electrical energy. This energy is stored in the battery, which powers the LED bulb when it gets dark outside. Understanding the interaction between these components is essential for effective disassembly, as you will need to disconnect them carefully to avoid damaging any part of the light fixture.
Furthermore, the housing protects these vital components from environmental elements. Usually, the housing is made from durable materials like plastic or metal, designed to withstand rain, wind, and UV radiation. Recognizing how these elements fit together provides a clear roadmap for taking the lights apart safely. Additionally, diagrams or instruction manuals provided by the manufacturer can serve as valuable references if available. Familiarity with the layout and function of each component not only assists in the dismantling process but also offers a greater appreciation of the technology behind solar lights.
2. GATHERING NECESSARY TOOLS FOR DISMANTLING
Before embarking on the dismantling process, it is crucial to gather all necessary tools. Generally, the basic toolset should include a screwdriver, pliers, and possibly a wrench, depending on the type of assembly of the solar light. A flathead screwdriver can be particularly useful for removing screws, while pliers assist in gripping and pulling wires or connections free without causing damage. Having a flashlight handy can also prove beneficial, especially if the lights are installed in darker areas or if you require high visibility during the process.
Moreover, depending on the complexity of your solar light fixture, you might need additional tools. For example, some models may require a drill or specialized screwdrivers for unique fasteners. Investigating the specific type of fasteners used in your solar light would prevent unnecessary delays during the disassembly. It is advisable to lay out these tools in an organized manner to ensure easy access throughout the dismantling process. This foresight can help maintain focus and efficiency, minimizing distractions as you work.
3. STEP-BY-STEP DISMANTLING PROCESS
The actual disassembly process begins with a systematic approach. Start by ensuring the solar lights are turned off and separating them from any electrical sources if applicable. This precaution minimizes the risk of electric shock or damage to the internal components. Subsequently, use the screwdriver to remove screws securing the solar panel to its frame. Many light models utilize clips or latches that may require gentle manipulation with a flathead screwdriver for release.
Once the solar panel is detached, examine how the LED bulb is connected within the fixture. Bulbs might be secured by screws, clips, or simply fit into a socket, demanding careful dismantling techniques. If screws are present, keep them in a designated container to prevent losing them during reassembly. In case of clips, use consistent pressure while gently pulling them back so as not to compromise their functionality. After removing the LED bulb, the connection with the battery needs to be handled with care. Exposed wires should be disconnected slowly—doing so ensures that you do not tug or harm any delicate wiring.
4. CARE WITH ELECTRICAL COMPONENTS
As you approach the battery disassembly, particular caution is paramount. Typically, the battery can be found in a compartment separate from the solar panel and LED wiring. This compartment is often enclosed for safety and may require the removal of additional screws. If you encounter any resistance while removing the battery, double-check for hidden fasteners that may not be immediately visible.
When disconnecting the battery, pay close attention to how the wires are aligned and connected. Documenting this information, either by taking notes or photographs, can greatly assist in reassembly later. Following proper procedures ensures the integrity of the components remains intact, allowing them to function efficiently upon reinstallation. Additionally, should you find corrosion on battery terminals, it’s vital to clean this carefully with a gentle cleaning solution and a cloth while taking care not to damage other surrounding components.
5. TROUBLESHOOTING COMMON ISSUES
During the dismantling process, various challenges might arise, such as stuck screws or difficult-to-disconnect wiring. If screws are stripped or rusted, a penetrating oil can often help loosen them. Apply the oil and wait several minutes to allow it to sink into the threads, then try removing them again. Sometimes, using a rubber band to help grip the screw can provide the extra torque needed to remove it successfully.
Moreover, if the wiring seems too tight or complicated, take a step back and reassess your dismantling strategy. A systematic approach to dealing with wires, such as following their path back to the battery, can clarify which connections to release and how to do so properly. Getting a friend to assist you may also be wise; an extra pair of hands can often help ease frustration and facilitate a smoother dismantling experience.
6. REASSEMBLY AND MAINTENANCE GUIDELINES
Upon completing the disassembly, it’s a practical step to take notes on how everything fits together. Remember, personalization and adjustments may need to occur during reassembly, especially if you’re replacing any parts. Check each part for wear and functionality; if any element is damaged, it might be worth sourcing replacements to ensure optimal performance. Maintaining solar lights often extends their life and ensures better energy efficiency.
During reassembly, refer back to any documentation or visual aids created during the dismantling process. It’s highly advisable to double-check all connections and screws before securing the components completely. Take your time in this phase; rushing can lead to mistakes, which would hamper the overall effectiveness of the solar lights. Ensuring that all components fit securely back into place will contribute positively to their longevity and functionality.
FREQUENTLY ASKED QUESTIONS
WHAT ARE THE COMMON COMPONENTS OF OUTDOOR FIXED SOLAR LIGHTS?
Outdoor fixed solar lights primarily consist of several core components: the solar panel, LED bulb, battery, and the housing. The solar panel is responsible for absorbing sunlight during the day and converting it into electrical energy, which is stored in the battery. This stored energy powers the LED bulb, allowing it to illuminate the surroundings during nighttime. The housing serves as a protective structure that shields these vital components from various environmental elements such as rain, wind, and UV radiation. Understanding these components is crucial for effective assembly and dismantling.
HOW DO I HANDLE DAMAGES DURING DISMANTLING?
When disassembling outdoor fixed solar lights, damages can occur, especially to delicate wiring or components. If you notice any damaged wiring or components while dismantling, it’s essential to stop and assess the situation. Make use of tools like soldering kits for minor repairs, or consider replacing the entire unit if the damage is severe. Always consult the manufacturer’s guidelines or repair manuals when dealing with damaged parts. If unsure, seeking professional assistance can ensure that further damage does not occur while attempting repairs.
HOW CAN I EXTEND THE LIFESPAN OF MY OUTDOOR FIXED SOLAR LIGHTS?
To prolong the lifespan of outdoor fixed solar lights, optimizing placement, regular maintenance, and careful handling during cleaning and disassembly are essential. Positioning solar lights in areas where they receive adequate sunlight maximizes their effectiveness. Regularly clearing debris from the solar panels and ensuring the connections remain intact are crucial maintenance steps. When performing any repairs or disassembly, handling each component with care and following a guided approach will prevent unnecessary wear and tear on these outdoor fixtures.
The dismantling of outdoor fixed solar lights requires careful attention to detail, preparation, and methodical execution. Key steps include identifying the type of solar light, gathering necessary tools, and understanding the various components involved in the assembly. Care must be taken when working with electrical elements to avoid damage to any parts. Proper documentation aids in a smoother reassembly, ensuring that all components function effectively afterward. Regular maintenance and careful handling when performing repairs or replacements contribute significantly to extending the lifespan and efficiency of outdoor solar fixtures. As solar technology continues to advance, remaining educated about best practices for maintenance and repair only further enhances the value these energy-efficient lights provide for illuminating outdoor spaces. The benefits of dismantling, maintaining, and reassembling these lights are long-lasting; embracing these practices ensures that outdoor areas remain adequately lit while also championing energy conservation and sustainability in daily usage.
Original article by NenPower, If reposted, please credit the source: https://nenpower.com/blog/how-to-dismantle-outdoor-fixed-solar-lights/
