
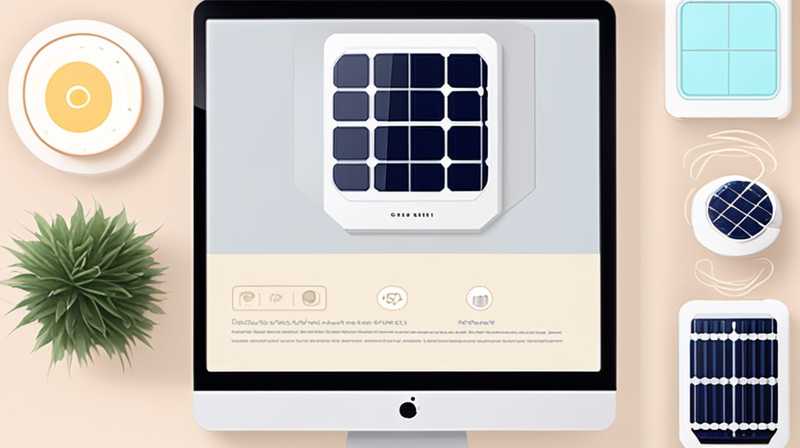
To effectively disassemble the Zhixin solar light, one must follow specific steps and procedures to ensure the process is efficient and damage-free. 1. Gather necessary tools and materials, such as a screwdriver, safety gloves, and a soft cloth. 2. Identify the components of the solar light, focusing on the casing, solar panel, battery compartment, and LED unit. 3. Carefully remove the screws holding the casing in place, ensuring to keep them organized for reassembly later. 4. Disconnect the wiring harness gently, as this is crucial for preventing damage. 5. Separate each component methodically, taking care to note how they fit together to assist with future reassembly. Properly following these steps will allow a safe and efficient disassembly of the Zhixin solar light.
1. INTRODUCTION
Disassembling an electronic device, such as the Zhixin solar light, necessitates a comprehensive understanding of its design and functionality. This particular solar light has gained popularity due to its efficient energy harnessing capabilities and eco-friendly approach to illumination. A meticulous approach ensures that each component can be accessed without causing damage.
Prior to initiating the disassembly process, it’s imperative to recognize the advantages of familiarizing oneself with the inner workings of the device. Beyond merely retrieving components for repair or replacement, understanding how the solar light operates can empower users to troubleshoot issues effectively. This knowledge also fosters an appreciation for solar technology and its practical applications.
2. PREPARATION
Before commencing disassembly, meticulous preparation sets the stage for a successful operation. Tools and Environment: Having the right tools is crucial. A small Phillips screwdriver is typically necessary, along with safety gloves to safeguard hands from sharp edges or unexpected debris. Additionally, a clean and organized workspace facilitates the process, minimizing distractions and the risk of losing small components.
Furthermore, ensuring good lighting is imperative. Adequate illumination allows for closer examination of tiny screws and intricate parts, making the disassembly smoother. Consideration should also be given to gathering a container for storing screws and small parts to maintain organization throughout the process.
Understanding the Product: Prior knowledge of the Zhixin solar light’s structure aids immensely in disassembly. Consulting the product manual, if available, provides insight into the arrangement of components. Graphics or diagrams can visually assist in understanding how sections connect, while also familiarizing one with potential hazards, such as delicate wiring.
3. DISASSEMBLY STEPS
A systematic approach to disassembly promotes efficiency and prevents damage.
3.1 REMOVING THE SCREWS
The initial step in disassembling the Zhixin solar light involves unscrewing the casing. Identifying Screws: Observing the positioning and types of screws holding the casing will direct the disassembly sequence. Commonly, the screws are located on the underside or rear of the light. Utilizing the appropriate screwdriver is essential; using one that doesn’t fit may strip the screws and complicate the disassembly process.
Carefully unscrew each one and place them into a designated container, ensuring they remain organized. Avoiding the temptation to rush through each screw is vital as some may require more torque or attention due to slight corrosion or wear.
3.2 REMOVING THE Casing
Upon removing all screws, the next phase involves detaching the casing itself. This step requires a gentle yet firm grip. Applying Even Pressure: Sometimes, the casing can be stuck due to accumulated debris or wear over time. Applying even pressure around the perimeter can assist in loosening it without causing damage. Avoid prying it open forcefully, which can lead to cracks or breaks.
Slowly work through areas where the casing may be more stubborn, listening for the subtle pops indicating the disengagement of clips or tight seals. If resistance is felt, it may be necessary to revisit the screws to check for any overlooked connections.
4. COMPONENT REMOVAL
With the casing successfully removed, attention now shifts to the individual components.
4.1 DISCONNECTING THE WIRING HARNESS
Underneath the casing, users will find the wiring harness connecting the solar panel, battery, and LED. Identifying Connections: Taking the time to identify how the wiring is organized aids in stress-free disconnection. In many cases, there are two or three connectors that need to be carefully detached.
To detach the wiring, it’s recommended to gently pull on each connector while supporting the components. Forcing connectors can result in damage to both the wiring and the components they connect to. Taking photographs of the wiring configuration can also provide guidance for reassembly.
4.2 REMOVING THE SOLAR PANEL
Following the disconnection of the wiring, focus shifts to the solar panel itself. Assessing Attachments: The panel is likely secured by additional screws and simplistically designed clips. Taking care to unscrew or unclip these attachments without excessive force ensures the integrity of the panel is maintained.
Solar panels are typically delicate; therefore, it’s advisable to handle them with care once removed to avoid any surface scratches or internal damage. If desired, cleaning the solar panel can be beneficial at this stage, resulting in improved performance once reassembled.
5. BATTERY COMPARTMENT REMOVAL
Continuing through the disassembly process, locating and removing the battery compartment is imperative for maintenance or upgrades.
5.1 LOCATING BATTERY COMPARTMENT
The battery compartment is usually positioned near the base of the light. Understanding Access Points: Often accessed through a dedicated compartment door secured by screws or clips, identifying the mechanism is critical. In some models, sliding or lifting the compartment lid off may be necessary.
Once the location is confirmed, the next step involves carefully deploying the same principles used for earlier components: removing screws or releasing clips systematically and without rush.
5.2 REMOVING AND REPLACING BATTERIES
After opening the battery compartment, users may find rechargeable batteries that power the solar light. Handling Batteries Safely: At this point, it is crucial to handle batteries with caution. If the goal of disassembly includes replacing old batteries, ensure to dispose of old batteries according to local regulations.
When replacing batteries, verifying compatibility with the Zhixin model is essential. Check specifications to confirm the new batteries will perform correctly. This upgrade could not only improve the efficiency of the solar light but also prolong its operational lifespan significantly.
6. LED UNIT REMOVAL
The incorporation of LEDs in solar lighting systems drastically enhances energy efficiency and lifespan. Thus, detaching and examining this component contributes to overall maintenance.
6.1 GETTING TO THE LED UNIT
The LED unit may be located at the top of the casing, often secured through additional screws or encased in a protective housing. Dismantling the Housing: Take caution when removing the LED unit as it contains sensitive electronic components. A steady and careful approach will prevent any accidental damage.
Evaluation of how the LED is affixed to the overall design reveals valuable insights for future maintenance or replacements. Observing how LED lights are integrated into the housing enriches the understanding of the function of each part.
6.2 REPLACING OR CLEANING THE LED
If the intention behind disassembly involves cleaning or replacing faulty LEDs, this is the opportune moment. Cleaning Methodology: Gently wipe the LED surfaces with a soft cloth, avoiding any abrasive cleaners which could diminish their light output or physical surface.
In cases where replacement is needed, ensuring compatibility with the existing systems is paramount. Sourcing quality LED units guarantees not only consistent light output but may also further enhance energy efficiency.
7. ASSEMBLY TIPS
After the completion of disassembly and any necessary maintenance or replacements, transitioning towards reassembly is the next step.
7.1 SECURING COMPONENTS
During the reassembly phase, reversing the disassembly steps proves to be the most effective strategy. Documenting the Process: The photographs taken previously can serve as a guide, ensuring that connections and placements match the original configuration.
Begin by reconnecting the individual components in the reverse order. Securing each component firmly, yet without excessive force, is crucial. Ensuring that all wires are routed correctly before reapplying the casing minimizes the risk of pinched wires or future complications.
7.2 FINAL CHECKS
Once reassembly is complete, performing a thorough inspection is recommended. Checking Functionality: Testing the solar light’s performance ensures that all components are working harmoniously. This step might include checking that the LED lights illuminate properly and verifying that the solar panel is collecting energy.
If any issues arise during testing, revisiting previous steps can help identify any missed connections or improperly seated parts. A systematic approach to troubleshooting can yield positive results, confirming that the Zhixin solar light operates at optimal performance once again.
LEDS IN SOLAR LIGHTING
A crucial aspect of solar lights is the incorporation of LED technology, greatly influencing the efficiency and lifespan of this type of illumination.
ENERGY EFFICIENCY
LED lights produce a higher lumen output per watt in comparison to traditional bulbs, providing significant energy savings. This enhancement is particularly important in solar-powered settings, where energy capture from sunlight is limited.
With minimal energy consumption, LEDs prolong the operational hours of the light during nighttime. This efficiency ensures that users benefit from a consistent and bright light source for extended periods.
LONGEVITY
The durability of LEDs contributes to lower maintenance needs over time. Unlike traditional bulbs that wear out relatively quickly, LEDs have a life expectancy of approximately 25,000 to 50,000 hours.
This longevity minimizes the necessity for frequent replacements, providing reliable outdoor lighting solutions that require significantly less attention. As a result, LEDs are becoming the standard choice in solar lighting applications due to their unmatched performance.
FREQUENTLY ASKED QUESTIONS
HOW OFTEN SHOULD I REPLACE THE BATTERIES IN MY ZHIXIN SOLAR LIGHT?
The frequency of battery replacement in Zhixin solar lights depends on several factors, including usage patterns, climate conditions, and the battery quality itself. On average, the rechargeable batteries in these solar lights last between one to three years. Regularly checking the operational efficiency of the light can indicate when battery performance is diminishing.
If the solar light struggles to maintain adequate brightness throughout the night or requires extended charging times, it may be time to consider replacements. Additionally, environmental conditions can play a significant role in battery degradation; extreme temperatures, humidity, or exposure to elements may accelerate the deterioration process.
Conducting routine checks, combined with awareness of environmental impacts, provides users with insights into whether battery replacement is necessary. Ultimately, being attentive to the solar light’s performance ensures continued illumination and enhances overall longevity.
CAN I CLEAN MY ZHIXIN SOLAR LIGHT?
Absolutely! Routine cleaning of your Zhixin solar light is essential to maintain the device’s efficiency. Dust, dirt, pollen, and other residues can accumulate on both the solar panel and LED, significantly reducing light output and energy absorption.
Utilizing a soft, damp cloth to gently wipe down the solar panel is advisable. Avoid using abrasive materials or harsh chemical cleaners, as they can scratch or damage the surface. For the LED section, ensure that it is also cleaned periodically to prevent obstruction of light output.
By implementing a regular cleaning schedule, you not only enhance the functionality of the light but also ensure aesthetic appeal. Cleaner solar panels will absorb more sunlight, which results in increased energy efficiency; therefore, cleaning is an essential task for optimizing performance over the solar light’s lifespan.
WHAT TO DO IF MY ZHIXIN SOLAR LIGHT IS NOT WORKING?
If your Zhixin solar light is not functioning correctly, a systematic approach can help troubleshoot the issue. Start by checking whether the solar panel is receiving adequate sunlight. If the solar light is located in a shadowed area, relocating it to a sunnier spot may improve performance.
Further inspection may involve examining both the battery and LED unit. Confirm that the batteries are charged and correctly installed. If need be, replacing worn-out batteries can invariably restore functionality.
Additionally, inspect any connections leading from the solar panel to batteries and LEDs. Loose wires can lead to intermittent or non-functioning units. If all components appear in good condition yet the light still does not operate, consulting the user manual or contacting customer support for assistance may be necessary.
Disassembling the Zhixin solar light requires a careful approach characterized by systematic steps that ensure all components are treated with care. Properly understanding each element brings clarity to the operation while aiding in maintenance and repair processes. By following the outlined steps, users are empowered to gain deeper insights into their solar lighting systems, ultimately enriching their experiences. Through engagement with the components, users not only learn about energy efficiency and the fundamental workings of solar technology but also foster a greater appreciation for sustainable design. Whether undertaking repairs or simple maintenance, this undertaking creates a pathway toward more effective use of solar solutions and encourages an eco-friendly lifestyle that promotes environmental sustainability.
Original article by NenPower, If reposted, please credit the source: https://nenpower.com/blog/how-to-disassemble-the-zhixin-solar-light/
