
To successfully disassemble a wall-mounted solar tube, one must follow a systematic process that includes several key steps. 1. Safety precautions are crucial; ensure the power is off before beginning. 2. Gather the appropriate tools like screwdrivers and pliers for effective handling. 3. Carefully detach the solar panel from the mounting bracket to access the components. 4. Document the configuration and wiring for easier reassembly later. It is essential to pay attention to the arrangement and condition of connections, as ensuring their integrity is vital for the proper functioning during reinstallation.
1. PREPARING FOR DISASSEMBLY
Before initiating the disassembly of a wall-mounted solar tube, undertaking thorough preparations is paramount. Understanding the specific model and its features can greatly simplify the process. Start by consulting the manufacturer’s manual or technical specifications. Familiarity with the device aids in identifying components that require attention and the tools necessary for disassembly.
Safety considerations, as mentioned, cannot be emphasized enough. Disconnecting the power source is essential to prevent any accidental electrocution during the process. It is advisable to wear safety gear such as gloves and goggles to shield against potential injuries. Moreover, assigning a dedicated workspace, ideally a well-lit area free from distractions, allows for a systematic approach to handling delicate components.
In advance, gather the requisite tools—typically screwdrivers, socket wrenches, and pliers. Using the correct tools ensures that no damage occurs to the components during disassembly. Materials like screws and bolts must be organized efficiently, preferably with labeled containers, to facilitate ease of access and prevent loss.
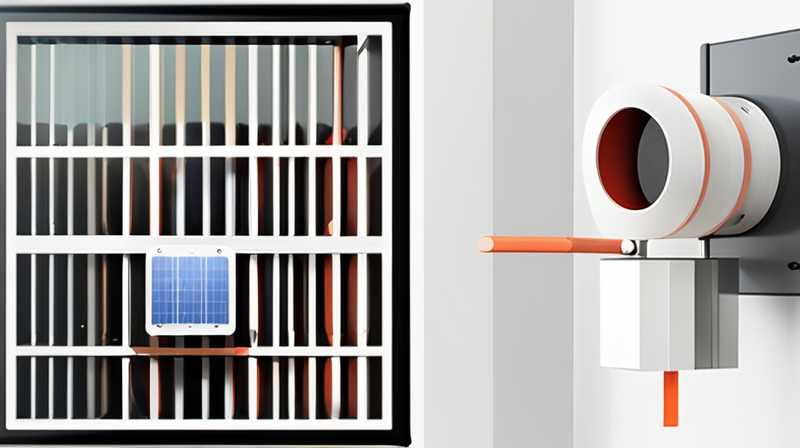
2. REMOVING THE SOLAR PANEL
Once all preliminary steps have been taken, attention can turn to disassembling the solar panel itself. The panel is often secured by brackets or screws, which must be carefully loosened to avoid bending or breaking any part. Begin by identifying the fastening mechanisms—these may be either visible or hidden under covers that will also need to be detached.
Upon exposing the fastening points, removal can commence. It is critical to proceed gently, as solar panels can be fragile. Using a magnetic screwdriver can prevent screws from falling into inaccessible areas. After the panel bolts have been safely removed, gently lift the solar panel away from its mounting and set it aside in a cushioned area to avoid scratches or impacts.
Pay careful attention to the wiring connections, which might include harnesses and plugs—these are often susceptible to damage if forcefully pulled. It may be prudent to photograph the wiring configuration beforehand, as this aids in reassembly without confusion. Each connection should be carefully unlatched or unscrewed, ensuring that no wires are accidentally severed.
3. ACCESSING INTERNAL COMPONENTS
With the solar panel successfully removed, focus can shift to accessing the internal components of the solar tube system. Typically, this involves detaching the tube’s exterior casing, which serves to protect the underlying parts. Depending on the model, this casing may be secured by screws, clips, or even adhesive bonding.
Begin by assessing the attachment method. If screws are present, apply a screwdriver to remove them—keep these screws organized for future use. For clips, a gentle prying movement using a flathead screwdriver can pop them loose without damaging the casing. In cases where adhesive is used, a careful application of a heat source, such as a heat gun, can soften the glue, making it easier to separate the components without excess force.
Once exposed, it is essential to identify vital components such as the light reflector, bulb holder, and wiring harnesses. Taking notes or similar photographs at this stage will be invaluable during the reassembly process. Isolation of parts such as the diffuser and the reflector should be done with care, as these can be sensitive to fingerprints and scratches.
4. REMOVING ELECTRICAL CONNECTIONS
As the process continues, emphasis must be placed on the safe removal of electrical connections. These connections can be among the most delicate aspects of the solar tube system. Following the initial diagrams or photographs taken prior, methodically detach each electrical component connected to the main apparatus.
Using pliers specifically designed for electronics can ease the removal of wire connectors and fastenings. Take special care when pulling on wires; any force could dislocate connections or cause fraying, leading to potential short circuits upon reassembly. Labeling each wire using tape can assist in organizing the reassembly phase, ensuring that connections are re-established in the correct order.
If any connectors have built-in clips, gently press down to unlatch them without forcing. Using excessive strength can crack or break essential components. Proceeding with caution guarantees not only the baseline integrity of the parts but also their functionality upon reinstallation.
5. INSPECTING AND CLEANING COMPONENTS
At this stage, having completely disassembled the solar tube, attention can turn to inspecting each component for damage or wear. This walkthrough is vital for ensuring that every part is fit for reassembly. Components like bulbs, reflectors, and adapters should be scrutinized for signs of degradation, while wiring should be checked for frays or cuts.
During this inspection, documentation about any replacements needed should be noted. Identifying problems in advance prevents unnecessary assembly delays later. If any components must be replaced, sourcing compatible parts—consulting with the manufacturer if necessary—should be prioritized to ensure seamless integration into the reinstallation phase.
Cleaning components is a crucial step often overlooked. Using a microfiber cloth to wipe down parts removes dust and residue, ensuring optimal performance during operation once reassembled. Glass surfaces like the tube itself can be treated with appropriate cleaning solutions to prevent any smudges, which can affect light reflection and overall efficiency.
6. REASSEMBLING THE WALL-MOUNTED SOLAR TUBE
With components inspected, cleaned, and accounted for, reassembly becomes the focal point. Referencing the photographs and notes collected during disassembly proves instrumental in properly reestablishing the device. Start with securing the internal components back into their respective housings carefully, ensuring that each part is seated correctly to avoid any blockages.
Re-establish all wiring, referring to previous documentation for accurate connections. It is critical to double-check that all electrical links are secure; loose connections can lead to inefficiencies or failure during operation. Ensuring that connectors click into place prevents future recalibrations or more extensive work down the line.
Continue with placing the solar panel back in its original position. Make sure that all brackets are secured tightly, and all screws are in place before proceeding to the final steps. Inspect the entirety of the assembly to ascertain that no tools or leftover materials are inadvertently left behind.
7. TESTING AND FINAL ADJUSTMENTS
Testing the system upon reassembly offers a crucial confirmation of functionality. This initial check should cover all aspects of the solar tube operations, ensuring that power is flowing correctly and that the system is calibrated for maximum efficiency. Utilizing a multimeter can provide readings of the electrical output, revealing whether operational thresholds are met.
Examine the solar panel’s alignment and any adjustments that might enhance its contact with sunlight. In cases where the tube direction could be optimized, inclination alterations might improve overall performance. Each solar tube system operates remarkably differently; thus, understanding its unique characteristics allows for successful performance enhancements.
Sustaining regular maintenance ensures longevity and continuous efficiency in solar tube systems. Advise checks on connections periodically and cleaning of panels to maintain optimal light absorption. Insights gained through this disassembly and reassembly process contribute significantly to understanding and enhancing the life cycle of solar devices.
What are the common issues when disassembling a wall-mounted solar tube?
Common issues encountered during disassembly typically involve difficulty in unscrewing rusted or stuck bolts. Additionally, mislabeling connections can lead to confusion during reassembly, ultimately causing operational errors. Notably, physical damage to fragile components such as the solar panel or internal bulb may occur if excessive force is applied.
Other concerns might include unexpected wiring problems, such as frayed or disconnected wires, which occur frequently during the disassembly process. Such situations often underline the importance of meticulous handling and prior documentation. Owners must also confirm that the power source has been completely cut off; otherwise, live wires present a significant risk.
How can I ensure safety while disassembling a solar tube?
To ensure safety, several precautions must be strictly adhered to. Firstly, it is crucial to disengage all power sources associated with the device before beginning any work. Utilizing insulated tools and wearing protective equipment such as gloves, goggles, and long sleeves significantly lessens accident risks.
Create a clean workspace where tools and parts do not become hazards or subjects of distraction. Employing a non-slip mat can reduce injury from falling tools, while also ensuring stability when utilizing ladders or other elevated surfaces. Additionally, keeping the area dry prevents accidental electrical discharges as moisture poses an electric shock hazard.
Regularly assessing the condition of tools used provides vital feedback about their reliability. Any defective or damaged tools should be replaced immediately to prevent accidents during disassembly. Moreover, employing a partner to assist may offer added safety; one individual can focus on holding components steady while the other performs precise disassembly work.
What should I do if a part is damaged during disassembly?
In the event of damaged components during disassembly, swift action must be taken to address the situation. Breakages or defects can impede the functionality of the entire system, necessitating replacement as quickly as possible. Should a solar panel be damaged, for example, it is vital to source an original or compatible replacement to ensure seamless reassembly.
Begin by documenting the damage thoroughly, which includes taking photos and noting model numbers for future reference. Assess whether repairs could be an option; minor cracks in casings may be fixed with appropriate sealants. However, critical components like wiring or panels typically require full replacement for safety and efficacy.
Reach out to the manufacturer or specialized retailers to identify proper parts for replacement, carefully cross-referencing compatibility. While it may be necessary to endure delays during the waiting period for a new component to arrive, it is always better to proceed with caution rather than compromise on quality. Reassess the entire system following part replacement to ensure everything installs correctly and functions efficiently.
Through careful preparation, systematic disassembly, thorough reassembly, and diligent troubleshooting, one can achieve a seamless experience with wall-mounted solar tubes. Embracing these processes fosters understanding and enhances engagement with renewable energy systems, promoting sustainability and efficiency long-term. Regular communication with manufacturers, coupled with proactive maintenance, is key to extending the lifespan of solar installations. Through these steps and precautions, individuals can greatly benefit from reliable solar energy harnessing, while also minimizing risks associated with disassembly tasks.
Original article by NenPower, If reposted, please credit the source: https://nenpower.com/blog/how-to-disassemble-the-wall-mounted-solar-tube/
