
To successfully disassemble a square column pendant solar light, it is essential to follow a systematic approach that ensures safety and efficiency. 1. Preliminary safety precautions should be adhered to, 2. Identification of individual components is crucial, 3. Proper disassembly techniques must be employed, 4. Organizing parts post-disassembly facilitates easier reassembly. An elaboration on the second point involves recognizing the various parts of the solar light, such as the housing, solar panel, battery compartment, and the LED fixtures. Each of these components plays a specific role, and knowing them ensures that the disassembly process does not inadvertently damage essential parts.
1. PRELIMINARY SAFETY PRECAUTIONS
Before embarking on the disassembly of a square column pendant solar light, it is imperative to prioritize personal and environmental safety. The solar light operates using a battery, and disconnecting or mishandling it could lead to accidental electric shock or damage. Wearing protective gloves and safety goggles is highly recommended to guard against any potential hazards. Additionally, working in a well-ventilated area, preferably outdoors, minimizes the risk of inhaling fumes that could emanate from damaged components.
Another critical aspect of safety involves ensuring that the solar light is turned off and completely disconnected from any power source, if applicable. It is advisable to allow the solar light to remain in the sun for a full charge cycle before starting disassembly. This practice not only reduces the risk of electric shock but also aids in the safe handling of batteries. Ensuring that the area is free from obstructions simplifies the disassembling process, allowing for a smoother workflow.
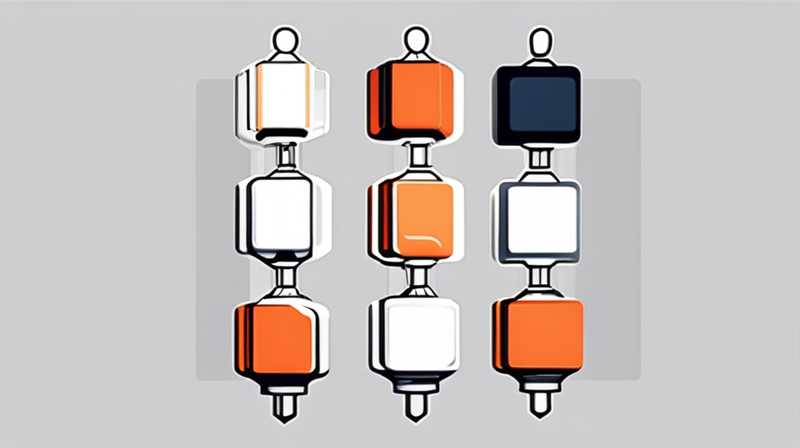
2. IDENTIFICATION OF INDIVIDUAL COMPONENTS
Understanding the layout of the square column pendant solar light is essential to a smooth disassembly process. A solar light typically consists of several components including a housing unit, a solar panel on top, a battery compartment, LED lighting fixtures, and a mounting bracket. Each of these components has distinct functions that contribute to the overall performance of the solar light.
The housing unit encases many parts, protecting them from environmental factors. It’s crucial to determine how it is fastened; some units may use screws, while others may rely on clips or adhesive seals. The solar panel serves as the primary power source, converting sunlight into energy stored within the batteries. Identifying the battery compartment is vital, as mishandling the batteries could pose hazards. Lastly, recognizing how the LED fixtures are integrated allows for careful removal without damaging their wiring.
3. PROPER DISASSEMBLY TECHNIQUES
Employing effective disassembly techniques can significantly ease the process. Using the appropriate tools, such as screwdrivers, pliers, and a pry tool, assists in loosening screws and separating adhesive bonds. If screws are rusted or tight, applying a penetrating oil can enhance the likelihood of success without stripping screws or damaging the unit.
Beginning with the removal of the solar panel is often a prudent first step. Gentle prying around the edges of the panel or unscrewing it will allow accessibility to the wiring beneath. Once exposed, carefully disconnect the wiring harness leading to the battery compartment without pulling excessively on the wires. Following this, the housing constraints can be addressed, with the goal of fully detaching the top cover to gain access to the interior components.
4. ORGANIZING PARTS POST-DISASSEMBLY
After successfully disassembling the square column pendant solar light, the next step involves proper organization of the various components. Managing to keep parts categorized not only simplifies future reassembly but also aids in replacing or repairing any damaged items. Utilizing labeled containers or a designated workspace where parts can be arranged based on their origin can greatly enhance efficiency.
It’s advisable to take photographs during disassembly, offering a visual reference for the reassembly process. In the event that any component needs repair or upgrading, having a clear layout aids in identifying what needs to be replaced. A systematic approach ultimately transforms what might otherwise be a cumbersome task into an organized workflow that can yield profitable results.
FREQUENTLY ASKED QUESTIONS
WHAT TOOLS DO I NEED FOR DISASSEMBLING A SOLAR LIGHT?
When disassembling a solar light, it is crucial to have the right tools on hand. Common tools include small screwdrivers, particularly Phillips and flathead types, pliers for gripping or twisting wires, and potentially a pry tool for removing any adhesive bonds. If the solar light has components that rely on screws, having a set of various sizes ensures adaptability.
Additionally, a multimeter can help in troubleshooting any electrical concerns, while zip ties or small containers aid in organizing screws and other small parts. It’s also worthwhile to consider wearing protective gear, such as gloves and goggles, to prevent injuries while handling the components. A clean and well-lit workspace will enhance visibility and help prevent losing small parts during the disassembly.
HOW DO I MAINTAIN MY SOLAR LIGHT AFTER DISASSEMBLY?
Maintaining a solar light after disassembly involves a few key steps to ensure longevity and proper functionality. Firstly, examine each component for any signs of wear or damage. Clean the solar panel regularly with a soft cloth to avoid dirt accumulation, which can impede sunlight absorption.
It’s essential to check the battery periodically, ensuring it is functioning effectively and replacing it if it shows signs of diminished capacity. Inspect the LED fixtures for any burnt-out bulbs or faulty connections. Occasionally, applying silicone grease on the seals can prevent moisture leaks, thereby extending the life of the solar light. Proper placement away from overhanging branches or obstructions optimizes solar gain, ensuring efficient operation.
CAN I REASSEMBLE THE SOLAR LIGHT ON MY OWN?
Absolutely, reassembling a solar light can be accomplished by following a methodical approach. Referencing images taken during disassembly can serve as a helpful guide, allowing one to match each component to its original place. Each part typically has specific alignment or fitting points making it easier to reconnect.
When reassembling, handling all components gently will avoid damage, and taking care to properly secure wiring connections is essential. After reassembly, conduct a thorough test to ensure all parts are functioning as intended and that the solar light is operational. If any issues arise, troubleshooting based on the assembly can often identify the problem. Being attentive to detail during both disassembly and reassembly significantly enhances the likelihood of successful operation.
In summation, disassembling a square column pendant solar light requires a careful and systematic approach. The process encompasses diverse facets, including ensuring personal safety, identifying components accurately, employing proper techniques, and organizing parts post-disassembly. By adhering to these principles, one can skillfully navigate the complexities involved. The crucial aspect lies in understanding that every step, from wearing protective gear to recognizing the individual parts, contributes to successful disassembly and potential reassembly. Moreover, comprehending maintenance measures ensures that the solar light remains functional and continues to serve its purpose effectively. Following the outlined techniques and insights will not only facilitate a successful disassembly but also engender confidence for future repairs or replacements, enhancing the overall experience of managing solar lighting systems in diverse environments. Applying diligence and precision throughout the process results in optimal operational efficiency and extended longevity of solar lights, yielding rewarding outcomes in both home and commercial contexts. Through careful attention to each aspect, disassembly transforms from an overwhelming prospect to a manageable and beneficial undertaking.**
Original article by NenPower, If reposted, please credit the source: https://nenpower.com/blog/how-to-disassemble-the-square-column-pendant-solar-light/
