
To disassemble a solar sun protection mat, follow these simple steps: 1. Gather essential tools, 2. Identify the attachment mechanism, 3. Carefully remove the mat, 4. Organize components for reassembly. The most critical aspect involves understanding the attachment mechanism, which varies among different products. Some may have adhesive backing, while others utilize fasteners or clips. Investigate the specific system employed by your mat to ensure a smooth disassembly process, minimizing the potential for damage.
UNDERSTANDING SOLAR SUN PROTECTION MATS
Solar sun protection mats, also known as solar screens or sun shades, serve as an effective barrier against harmful ultraviolet (UV) rays while offering the advantage of thermal insulation. Consumers often invest in these products to improve indoor comfort, reduce energy costs, and protect furnishings from sun damage. With a myriad of designs available, they can be quite effective for various applications, including residential, commercial, and automotive use.
The primary goal when utilizing solar sun protection mats is to lower the penetration of sunlight into interiors. Not only do they mitigate glare, but they also reduce the load on air conditioning units, subsequently lowering electricity expenses. Individuals seeking to maximize the potential of these sun shields must understand the various components and how they integrate into existing structures.
Though these mats offer numerous functional benefits, disassembling them requires a methodical approach to preserve their integrity for future use. Various factors come into play; therefore, grasping essential disassembly guidelines will further enhance the longevity of these products. Understanding the intricacies of their installation is crucial for an effective removal.
COMPONENTS OF SOLAR SUN PROTECTION MATS
Solar sun protection mats comprise various components, which can include the fabric itself, a mounting system, and sometimes additional yarn threads to enhance sturdiness. Each specific element plays a role in both the protective features of the mat and the ease with which it can be disassembled. Notably, various fabrics are utilized, such as mesh or solid materials that allow for different light transmissions, cater to your specific needs.
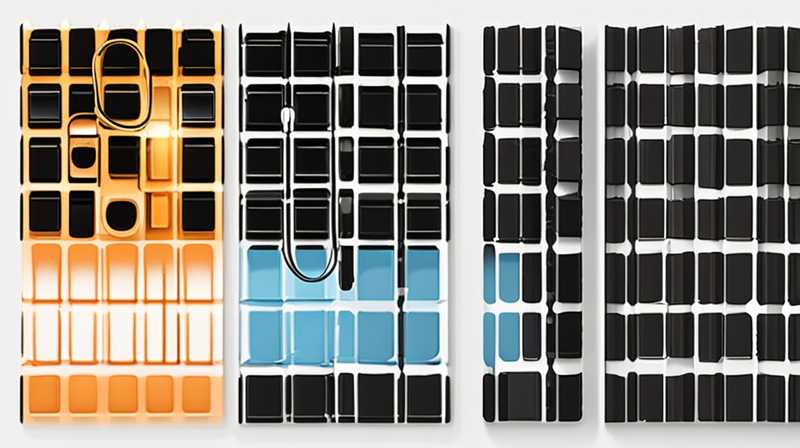
Furthermore, the mounting system can significantly differ depending on where the mat is installed — inside or outside of a window frame, or possibly on a vehicle. Common attachment types include adhesive strips, hooks, or brackets. Knowing the materials and tools needed to detach a solar sun protection mat will be necessary to execute the process efficiently while avoiding damage or excessive wear.
It is imperative to address the fabric’s characteristics. For instance, if a mat is made from a polyester blend, special precautions should be taken to ensure that the fabric remains unscathed throughout the process. This understanding will guide proper handling techniques during disassembly.
TOOLS REQUIRED FOR DISASSEMBLY
Prior to embarking on the disassembly journey, gathering the appropriate tools is vital. Depending on the mounting mechanism, one may require various objects such as:
- Screwdriver for screws
- Utility knife for cutting adhesive
- Pliers for gripping or releasing clips
- Measuring tape to maintain organization
- Drop cloth to protect surrounding areas
Using a utility knife carefully will aid in removing adhesive-based attachments while avoiding unnecessary damage. Similarly, employing pliers can facilitate the removal of stubborn clips, which may otherwise render oneself frustrated. Moreover, arranging components as they are removed with a measuring tape will help catalog which pieces correlate with the disassembly process.
If the disassembly involves multiple tools or a series of steps, ensuring that all are close at hand contributes to a smoother experience. By preparing in advance, the likelihood of accidents or mistakes decreases substantially.
DISASSEMBLING THE SOLAR SUN PROTECTION MAT – STEP-BY-STEP APPROACH
In order to successfully disassemble the solar sun protection mat, one must follow a systematic stepwise approach. This organized method ensures that the mat can be handled without unnecessary strain or risk of damage, both to the mat itself and surrounding surfaces. Here is how to proceed:
1. REMOVE ATTACHMENTS
The initial phase consists of identifying and removing the attachments that hold the solar mat in place. If the mat employs hooks or brackets, first unscrew them or detach them from the structure. Care should be taken to retain any screws or fragile pieces for future use; they should be stored in a labeled bag to avoid confusion later. For adhesive attachments, use a utility knife or a similar cutting tool to carefully slice through the adhesive layer.
Additionally, if the mat has been installed using double-sided tape, it’s advised to apply gentle pressure while pulling the mat away from the surface. This will avoid leaving behind adhesive residue that may be challenging to clean later.
2. HANDLE WITH CARE
As disassembly proceeds, handling the solar sun protection mat with care is paramount. Regardless of whether the material is resilient or more delicate, treating it gently will prolong its lifespan and maintain its condition for subsequent use. Avoid folding or creasing the fabric unduly, as this could weaken the structure over time.
Sometimes, mats can be bulky; employing an additional set of hands may also prove beneficial while disengaging them from the mounting system. Optional step — after the mat itself has been removed, one should inspect the area for any remaining fasteners or clips, and ensure that nothing is left behind.
3. CLEAN THE SURFACE
Once the mat is successfully removed, another crucial step is to clean the surface area of any leftover adhesive or residue. A mild cleaning solution will generally suffice; nevertheless, selecting a product that is compatible with the surface material ensures no damage occurs. Utilize a cloth or sponge for scrubbing, and ensure the area dries completely before any new applications are made.
Removing leftover fasteners or unnecessary debris protects the structure from future complications, such as increased wear or obstruction of new installations.
4. ORGANIZATION FOR REASSEMBLY
The final phase involves organizing all components for reassembly, whether immediate or postponed. Ensure that each part is stored in a way that prevents damage and makes future access straightforward. All screws, brackets, and clips should be categorized and easily identifiable.
Establishing an organized workspace diminishes confusion during the reinstallation process in the future. One effective method includes labeling sections or using clear containers to designate different component types for clarity and expedience.
MAINTAINING SOLAR SUN PROTECTION MATS AFTER DISASSEMBLY
Even post-disassembly, maintenance of solar sun protection mats is an essential exercise to ensure that they remain in the best possible condition for future use. Various factors contribute significantly to the longevity of these products.
REGULAR INSPECTION
Carrying out regular inspections allows users to detect any issues early on. Inspect the fabric for wear, tears, or fraying edges. For regard to any hardware, ensure that bolts, screws, and other components are in good condition without rust or corrosion.
Timely addressing any signs of damage will facilitate less costly repairs later on. Employ a proactive approach to upkeep, ensuring that your solar sun protection mat stands the test of time.
CLEANING PROTOCOLS
While still stored, implement effective cleaning procedures. Remove dust and surface debris regularly to prevent accumulation. Utilizing a vacuum with a soft brush attachment is a modest but fruitful way to maintain both the fabric’s structure and aesthetics.
When cleaning, make certain to obey the manufacturer’s guidance regarding suitable cleaning products — opting for gentle, non-abrasive cleaners that will not harm the material. This diligence will keep your solar mat looking pristine for future installations.
REASSEMBLY PREPARATION
When preparing for the reinstallation of a solar sun protection mat, carefully reviewing the disassembly notes will assist in maximizing efficiency and reducing errors. Systematically arrange all components referenced earlier to establish a guideline for where each piece belongs.
Ensure that all fitted parts are firmly in place, and check the stability of attachments after they are reinstalled. Completion of this step not only guarantees the mat serves its intended purpose but also reinforces the longevity of associated mechanisms.
FREQUENTLY ASKED QUESTIONS
WHAT ARE THE BENEFITS OF USING SOLAR SUN PROTECTION MATS?
Solar sun protection mats provide multiple benefits, including reducing excessive heat indoors, enhancing comfort, and protecting furnishings from fading due to UV exposure. They significantly lower energy consumption, particularly during warmer months, as they minimize reliance on air conditioning systems. Furthermore, these protective coverings improve privacy, allowing occupants to enjoy light without losing their visual seclusion.
The options available on the market vary, catering to diverse aesthetic preferences and practical requirements. They can be customized in size, color, and transparency, making them suitable for numerous applications, such as residential windows, outdoor patios, or vehicles. Proper installation and maintenance are crucial to ensure the optimum performance of solar sun protection mats, making them a worthy investment for enhancing living spaces.
HOW OFTEN SHOULD SOLAR SUN PROTECTION MATS BE CLEANED?
Cleaning frequencies for solar sun protection mats may differ based on placement and level of usage. Ideally, conducting a light cleaning every six months is advisable to maintain their appearance and functionality. However, if the mat is exposed to pollutants, pollen, or dust, one may need to consider additional cleanings.
Utilize gentle cleaners and a soft cloth or sponge to avoid damaging the fabric. Thoroughly wiping down mats is desirable before the onset of seasonal changes, allowing for an effective removal of accumulated debris. For those residing in exceptionally dusty or wet climates, increasing the frequency of maintenance might be warranted to uphold their protective qualities.
CAN SOLAR SUN PROTECTION MATS BE RECYCLED OR DISPOSED OF SAFELY?
Recycling or disposal of solar sun protection mats largely depends on their composition and condition. Mats made of synthetic fibers may not be recyclable through conventional processes, though some facilities may accept specific types of materials. As such, individuals should research local recycling programs or speak with recycling specialists for guidance.
If a mat is no longer usable, the safest disposal method involves placing it in regular rubbish. However, checking for any localized disposal or recycling initiatives is encouraged to minimize environmental waste. It’s advisable to review manufacturer guidelines regarding the fabric type before final disposal to ensure responsible practices.
In discussions surrounding solar sun protection mats, the disassembly process stands as a critical point that requires meticulous attention. Understanding the nuances of handling these products directly correlates with their longevity and effectiveness upon reinstallation. Clarity in methods utilized for disassembly not only preserves the mat’s condition but sets a precedent for maintaining energy efficiency in homes or businesses. Beyond the mechanics of removal, equipping oneself with appropriate tools, comprehending the assembly, and organizing the elements is essential in maintaining proficiency throughout the entire lifecycle of these protective coverings. Ultimately, valuing the impacts of sunlight and heat on living spaces underscores the importance of such protective measures, making the investment in solar mats a prudent choice to consider for various environments. With thoughtful maintenance and the know-how to disassemble properly, these products will continue to deliver energy-saving advantages and improve indoor comfort for years to come.
Original article by NenPower, If reposted, please credit the source: https://nenpower.com/blog/how-to-disassemble-the-solar-sun-protection-mat/
