
How to disassemble the solar shell
1. Identifying Sunlight Absorption Mechanisms, 2. Determining the Shell Layout and Components, 3. Securing Appropriate Tools for Safe Disassembly, 4. Step-by-Step Disassembly Process.
To disassemble a solar shell effectively, one must take a systematic approach that emphasizes safety, organization, and knowledge of the system’s components. 1. Begin by anticipating potential hazards associated with the disassembly, including electrical risk and structural integrity. 2. Understand that methodical removal can enhance efficiency and prevent damage to the solar cells and surrounding hardware. 3. Ensure proper preparation involves collecting the right tools and protective gear. 4. Review manufacturer guidelines, as they can provide essential insights on specific models. For instance, solar shells may incorporate various types of cells and modules, thus necessitating tailored approaches for each design. After adequately preparing, the disassembly process entails several key steps that require attention to detail and accuracy.
1. IDENTIFYING SUNLIGHT ABSORPTION MECHANISMS
A crucial aspect of understanding how to disassemble a solar shell lies in comprehending the sunlight absorption mechanisms. Solar shells typically contain photovoltaic cells designed to convert sunlight into electrical energy. These cells utilize semiconductor materials, usually silicon-based, which facilitate the absorption of photons and the subsequent generation of electric current. Recognizing these components is imperative not only for efficient disassembly but also for handling them appropriately during the process.
Moreover, certain solar shells are engineered with advanced technologies that enhance their absorption efficiency, such as anti-reflective coatings and light-trapping structures, which can vary among manufacturers and models. Familiarizing oneself with these technologies enables a better grasp of how to handle the solar shell without compromising the integrity of the cells. Understanding the intricate mechanisms through which solar shells harness solar energy can foster respect for the technology, and therefore, one can approach disassembly with a conscientious mindset.
2. DETERMINING THE SHELL LAYOUT AND COMPONENTS
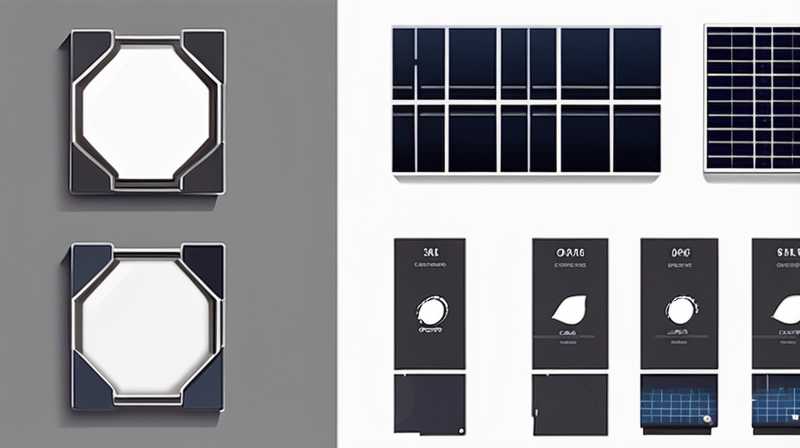
Before embarking on the disassembly journey, precise knowledge of the solar shell’s layout and its constituent parts is paramount. Solar shells comprise several essential components, including the glass covering, frame, backsheet, junction box, and photovoltaic cells. Each of these parts requires specific disassembly techniques to avoid damage. Understanding the arrangement and how each component interacts can streamline the disassembly process and reduce the likelihood of unintended damage.
The layout of the solar shell can vary significantly depending on the manufacturer and the intended application, leading to different configurations for components. For instance, some shells may utilize a monocrystalline design, while others may incorporate polycrystalline technology. Each design choice affects how the cells are connected and how easily they can be removed. Since these components often serve both aesthetic and functional purposes, acknowledging their layout will promote careful handling and systematic disassembly procedures.
3. SECURING APPROPRIATE TOOLS FOR SAFE DISASSEMBLY
Equipping oneself with the right tools is integral to a successful solar shell disassembly. Not only does having the appropriate instruments promote efficiency, but it also ensures the safety of both the individual disassembling and the shell itself. Generally, tools required for this task include a plastic pry tool, screwdrivers (both Phillips and flathead), a multimeter for electrical checks, and safety goggles to protect the eyes from debris. Ensuring that all tools are readily available beforehand can save significant time during the disassembly process.
Additionally, using specialized tools designed for working with delicate electronics can enhance safety. For example, using non-conductive tools can help avoid unintentional shorts across the electrical connections. A meticulous approach to tool choice, combined with attention to safety measures, can lead to a smoother dismantling process. Adequate preparation paves the way for a focused effort while minimizing the risk of mishaps.
4. STEP-BY-STEP DISASSEMBLY PROCESS
Upon gathering the necessary tools and achieving familiarity with the components and layout of the solar shell, one can commence the disassembly process. To ensure clarity, each key step will be outlined methodically so that everything adheres to the highest standards of safety and efficiency.
- Initial Inspection: Start by examining the solar shell for any visible signs of wear or damage. Ensuring that the unit is disconnected from any electrical source is paramount; this can often involve turning off solar inverters and switching off breakers associated with the system.
- Removing the Junction Box: The junction box typically resides at the back of the solar shell. Carefully detach it by unscrewing the screws securing it to the backsheet. Gently release the electrical connections, ensuring no wires are damaged during the process.
-
Detaching the Backing: With the junction box removed, focus on the backsheet. This component is often held in place by adhesive as well as mechanical fasteners. Employ the plastic pry tool to delicately lift the edges in order to loosen it.
-
Taking Out Photovoltaic Cells: After detaching the backsheet, one can observe the photovoltaic cells. Handle them with care, removing the connections between cells systematically. Depending on the shell’s design, cells may be wired in series or parallel, making it critical to document their arrangement for reassembly or disposal.
-
Removing the Glass Cover: Finally, the glass layer on top of the shell can be removed. Similar to the backsheet, this glass is often secured by adhesive. Carefully apply pressure around the edges with a pry tool until it detaches. It’s essential to wear gloves during this stage to prevent injury from broken glass.
Each of these steps requires a thorough approach, maintaining an organized workspace will aid in tracking components and ensuring nothing gets misplaced. Taking time to document the process or capturing photos can result in a smoother reassembly process if needed.
COMMON QUERIES REGARDING SOLAR SHELL DISASSEMBLY
WHAT SAFETY MEASURES SHOULD I TAKE WHEN DISASSEMBLING A SOLAR SHELL?
When embarking on the disassembly of a solar shell, prioritizing safety is essential. Begin by disconnecting the solar panel from any power sources, including inverters and batteries, to prevent electrical shock. Wearing appropriate protective gear, such as goggles and gloves, is vital to safeguard against injuries from sharp edges or broken components during disassembly. Additionally, working in a clean, organized environment minimizes the likelihood of losing small parts and enhances efficiency.
As you proceed, maintain a steady and careful pace. Using appropriate tools tailored for delicate electronics helps prevent accidental damage to components. Documenting each step in the process with photographs can also provide a reference for potential reassembly and ensure that components are correctly reattached. Finally, disposing of any broken or damaged materials following local regulations is crucial to maintaining an environmentally responsible approach towards solar technology.
HOW CAN I PROPERLY STORE DISASSEMBLED COMPONENTS?
Proper storage of disassembled components is crucial to avoid damage during the disassembly and any subsequent handling of individual parts. One effective method is to organize all components in separate, labeled containers. Each part, from the junction box to the photovoltaic cells, should be stored in a protective casing to prevent scratching, contamination, and accidental breakage. Using anti-static bags for the electrical components can also help avoid static charge buildup, which could potentially damage sensitive circuits.
Additionally, a designated workspace should be free of clutter, providing sufficient room to prevent accidental mishandling while searching for or sorting parts. Storing sensitive items away from exposure to humidity and extreme temperature changes is advisable, as these factors can affect performance once reassembled. Careful consideration of storage practices can maintain the integrity of disassembled solar shell components and ensure they remain in optimal condition for future use.
WHAT DISPOSAL METHODS ARE RECOMMENDED FOR OLD SOLAR PANELS?
When the time comes to dispose of old solar panels, one should always prioritize environmentally responsible methods that adhere to local regulations. Simply throwing them in the trash is not advisable due to the presence of materials that can be harmful to the environment. Instead, consider reaching out to recycling centers that specialize in electronic waste, particularly those equipped to handle solar technology. Several organizations and companies participate in programs that specifically focus on recycling solar panels. They can ensure that materials are repurposed and harmful substances are disposed of safely.
In addition to recycling, some manufacturers offer take-back programs or services that facilitate the process of returning old panels for proper recycling. This option can often include incentives for customers. Ensuring that panels are handled properly not only supports sustainability efforts but also promotes the responsible development and adoption of solar energy solutions for the future.
Disassembling a solar shell involves a series of detailed steps that require meticulous attention and a deep understanding of the technology in question. By recognizing the integral mechanisms of solar energy absorption, one can appreciate the importance of careful handling during disassembly. Prioritizing safety throughout the dismantling process, from gathering the right tools to securing the environment, ensures a smoother workflow and minimizes unnecessary risks. Furthermore, a comprehensive recognition of the shell’s layout and components supports efficient disassembly, while proper storage and disposal methods promote responsible practices concerning materials. Engaging in this intricate process not only fosters respect for solar technology but also enhances knowledge that contributes to a higher proficiency in handling energy solutions. In doing so, individuals can ensure they navigate the disassembly of solar shells with skill and responsibility, paving the way for increased understanding and mindful practices in the renewable energy sector.
Original article by NenPower, If reposted, please credit the source: https://nenpower.com/blog/how-to-disassemble-the-solar-shell/
