
To disassemble the solar panel of a globe lamp, follow these detailed steps: 1. Gather necessary tools, 2. Ensure safety measures are taken, 3. Detach components systematically, 4. Take notes for reassembly. Disassembling a solar panel requires careful attention to detail and precision to avoid damaging delicate parts, thus making the task much easier during reassembly. Also, ensure proper handling of electrical components and consider disabling power to mitigate any risks.
1. UNDERSTANDING SOLAR PANEL FUNCTIONALITY
Solar panels are devices designed to convert sunlight into electrical energy. Understanding how these panels operate is crucial before attempting disassembly. The fundamental principle lies in the photovoltaic effect, where materials such as silicon generate an electric current when exposed to sunlight. This energy is then stored in an internal battery that powers the globe lamp during the night.
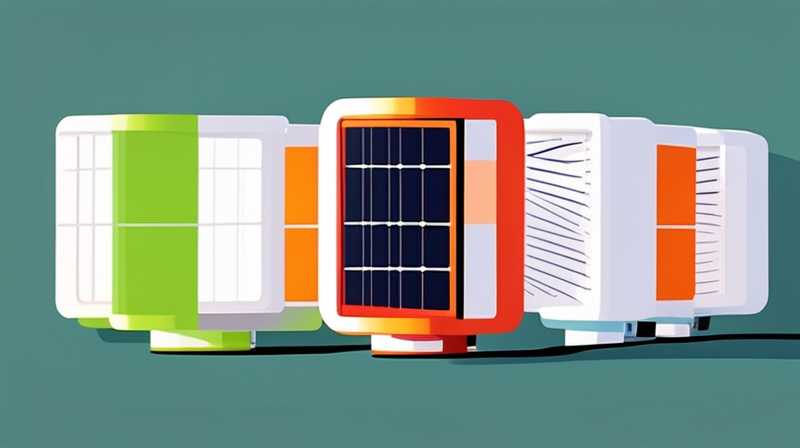
A solar panel comprises several components, including the photonic cells, glass covering, and wiring. Each part plays a critical role, and mishandling any of them may lead to irreversible damage. Familiarity with these elements will not only aid in the disassembly process but also enhance the effectiveness of the repair or replacement steps you may undertake.
Expanding on the role of the battery, it acts as a reservoir for the energy collected during the day. If the battery is faulty, the mechanism will not function, regardless of the solar panel’s efficiency. Hence, diagnosing this issue often necessitates disassembling the unit to inspect or replace the battery. This process requires a methodical approach to ensure that all components can be restored to their original state after diagnosis.
2. PREPARING FOR DISASSEMBLY
Prior to beginning the disassembly process, proper preparation is crucial. Safety should always be the primary concern. It is recommended to wear protective gloves and goggles to safeguard against potential sharp edges or electrical components. Additionally, ensure the working environment is adequate, preferably a clean and well-lit space free from distractions.
Gathering the right tools will significantly influence the efficiency of your efforts. Essential tools often include a screwdriver set, pliers, and a multimeter—each serves a specific purpose in the overarching disassembly task. For instance, screwdrivers will help detach screws without damaging the panel housing, while pliers may assist in loosening certain fitted sections. Having everything organized allows for a smooth workflow and mitigates the chance of misplacing critical components.
Furthermore, documenting the entire process with photographs or notes can be exceptionally beneficial. This method provides a reference point for reassembly, ensuring the process remains straightforward and manageable later. Each step taken during disassembly should be recorded clearly for efficient tracking, reducing the likelihood of confusion.
3. DISASSEMBLY PROCESS STEPS
The disassembly steps themselves should be approached with patience. Start by disconnecting the power supply, especially if the globe lamp was previously operational. Ensure that all components are de-energized to prevent accidents or shocks while you work. If the solar panel is connected to a fuse or switch, turn these devices off before proceeding.
Once power is disconnected, begin by carefully removing the exterior protective cover of the globe lamp. This often requires unscrewing several screws, which can be done carefully to prevent stripping the heads. Once the cover is off, disconnect any wiring that connects the solar panel to the internal components of the lamp. Take note of where each wire connects, as this information will be invaluable when restoring everything post-inspection.
Following this, the solar panel itself may be secured through additional screws, adhesive, or both. Evaluate how the panel is mounted to recognize the most effective means of removal. Use gentle force to avoid cracking or damaging the solar cells. It is advisable to work methodically, taking care not to rush through each phase. Removal of the panel necessitates a steady hand and a watchful eye.
4. INSPECTING THE COMPONENTS
After successful disassembly, it becomes imperative to inspect the various components for any visible damage. The solar cells should be unbiasedly reviewed for cracks or discoloration indicating failure. Such defects often stem from prolonged exposure to harsh weather conditions.
Inspecting the wiring is equally important; frayed or burnt wires may signify electrical failures, which can compromise the functioning of the entire system. Use a multimeter to test continuity in the wires, ensuring that they are conducting properly. If any wiring appears damaged, it’s better to replace them than to attempt a repair that could cause further complications.
Having evaluated the essential components, consider the battery condition as well. Open the battery compartment, inspect for corrosion or leaks, and check the charge using the multimeter. If the battery voltage reads below the required level, it may need replacement to restore functionality.
5. REASSEMBLY CONSIDERATIONS
Reassembling the solar panel and globe lamp requires retracing your steps. Utilize the notes and photographs taken earlier to guide you through the process effectively. Begin by re-attaching the solar panel securely in its intended position, ensuring that wiring is aligned correctly before fastening it down.
Post securing the panel, reconnect the wiring according to the layout observed initially. Double-check that all connections are snug, as loose wires can lead to performance issues or even safety risks. Afterward, the protective cover can be re-installed, paying attention to any screws or fasteners needed to secure it in place.
Once everything is reassembled, it’s prudent to perform a functionality test. Before connecting to power, first, ensure that the battery is charged adequately. Then, connect the solar globe lamp and observe if the system operates as intended. Testing during daylight hours will allow the solar panel to begin collecting energy immediately.
6. MAINTENANCE TIPS FOR LONGEVITY
Proper maintenance practices can greatly enhance the lifespan of solar-powered globe lamps. Regularly clean the surface of the solar panel to remove dust and debris, ensuring optimal energy absorption. A clean surface allows maximum sunlight exposure and maintains the performance of the panel.
During the winter months or periods of heavy snowfall, ensure that snow is gently brushed off the panel’s surface. Excess weight and snow accumulation may hinder energy collection, affecting the lamp’s functionality. Additionally, inspect the battery condition periodically, looking for signs of wear or corrosion.
If possible, position the globe lamp in a location that receives ample direct sunlight throughout the day. Avoid placing it under trees or structures that provide shade, as this reduces exposure and subsequently energy generation.
Beyond the external care, being mindful of the internal components can prevent unexpected failures. For instance, when installing or modifying the solar panel setup, always adhere to best practices. This means replacing damaged electrical components immediately or consulting a professional electrician for in-depth issues if necessary.
FREQUENTLY ASKED QUESTIONS
WHAT TOOLS ARE REQUIRED FOR DISASSEMBLING A SOLAR PANEL IN A GLOBE LAMP?
The successful disassembly of a solar panel in a globe lamp necessitates a few essential tools typically found in a standard toolbox. A screwdriver set is primary—these can vary between Phillips and flathead types, depending on the screws used in the panel and its housing. Proper sizes ensure effective engagement without stripping screws, a common pitfall during disassembly.
Pliers are also valuable, particularly during the removal of wires or connections secured tightly within the assembly. These tools assist in gripping and releasing components that may otherwise resist manual efforts. It is beneficial to have a multimeter handy while disassembling, as this instrument measures electrical continuity within wires and components, helping to troubleshoot any potential issues.
Protective gear should not be overlooked. Items such as gloves and goggles are crucial for safeguarding against sharp edges, corrosive materials, or accidental electric shocks. This preparation emphasizes the importance of safety while engaging in potentially hazardous work. Lastly, a clean workspace with adequate lighting cannot be stressed enough; these elements facilitate smoother work and enhance focus.
HOW TO KNOW IF THE SOLAR PANEL OR BATTERY IS FAULTY?
Identifying whether the solar panel or battery of a globe lamp is malfunctioning requires a systematic approach involving inspections and measurements. First, evaluate the solar panel visually for cracks or discolorations, which can indicate damage and affect efficiency. Conduct a performance test: if the lamp does not illuminate despite receiving adequate sunlight, the panel’s efficiency is likely compromised.
If damage is not immediately visible, the next step is to check the electrical outputs. Utilizing a multimeter, measure the voltage produced by the solar panel—a reading below expected levels suggests impaired function. A healthy solar panel would typically generate around 18-20 volts in bright conditions, while any significant reduction signals issues.
Examining the battery condition is equally critical. After prolonged use, batteries tend to degrade, diminishing their storage capacity. Measure the voltage across the battery terminals using the multimeter. If readings are drastically lower than specified, particularly below 12 volts for many batteries, it indicates the battery may need replacement. Additionally, consider environmental factors; a battery dropped in performance overnight perpetually may simply require a new unit.
IS PROFESSIONAL HELP NECESSARY FOR DISASSEMBLING A SOLAR PANEL?
The necessity for professional assistance when tackling the disassembly of a solar panel largely depends on the individual’s experience and comfort level with electrical components. For those with a background in DIY repairs or electrical work, confidently proceeding with disassembly may be feasible. Engaging in thorough research and preparation can equip you with the knowledge required to navigate the task successfully.
However, if doubt exists or specific complexities arise, consulting a professional might be more prudent. Electrical systems can pose risks if improperly handled; professionals are trained to mitigate these dangers. They possess insights into more intricate schematics and might offer solutions unreachable by amateur attempts.
Moreover, professionals come equipped with specialized tools and resources that facilitate safer and more efficient disassembly. If you decide to proceed independently, ensure proper safety measures are in place and stay within your comfort levels. In cases of significant electrical work or complexities, leaning towards professional guidance ensures both safety and effective problem resolution.
END
By adhering to the preceding guidelines and recommendations, one can proficiently disassemble a solar panel from a globe lamp while ensuring minimal risk to both personal safety and the equipment itself. Each step must be executed with precision and care, and knowledge is informed by a preemptive understanding of the components involved. The insights provided aim to empower individuals in performing electrical repairs or assessments confidently. Mastery over this process can yield not only practical benefits but also deepen one’s understanding of solar technology and its maintenance. Enhanced awareness of how cleaning and organizing components contributes to prolonged durability underscores the value of attention to detail. Proper execution will ultimately lead to improved performance of the solar globe lamp, serving as an illuminative enhancement in your outdoor spaces in a manner that remains reliable and efficient for years.
Original article by NenPower, If reposted, please credit the source: https://nenpower.com/blog/how-to-disassemble-the-solar-panel-of-the-globe-lamp-video/
