
1. Disassembling the solar panel casing requires careful steps to avoid damaging the components involved, ensuring safety throughout the process. 2. Gather necessary tools such as a screwdriver, gloves, and safety goggles, as these will enhance safety and efficacy during disassembly. 3. Examine the panel’s structure, as different designs have unique assembly methods, which can influence the disassembly approach. 4. Always consult the manufacturer’s manual if available; this serves as an indispensable guide for specific procedures related to the panel model.
UNDERSTANDING THE STRUCTURE OF SOLAR PANELS
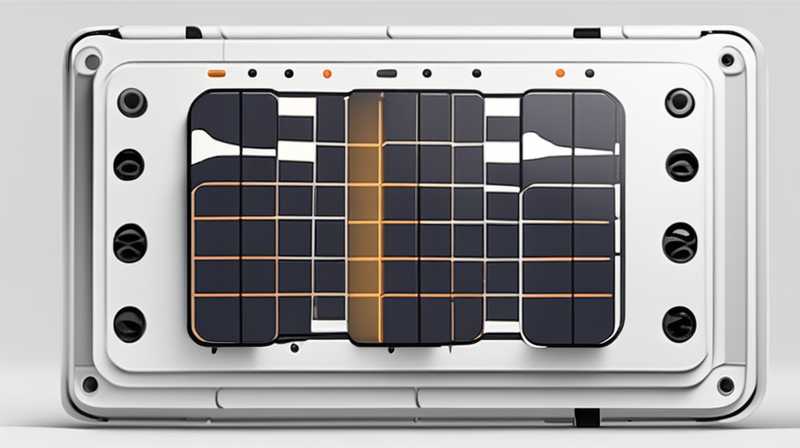
To grasp the process of disassembling a solar panel casing effectively, an understanding of the overall structure of solar panels is imperative. Solar panels consist primarily of photovoltaic cells, a glass top layer, an aluminum frame, and a backing layer, typically made of plastic or metal. Beneath these layers, various components work together to harness solar energy and convert it to electrical energy. Knowing how these parts fit and function can significantly aid in safely removing the casing.
Moreover, the casing serves several purposes, including protection from environmental elements such as rain, hail, and dust, while also providing structural integrity. This ensures that the inner components are shielded and reduces the likelihood of degradation over time. Understanding this context prepares one for the disassembly process, making it essential to approach it with precision and care.
PREPARING FOR DISASSEMBLY
Before commencing the disassembly, several preparatory steps must be taken. Start by ensuring that the panel is not connected to any electrical supply to mitigate the risk of electrical shock. Disconnecting the solar panel from any power source requires locating the inverter and turning it off. Safety equipment, such as gloves and goggles, should be worn to protect against potential injury from sharp edges during disassembly.
The work environment is another critical consideration. Establishing a clean, well-lit area free of distractions allows for greater focus and precision. Maintaining an organized workspace facilitates accurate reassembly afterward, as one can keep track of all components and hardware. Additionally, keeping the panel on a stable surface reduces the chances of accidental damage during the disassembly process.
TOOLS REQUIRED FOR DISASSEMBLY
Having the right tools is essential when embarking on the disassembly endeavor. Commonly used tools include a screwdriver set, a prying tool, a utility knife, and gloves. A screwdriver set with varying sizes allows for compatibility with the different screws employed in solar panel assemblies, while a prying tool helps detach the frame from the casing without inflicting damage to the components.
An essential element to remember is that utilizing appropriate tools directly impacts the efficiency of the disassembly process. For instance, using a utility knife effectively can help cut through adhesive seals that may hold the panel casing together. Improvisation with inadequate tools can lead to damage not just to the panel but also to personal safety; hence, investing in or borrowing the correct tools is wise.
STEPS FOR DISASSEMBLY
With the preparations set, the actual disassembly can begin. Start by inspecting the perimeter of the solar panel casing to determine the type of screws or fasteners used. Depending on the model, screws may be found behind plastic caps or may be exposed. Carefully remove any covers or caps to access the screws beneath. Once identified, remove the screws systematically, ensuring that they are collected in a container for easy access during reassembly.
After removing the screws, the next step involves detaching the aluminum frame from the solar panel. This part can sometimes be tightly fitted, so applying gentle pressure with a prying tool is advisable. Care should be taken to avoid bending or damaging the frame, as it plays a crucial role in the overall structure of the solar panels. With the frame removed, the glass layer can be lifted carefully, allowing for further access to the photovoltaic cells.
REMOVING THE GLASS LAYER
Upon successfully detaching the aluminum frame, attention must turn to the glass layer. This aspect typically presents risks due to its fragility. Using a utility knife, one can carefully cut through any adhesive seals that hold the glass layer in place. It’s fundamental to take slow and deliberate movements, as harsh or abrupt actions can cause the glass to shatter, posing injury risks and leading to unnecessary loss of materials.
Once the adhesive has been cut, slowly lift the glass panel from one edge using a flat tool, ensuring support on both sides. This method diminishes the likelihood of shattering and provides stability while lifting. It’s crucial to remain cautious, as the photovoltaic cells beneath are delicate and can suffer damage if not handled properly. Having a friend or helper assist during this process can also enhance safety and ease.
HANDLING THE PHOTOVOLTAIC CELLS
After gently removing the glass layer, the next step involves dealing with the photovoltaic cells directly. These cells are susceptible to damage if mishandled. Carefully inspect their connections and wiring before any alterations are made. Disconnecting wires must follow a systematic approach to preserve functionality upon reassembly; documenting connections through photographs can be beneficial.
When accessing the cells, ensure that all handling is done with dry, non-conductive gloves. This reduces the risk of static electricity damaging the electronic components. Each cell often connects to the junction box, and making note of these connections will allow seamless reattachment later. It is crucial during this stage to remain methodical and patient, as rushing might lead to mistakes that can be difficult to rectify.
UTILIZING MANUFACTURER GUIDELINES
Throughout disassembly, referencing the manufacturer’s guidelines can provide invaluable insights tailored to the specific solar panel model. Typically, these manuals contain diagrams and detailed steps that accommodate model variations. Engaging with this documentation can clarify nuances that would otherwise delay the process, ensuring a more effective disassembly.
Moreover, many manufacturers provide online resources or support pages where detailed disassembly videos or tutorials are available. Accessing this information can prove beneficial, especially for those less familiar with solar panel technology. Engaging with these materials fosters both safety and efficiency in navigating through potentially complex assembly systems, aiding the overall disassembly task significantly.
REASSEMBLY CONSIDERATIONS
Once disassembly is complete, it’s essential to pivot attention to the reassembly phase, which often poses its own challenges. Following the same methodical reverse order can mitigate errors and enhance efficiency. Utilizing the previously taken photographs can provide guidance for reconnecting wires accurately and ensuring all components are in their rightful places.
Additionally, patience during reassembly will yield the best results. This process may involve multiple attempts or adjustments to ensure all parts fit seamlessly. Taking time to double-check connections and secure screws correctly will support the longevity and functionality of the solar panel after reassembly.
ENVIRONMENTAL AND SAFETY AWARENESS
Awareness of both environmental and safety impacts during disassembly cannot be overlooked. Proper disposal of unwanted parts, especially the glass and electrical components, is crucial. Many localities have specific guidelines or facilities for recycling these materials, which supports both community efforts and minimizes ecological impact.
Furthermore, adhering to safety protocols during the disassembly process is non-negotiable. Accidents can occur unexpectedly, and having first aid kits nearby or working with a second individual can enhance safety. The consideration for personal safety and environmental ramifications should remain at the forefront throughout the entire project, reinforcing ethical responsibility in technical endeavors.
COMMON INQUIRIES
WHAT TOOLS ARE ESSENTIAL FOR DISASSEMBLING SOLAR PANELS?
The essential tools for disassembling solar panels typically include a specialized screwdriver set, utility knife, and prying tool. Using the proper screwdriver sizes will enable the removal of various screws present in the panel’s frame and casing. A utility knife comes in handy when cutting through any sealing adhesives that secure the glass layer and other components.
A prying tool is valuable in safely detaching components without causing damage, particularly to the aluminum frame and glass surface. Additional safety gear, such as gloves and goggles, is crucial for protecting oneself from sharp edges and potential breakage. The overall preparedness with the correct tools ensures a smooth disassembly process with minimal risks.
HOW CAN I SAFELY DISCONNECT SOLAR PANELS FROM THE POWER SOURCE?
To safely disconnect solar panels from the power source, begin by locating the inverter which converts the energy produced by the panels. This device typically has a shut-off switch or breaker that must be turned off before proceeding. Always follow the manufacturer’s instructions regarding disconnection to ensure all safety protocols are observed.
It is also prudent to verify that the solar panel system is not producing electricity before handling components. This can be confirmed by checking whether the display on the inverter reads a zero output. Taking these precautions protects the individual from potential electrical hazards that could occur during disassembly.
WHAT SHOULD I DO WITH THE COMPONENTS AFTER DISASSEMBLY?
After disassembly of solar panels, it’s important to consider the appropriate handling and disposal of each component. Any broken glass should be packaged carefully to avoid injury and disposed of in accordance with local regulations regarding hazardous waste. Similarly, electrical components need to be assessed for potential recycling options. Most communities have designated recycling programs for electronic waste, and it is advisable to reach out to local facilities for guidance.
Furthermore, if any items are still functional, consider donating them to local schools or organizations that focus on renewable energy education. Proper management of materials not only minimizes environmental impact but also promotes responsible consumer practices within the community, supporting sustainability efforts.
In summary, the intricate task of disassembling solar panel casings involves careful planning, appropriate tools, and a considerate approach to safety and environmental impact. Proper preparation, understanding of the structure, and adherence to manufacturer guidelines are essential in executing this task effectively. The level of detail involved in each phase, from removing the glass layer to handling the photovoltaic cells, showcases the importance of methodical work in preserving both safety and solar panel functionality. By following these principles, not only is effective disassembly achieved, but also a foundation laid for responsible reassembly, ensuring that solar technology continues to operate efficiently. Engaging with this process encourages mindfulness of personal safety, ecological responsibility, and serviceable knowledge about renewable energy systems.
Original article by NenPower, If reposted, please credit the source: https://nenpower.com/blog/how-to-disassemble-the-solar-panel-casing/
