
Disassembling a solar light panel requires careful attention to detail to ensure that the components are handled safely and effectively. There are specific steps involved in this process: 1. Safety Precautions, 2. Equipment Preparation, 3. Disassembly Steps, 4. Component Handling. The importance of safety precautions cannot be overstated, as solar panels may still retain charge. Additionally, it is crucial to gather the necessary tools, such as screwdrivers, pliers, and safety gloves. Each component of the solar light panel plays a significant role in its functionality, thus thorough care should be observed when detaching or handling these parts.
1. SAFETY PRECAUTIONS
Prior to commencing the disassembly of a solar light panel, ensuring personal safety is of utmost importance. Wearing protective gear is essential. This includes safety goggles, gloves, and possibly a hard hat if the panel is mounted at a height. Electrical components can pose hazards, so it is vital to protect oneself adequately. Aside from personal protection, one must also ensure that the area being worked on is safe and free of obstacles that could lead to accidents.
Furthermore, deactivation is crucial. Before disassembling the solar panel, disconnect it from the power source or remove the batteries if applicable. This step mitigates any risk of electric shock during the process. Solar panels have capacitors that may hold a charge; hence, allowing them to fully discharge is advisable. Ensuring all safety protocols is in place will significantly lower the risk of injury or mishap.
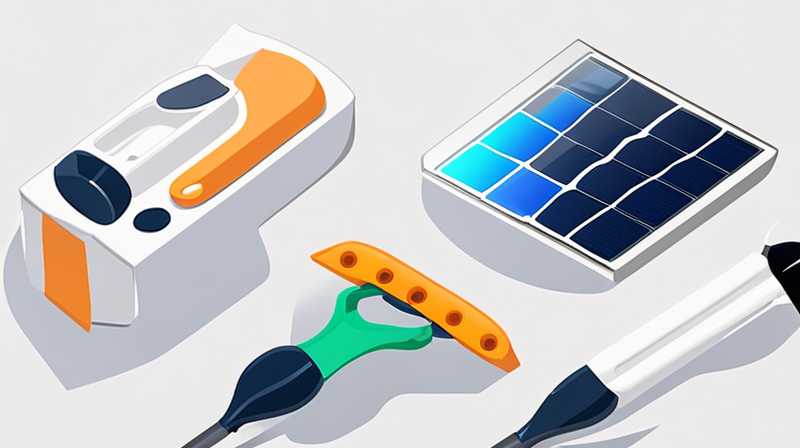
2. EQUIPMENT PREPARATION
Having the appropriate tools and materials at hand is vital for the disassembly of any solar light panel. A well-equipped workspace is crucial. Begin by gathering necessary tools, which should typically include various sizes of screwdrivers (both flathead and Phillips), pliers, wire strippers, and a multimeter to test for electrical flow. These tools will enable one to access the internal components of the solar light panel effectively.
Moreover, an organized workspace contributes to efficiency. Conducting the disassembly in a clean, well-lit area ensures that small parts or screws do not get lost during the process. Employing a magnetic tray can aid in keeping screws organized, preventing unnecessary delays. Furthermore, having a soft cloth or workspace mat can protect the panel from scratches or other potential damage while disassembled.
3. DISASSEMBLY STEPS
To proceed with the actual disassembly, there is a systematic approach to be followed. Start by removing the outer casing. Most solar light panels are enclosed in protective plastic or metal casings, secured by screws or clips. Carefully inspect the exterior to identify these anchors. Use the appropriate screwdriver to gently unscrew them without damaging the casing. Patience is vital during this step to avoid stripping the screws or cracking the edges of the panel.
Once the outer casing is removed, next, examine the internal components. Inside a solar light panel, one can typically find the solar cells, a charge controller, an LED light source, batteries, and various wiring connections. Assess the layout and take note of how they are interconnected. This understanding is critical for reassembly later on if needed. Avoid pulling on wires or dislodging components hastily, as this could lead to damage.
Following this, disengage the battery connections. Before removing batteries, double-check that the panel is completely deactivated. Detaching the batteries should be done delicately to prevent any short circuits or damage to the battery terminals. Utilize appropriate tools to loosen any tight connections if necessary. Once the batteries have been safely removed, take the time to examine the charge controller. This component is integral in regulating the power from the solar cells and storing it within the batteries. Check for any signs of wear or failure, which can be an indicator of why a solar light panel may not be functioning as intended.
After handling the internal components, detaching the solar cells can be the next step. These are usually fixed onto the frame with strong adhesives or connected by wires. If the solar cells are fastened with wires, ensure to carefully disconnect them without exerting excessive force. For those cells that are glued down, a utility knife can be used judiciously to cut around the edges, ensuring not to damage the cells themselves. Each solitary piece needs to be handled with care, as repairs and replacements can be costly if they break.
Carefully document the removal of each part. Creating a record of the disassembly process can facilitate easier reassembly later. For instance, taking photographs of how components are attached can serve as a reference when putting everything back together. Labeling wires and components can also help streamline the reassembly process, preventing misalignment or improper configurations.
4. COMPONENT HANDLING
Once the solar light panel is disassembled, handling the individual parts must be done methodically. Proper storage of components is essential. Ensure each part—whether it be screws, batteries, or electronic circuitry—is stored in labeled bags or containers. This organization prevents the loss of vital components and allows for straightforward accessibility during reassembly or repairs.
Maintenance also plays a significant role during this phase. Prior to reassembling the solar panel, inspect all parts for signs of damage or wear. Cleaning any exposed surfaces with appropriate cleaners and materials is advisable, as dust and debris can hinder functionality later. Inspect wiring for frays or burns, and test electrical components with a multimeter to determine their viability before attempting to reassemble the unit.
In conclusion, having a methodical approach will aid in ensuring everything is reassembled properly and functions optimally once the disassembly has been completed. Seek repair guides or manufacturer instructions if available, as these resources can provide valuable insights into specific models and components unique to the solar light panel in question.
FREQUENTLY ASKED QUESTIONS
WHAT TOOLS ARE NEEDED FOR DISASSEMBLING A SOLAR LIGHT PANEL?
When preparing for the disassembly of a solar light panel, it is crucial to ensure that you have all necessary tools at your disposal to facilitate a smooth process. Basic tools might include screwdrivers of varying sizes and types—both flathead and Phillips are typically essential. Additionally, pliers may assist in gripping smaller components, and wire strippers help in managing connections effectively.
For diagnosing any electrical problems that could be present, having a multimeter is beneficial. This device allows one to measure voltage, current, and resistance to ensure all electrical components are functioning properly. Utility knives can help with cutting through adhesive or removing stuck parts without causing damage.
Moreover, preparing an organized workspace can enhance efficiency. Consider having containers or a magnetic tray to collect screws and small pieces to prevent loss. A soft cloth or mat can protect the panel from scratches while disassembled. Ultimately, understanding what tools are necessary creates an efficient environment that promotes safety and success in disassembly.
IS IT SAFE TO DISASSEMBLE A SOLAR LIGHT PANEL?
Disassembling a solar light panel can be accomplished safely with the right knowledge and precautions in place. Firstly, it is essential to disconnect the unit from any power source. Many solar light panels are equipped with rechargeable batteries, which must be removed to eliminate the risk of electric shock. Ensure that there is no potential residual energy in the unit by allowing it to sit for a while before beginning the disassembly.
Another aspect of safety involves wearing appropriate protective gear. Safety goggles are crucial to protect your eyes from dust and debris, while gloves can prevent cuts and scratches with the panel’s sharp edges or the internal components. Additionally, it’s advisable to work in a clear, organized area free from distractions or hazards that could lead to accidents during the disassembly process.
Consideration must also be given to the components being handled. Some parts, such as capacitors, can hold a charge even after being disassembled, which could pose danger. By implementing safety protocols and procedures, disassembling a solar light panel can be done in a manner that minimizes risks significantly.
HOW CAN I REASSEMBLE THE SOLAR LIGHT PANEL AFTER DISASSEMBLING IT?
To successfully reassemble a solar light panel after disassembly, starting with a clear plan is crucial. Refer to any notes or photographs taken during the disassembly process. This documentation can serve as an invaluable guide for putting components back together accurately. It’s important to follow the same order of assembly as disassembly to avoid confusion.
When reconnecting wiring, make sure to match colors or labels assigned during the removal. Always double-check that each connection is secure to ensure that there will be proper functionality once the solar panel is reassembled. Take care to position solar cells and controllers in their correct locations, as misplacing them can lead to ineffective operation when power flow is restored.
Finally, once everything is put back in place, test the functionality of the solar light panel. Using a multimeter can help confirm that current is flowing properly and that all connections are sound before sealing the outer casing. After verifying that everything is functioning well, carefully reattach the outer casing and ensure that all screws are tightened. Following these guidelines ensures that the solar light panel will function effectively post-reassembly and return to its operational state.
In summarizing the process of disassembling a solar light panel, meticulous care is essential; one must consider safety, the right tools, and proper handling of each component involved. By adhering to the outlined steps diligently, individuals can successfully disassemble and reassemble these units, ensuring their longevity and functionality. Disassembling a solar light panel may initially appear daunting, yet with adequate preparation and methodical execution, it is highly manageable. This undertaking not only enhances understanding of the panel’s intricacies but can potentially lead to successful repairs and maintenance, ensuring optimal operation. As societies increasingly gravitate towards sustainable energy solutions, being well-versed in the functioning of such devices becomes paramount, promoting both economic and environmental benefits. Proper maintenance and care will significantly extend the life of solar lighting, reinforcing the importance of understanding these essential components. In the broader context of energy efficiency and sustainability, taking the time to learn and practice such skills contributes positively to both individual initiatives and collective environmental goals, ultimately leading to a greener future.
Original article by NenPower, If reposted, please credit the source: https://nenpower.com/blog/how-to-disassemble-the-solar-light-panel/
