
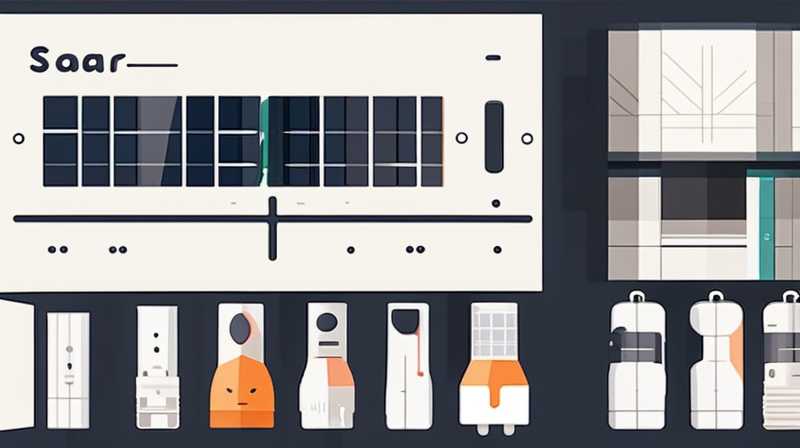
To disassemble the solar lamp head effectively, you need to follow a systematic approach to ensure that the process is safe and without damage to the components. First, gather the necessary tools such as a screwdriver, pliers, and a soft cloth. 1. Remove the screws carefully, 2. Disconnect the wiring gently, 3. Clean the components, 4. Inspect for damage, 5. Reassemble if necessary. This process can improve maintenance and functionality. An elaboration on removing the screws emphasizes that overtightened screws may require careful application of force to avoid stripping, thus necessitating the use of appropriate-sized screwdrivers.
1. PREPARATION AND PLANNING
Disassembling the head of a solar lamp is a task that requires careful preparation. Before commencing, ensure that you have all the necessary tools within reach. Typically, common tools for this operation include a Phillips head screwdriver, flathead screwdriver, and pliers. Additionally, having a soft cloth to handle the bulky components with care is advisable to prevent any scratches or damage.
Assess the environment in which you will perform this task. Selecting a clean, well-lit area is crucial for visibility and precision during disassembly. Wearing safety goggles can also protect your eyes from any debris. Planning the steps ahead of time allows you to anticipate challenges, such as stuck screws or nemesis components, resulting in a smoother disassembly process.
Be mindful of how the solar lamp is constructed. Not all solar lamp heads are identical. Understanding the design of your lamp will assist in the disassembly process, as some models may feature snap-fit designs, while others are more traditional with screws securing the components. Indeed, forethought reduces the chances of mistaking the type of head used in your unit.
2. REMOVING THE SCREWS
One of the crucial steps in taking apart the solar lamp head is the proper removal of screws. Screws can often be found at the base of the head, securing it to the pole or the body of the lamp itself. Using the right size screwdriver for the screws is imperative. An ill-fitting tool can strip the screw head, making removal a daunting task.
Create a workflow that involves placing screws in an organized manner post-removal. For instance, using a bowl or magnetic tray can keep your screws in one place, minimizing the risk of losing them. As you work through the screws, a good technique is to start from the outer edges and work your way inward, which can sometimes release tension in the assembly.
Should you encounter excessive resistance while removing the screws, consider applying a penetrating oil. This can help in loosening rusted screws without damaging them. Always remember to work slowly and patiently to avoid damaging any of the components or units attached to the lamp head. A circumstantial approach will ensure that you have not cracked or broken anything while disassembling.
3. DISCONNECTING THE WIRING
Once the screws have been removed successfully, it’s time to move on to the electrical connections, which require meticulous handling. The wiring is typically secured with connectors that can involve clips or clips that might be easily dislodged. Take care to document the wiring setup before detaching anything. This documentation might include photographs or notes regarding which wires lead where, particularly useful for reassembly.
Gentle handling is the key principle while disconnecting wires; do not yank at connections or use excessive force. If the wires are stubborn, check for any locking mechanisms that might be holding them in place, and ensure no elements from the circuit board are intact while disengaging wiring.
After satisfactorily disconnecting the wiring, inspect all components for any signs of wear or damage. Frayed wires or burned-out connections may necessitate replacement components, which can save time in the long run. Evaluating for potential repairs ensures the lamp head will function optimally when reassembled.
4. CLEANING THE COMPONENTS
With the head disassembled and internal components clearly visible, it is crucial to clean the various pieces effectively. Debris and dust accumulation can interfere with the lamp’s performance, leading to reduced efficiency. Take a soft cloth and a light solution of soapy water to wipe down surfaces, ensuring not to saturate any electrical connections.
Focus on areas such as the solar panel, reflectors, and bulbs. Carefully inspect each part for any signs of corrosion or damage while cleaning. The accumulation of dirt can obscure light performance and, if left untreated, might result in permanent damage to sensitive parts like connectors.
Once cleaned, allow the components to dry thoroughly before reassembly. When moisture is left, it may contribute to malfunctioning in the long term. Once dry, inspect the points of contact and connections to ensure everything is intact before proceeding to the next step of the process, which is the inspection of components.
5. INSPECTING COMPONENTS
Being thorough in inspecting the components during disassembly is vital for long-term maintenance. Pieces such as batteries, wiring, and LEDs often wear out over time and may require immediate replacement for optimal efficiency.
Start with the batteries, checking for any signs of leaks or corrosion. If the batteries appear to be in poor condition, now would be the perfect moment to swap them out for new ones. Many solar lamps use rechargeable batteries, so identifying the right specifications when seeking replacements is key.
Upon inspecting the lighting elements, ensure that bulbs are not burnt out. A visual check for any darkened areas within the glass can indicate failure. Testing the circuit connections by using a multimeter can also confirm whether the wiring is conducive, ensuring all systems are complete and fewer headaches during reassembly.
6. REASSEMBLING PREPARATIONS
Post-inspection, you may feel confident about reassembly. Ensuring that all components are clean and in good working order, start thinking about the reverse process of disassembly. Refer back to any documentation you had created during take-down, such as photographs or diagrams.
Establish the sequence in which you’ll reattach parts. For instance, beginning with wiring is often the logical route, as it allows access to the internal areas without obstruction. Following wiring, screws can be reintroduced systematically. Securely fastening the screws helps ensure that the entire assembly is solid and stable.
While reassembling, use moderate force to avoid overtightening any element. If screws are too tight, it can lead to malfunction due to bending of materials, or in more extreme cases, breakage of essential parts. Maintaining the integrity of the housing will sustain the structural reliability of the solar lamp over time.
7. TESTING THE LAMP HEAD
The final phase of disassembly is to test the lamp head to confirm that all components are functioning as intended. Reconnecting it to its base is essential for a complete run-through of the functionalities. Ensure that it is secure without any wobble or instability. Once the connections snap back into place, plug in any wiring that was previously removed, focusing on the polarity to avoid confusion.
After reassembly, allow the solar panel to charge under sunlight for a sufficient duration, generally about 8 hours, depending on the solar lamp’s specifications. This ensures that the device receives an adequate charge for testing. Upon nightfall, activate the lamp to assess its functionality. Observe how well the solar lamp illuminates the area; an optimal performance indicates successful reassembly.
If any issues arise during the testing phase, refer back to the reassembly steps and ensure that all connections were correctly fastened. Should difficulties continue, further inspection may be necessary, as early signs of malfunction often indicate incomplete assembly or underlying issues needing attention.
8. MAINTENANCE TIPS FOR LAMP HEADS
Routine maintenance can prolong the lifespan of solar lamps significantly. Regularly inspect the lamp for any debris that may accumulate, particularly around the solar panels. Lift any accumulating dust and wipe the surface with a soft cloth, ensuring sufficient sunlight penetration.
In addition, consider replacing batteries periodically according to the manufacturer’s recommendations. Ensuring that all lamp parts are functional and intact will improve the lighting efficiency and ensure maximum battery performance.
Finally, if the lamp is located in an outdoor environment exposed to harsh weather conditions, consider covering it during severe storms or winter months to avoid unnecessary wear or damage. Investing in protective gear will save you headaches when the unit requires extensive upkeep.
FREQUENTLY ASKED QUESTIONS
HOW OFTEN SHOULD I DISASSEMBLE MY SOLAR LAMP HEAD?
Disassembling a solar lamp head depends on its usage, environmental exposure, and observed performance. Ideally, a thorough inspection and possible disassembly should occur at least once or twice a year. If the lamp is set up in a particularly dusty area or prone to moisture, increasing the frequency to every six months may be beneficial. This proactive approach ensures that all components are functioning optimally, particularly solar panels and batteries, which tend to degrade quicker if not routinely maintained.
WHAT TO DO IF A SCREW BREAKS OR STRIPS DURING DISASSEMBLY?
When encountering a broken or stripped screw, it’s paramount to handle this situation with caution to avoid further damage. Utilizing a screw extractor set is highly recommended, as it can grip the remaining shaft effectively. Alternatively, if the screw is slightly stripped, using a rubber band between the screw and driver may help increase friction for removal. If all else fails, drilling out the stripped screw may become necessary, followed by replacing it with a new one tailored to fit. Exercise patience while navigating the removal process to safeguard surrounding components.
CAN I REPLACE THE SOLAR PANEL WITHOUT DISASSEMBLING THE HEAD COMPLETELY?
In certain solar lamp designs, replacing the solar panel may be feasible without completely disassembling the head. However, this is contingent upon the specific model and manufacturer guidelines. If the solar panel is accessible through a designated compartment without removing the head or other critical components, you can simply unclip or unscrew it. Always review manufacturer instructions or reach out to customer support for precise guidance before attempting any service work. This ensures that you do not inadvertently damage internal parts.
FINAL THOUGHTS
Disassembling the head of a solar lamp is not merely a mechanical endeavor; it is an opportunity to enhance the efficiency and functionality of your lighting solution. Throughout this guide, the focus on detailed preparation, careful disassembly, diligent cleaning, thorough inspections, and proper reassembly imprint vital practices on anyone involved in solar lamp maintenance. These practices significantly affect the overall longevity of the solar lamp and improve its performance in illuminating spaces efficiently.
When activities are approached with due diligence, users can maintain their solar lamps in optimal working condition, prolonging their lifespan and effectiveness. No aspect of solar lamp care should be overlooked; all components, from wiring to bulbs, demand attention. Neglect or improper handling can lead to performance drops and the need for premature replacements, costing time and resources.
Engaging with your solar lamp process promotes not just improved functionality but also a satisfactory sense of accomplishment. This reinforces the understanding that every component has a role in this sustainable lighting solution. Committing to routine inspections and appropriate interventions can transform solar lamps into reliable fixtures that contribute effectively to energy efficiency and reduced environmental impact for years to come. By following this structured guide, enthusiasts and professionals alike can engage further in the maintenance of solar energy solutions, leading through example and fostering a sustainable approach to lighting.
Original article by NenPower, If reposted, please credit the source: https://nenpower.com/blog/how-to-disassemble-the-solar-lamp-head-2/
