
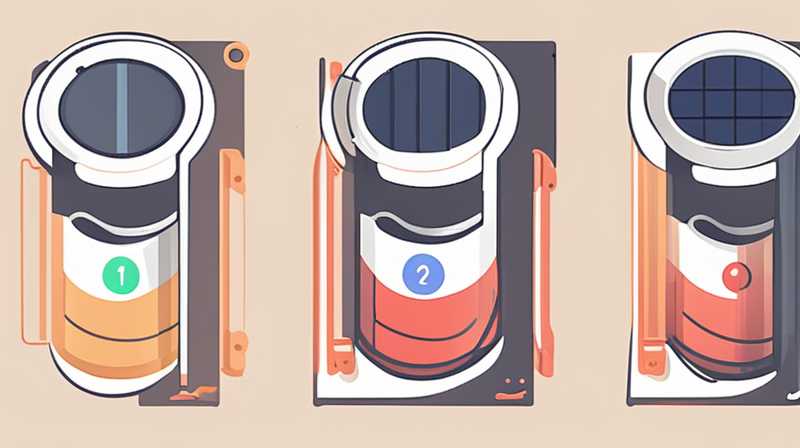
To effectively disassemble a solar charging cable, follow these steps: 1. Safety precautions are essential, 2. Gather necessary tools, 3. Identify and detach connectors, 4. Remove insulation carefully. Safety precautions involve disconnecting the charger from any power source to prevent electrical shocks or short circuits. Gathering necessary tools, such as wire cutters, pliers, and a screwdriver, will facilitate the process. Identifying and detaching connectors is crucial, as it involves recognizing different parts of the cable, which can vary based on the design. Finally, removing insulation carefully will help avoid damage to the internal wiring, enabling a successful disassembly.
IMPORTANCE OF DISASSEMBLING SOLAR CHARGING CABLES
Understanding the significance of disassembling solar charging cables is paramount in various contexts, such as repair, recycling, or upgrading. Maintenance plays a critical role in extending the lifespan of solar equipment. When the components of the charging apparatus become worn, disassembly allows for inspection and potential replacement of certain sections. Moreover, attentively examining the interior wiring can reveal other issues that might not be apparent externally. Recycling is another crucial factor that underscores the need for careful disassembly. With the growing concern over e-waste, it becomes imperative for users to understand how to dismantle cables effectively, facilitating responsible disposal and recovery of materials.
The upgrading of components can also motivate users to disassemble these cables. As technology progresses rapidly, older solar charging cables may become obsolete or inefficient. By disassembling and replacing certain parts, individuals can modernize their charging systems without incurring the expense of entirely new units. Ultimately, the act of disassembling serves multifunctional purposes that cater to different needs—ranging from maintenance to environmental stewardship.
SAFETY PRECAUTIONS
Emphasizing safety is non-negotiable during the disassembly of any electrical component, including solar charging cables. Unplugging any connected devices is crucial to prevent potential electrocution and protect the individual performing the disassembly. Prior to commencing, ensure that the workspace is dry and clear of any conductive materials. The inherent risk of working with solar equipment, especially when it has been exposed to sunlight, necessitates this safety measure.
Wearing protective gear such as gloves and goggles is advisable to shield against accidental cuts from sharp wire ends or soldering metal. Engaging with tools can sometimes result in slips or unintended accidents, exacerbated by the inherent strength of the materials involved. Employing appropriate safety gear ensures that individuals can act with both efficiency and caution while working.
GATHERING NECESSARY TOOLS
Equipping oneself with the right tools simplifies the disassembly process considerably, making it more efficient and less prone to error. Essential tools typically include wire cutters, pliers, small screwdrivers, and a heat gun. Each tool serves a specific purpose, from cutting through thick insulation to loosening connectors that might be tightly bound.
Wire cutters are indispensable in the disassembly process, enabling clean cuts through both the insulation and the wiring itself. Pliers can assist in gripping and pulling apart the connectors, allowing for controlled force during removal. The heat gun occasionally comes into play when dealing with heat-shrinkable tubing that covers some connections, as gentle heating helps in loosening the adhesive binding. This tools list offers a well-rounded approach to ensure that every component can be addressed without unnecessary complications.
IDENTIFYING AND DETACHING CONNECTORS
Upon having the necessary equipment handy, the next task is to identify the various connectors incorporated within the solar charging cable. Understanding the types of connectors used—such as MC4, XT60, or Anderson connectors—will aid immensely in the process. Each connector type has distinct characteristics designed for different purposes, highlighting the importance of knowing which you are dealing with.
Disconnecting these connectors often requires a careful approach, as forceful removal can lead to damage. Employing the appropriate tool, like pliers, can ensure a secure yet gentle grasp. While pulling or twisting the connectors, it is imperative to focus on maintaining the integrity of surrounding components. After successfully detaching the connectors, carefully observe and document their arrangement and wiring color coding. This attention to detail proves invaluable when one needs to reassemble or replace parts later on.
REMOVING INSULATION CAREFULLY
The insulation layer functions as protection for vulnerable wiring within the solar charging cable. To begin removing this layer, apply the wire cutters judiciously. Precision is key; it is crucial to make clean cuts that don’t damage the underlying wires. Insulation can vary in thickness depending on the brand and type of cable, and different removal techniques may be needed accordingly.
Once the initial cut is made, carefully peel back the insulation. This process must be done with patience to avoid fraying the wires, which could compromise functionality. If additional heat-shrinkable tubing is present, utilizing a heat gun will provide a gentle melting effect that allows for easier removal without unnecessary force. Carefully handling insulation assures that wires are maintained in a pristine state.
REASSEMBLING COMPONENTS
If the purpose of disassembly is to facilitate upgrades or repairs, one must consider the subsequent reassembly of the solar charging cable. Understanding the arrangement of connectors is vital for ensuring proper functionality. A thorough examination of the initial layout, alongside any photographs or notes taken during the disassembly process, will help synchronize the reassembly phases.
During reassembly, it may be necessary to replace worn components, which underscores the importance of obtaining high-quality parts. Using substandard materials can lead to inefficiencies or repeated failures down the line. Following manufacturer specifications when reassembling components guarantees compatibility and enhances performance.
All securing mechanisms, such as screws or clips, should be properly affixed to ensure that connections remain tight and do not loosen over time. Taking the time to meticulously inspect the assembled solar charging cable after reassembly ensures that all components work harmoniously, providing a reliable energy supply from the solar system.
MAINTAINING A SOLAR CHARGING SYSTEM
After effectively disassembling and reassembling a solar charging cable, ongoing maintenance is vital to maintain its operational capacity. Regular inspections should be a practiced routine, checking for any signs of wear or damage in insulation or connectors. Such proactive measures can uncover potential failures before they escalate into more significant problems.
Cleaning the surface of connectors can also enhance the longevity of the solar charging system. Dust or corrosion may inhibit effective energy transfer, ultimately affecting performance levels. Using appropriate cleaning agents can facilitate a well-functioning system, ensuring the solar charging apparatus remains in optimal condition.
In addition, environmental considerations must be acknowledged, as exposure to the elements can impact the durability of components. Using weatherproofing techniques and storage methods will prolong the lifespan of solar charging cables. Consistent attention to these factors will solidify the foundation for reliable energy solutions.
FAQs
HOW OFTEN SHOULD I DISASSEMBLE MY SOLAR CHARGING CABLE?
Disassembling your solar charging cable should primarily be based on its performance and condition rather than a fixed schedule. Ideally, users should conduct thorough inspections every six months to a year. If any signs of wear, such as frayed wires, corrosion, or difficulty in connecting, emerge, this warrants immediate disassembly for repair or replacement.
Considering environmental factors can also influence frequency. If the cables are used in harsh conditions or exposed to elements such as extreme heat, moisture, or physical wear, more frequent checks are advisable. Ongoing maintenance not only enhances efficiency but also ensures longer-lasting performance. This proactive approach minimizes the risks associated with neglect, allowing users to maximize the potential of their solar energy systems.
CAN I USE REGULAR TOOLS FOR DISASSEMBLING SOLAR CHARGING CABLES?
Using appropriate tools is instrumental in ensuring successful disassembly; however, regular tools may suffice with caution. While tools like wire cutters and pliers are highly recommended, improvised tools can lead to damaging the cable or the connectors. If that is the case, there is a chance that it might compromise the operation of the cable post-disassembly.
Specialized tools designed for electrical work can provide more precise and safer handling. Therefore, investing in suitable equipment specific to cable disassembly is advisable. The importance of using the correct tools cannot be understated, as it safeguards both the user and the integrity of the solar charging cable, fostering a more efficient and effective process.
WHAT SHOULD I DO IF I BREAK A CONNECTOR DURING DISASSEMBLY?
If a connector breaks during disassembly, the primary step is to remain calm and carefully assess the damage. Replacing a broken connector is crucial to maintaining the functionality of the solar charging system. First, identify the connector type and gather the required tools for replacement.
It may be possible to detach the remaining portion of the connector gently, although utmost care is necessary to avoid damaging the sturdiest of wiring. After removal, examine the wiring for any signs of stress or damage. If all wiring is intact, attaching a compatible replacement connector should be straightforward. However, should the wiring appear compromised, a more significant repair—such as splicing or full replacement—might be warranted. Always ensure proper connections are made and test to confirm functionality post-repair.
Disassembling a solar charging cable is both an essential skill for maintenance and an act of environmental courtesy. With proper safety measures in place, users can carry out this process with confidence and effectiveness. As technology continues to evolve, upgrading components ensures continued relevance in solar energy applications. Frequent inspections and ongoing maintenance establish a reliable energy source, maximizing output efficiency while minimizing wear. By accumulating knowledge and tools, individuals achieve a practical understanding of their solar charging systems, fostering ongoing sustainability practices. Ultimately, the ability to disassemble, repair, and maintain these cables adds both value and longevity to solar energy solutions.
Original article by NenPower, If reposted, please credit the source: https://nenpower.com/blog/how-to-disassemble-the-solar-charging-cable/
