
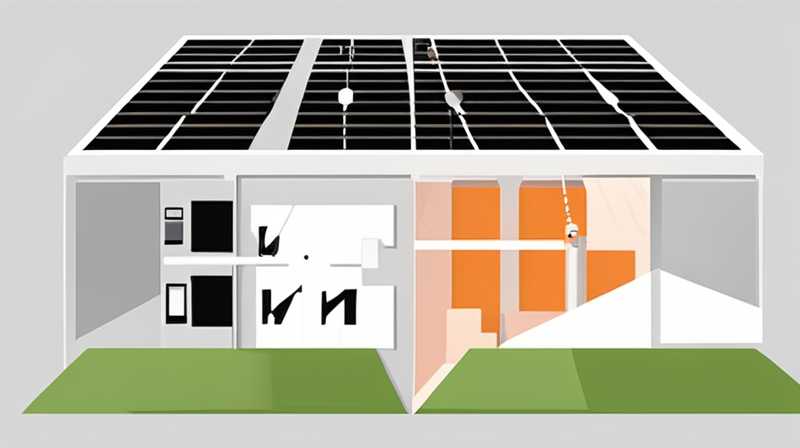
To effectively disassemble a solar panel, certain steps must be followed thoroughly to ensure safety and prevent damage. 1. Gather essential tools and safety equipment, which includes screwdrivers, pliers, and safety goggles. 2. Disconnect the solar panel from any connected systems, including electrical circuits or battery storage. 3. Remove the mounting hardware carefully to avoid any physical damage. 4. Detach the junction box, which is crucial for securing the connections inside the panel. 5. Finally, separate the front glass from the back sheet, ensuring all components are handled gently to maintain their integrity. Each of these steps is vital in the disassembly process.
1. TOOLS AND SAFETY PRECAUTIONS
When embarking on the journey to disassemble a solar panel, having the appropriate tools at one’s disposal is paramount. Safety goggles, gloves, screwdrivers, and pliers are essential; this equipment aids in both the protection of the individual and the preservation of the panel components. The role of safety gear cannot be emphasized too strongly, for there are potential hazards associated with the electrical components within the solar system.
Moreover, ensuring the work area is free from clutter enhances focus on the task at hand. Electrical currents can pose a serious threat if panels are improperly handled or if unintentional contact is made with live wires. By maintaining an organized workspace, a clear workflow is established, reducing the risks associated with disassembly.
2. PREPARATION FOR DISASSEMBLY
Preparation is a critical phase that lays the foundation for successful disassembly. Before commencing, it is crucial to disconnect the solar panel from the electrical system. This step ensures that no residual electrical charge poses a risk during the disassembly process. To perform this task, locate and turn off any switches connected to the solar system, including the inverter, which typically manages the flow of electricity.
Additionally, double-checking that the system is completely offline is wise. Testing with a multimeter can affirm that there are no hidden charges in the circuits. Once confirmed, securely marking the connections and taking photographs can be useful for future reassembly should that be necessary. This foresight minimizes confusion and misunderstandings about where each wire and component belongs.
3. REMOVAL OF MOUNTING HARDWARE
The removal of mounting hardware is a defining step in the disassembly process. Solar panels are often affixed strongly to rooftops or stands, necessitating the use of appropriate tools to avoid damaging the panel itself. Depending on the installation type, the hardware may include bolts, brackets, or clamps. Begin by loosening these components gradually to avoid bending or twisting, which may affect the panel’s subsequent performance if reinstalled.
Once the primary screws or bolts are removed, it is essential to carefully lower the panel. Utilizing another person or mechanical assistance is advisable, as solar panels are generally large, glass-covered structures that can easily be dropped or mishandled. If fallen, they risk becoming unserviceable.
4. JUNCTION BOX DETACHMENT
The junction box serves as a pivotal component where the electrical connections occur inside the solar panel. To detach this vital piece, start by carefully unscrewing any visible screws or fasteners holding it in place. These can often be found on the rear side of the panel and must be treated gently to prevent breaking the panel.
Next, pry the junction box away while ensuring no wires are damaged during the process. Carefully noting the wiring configuration is crucial, as this information may be needed if the panel ever needs to be reassembled. By doing so, not only are the individual components preserved, but one’s understanding of the electrical layout deepens.
5. GLASS AND BACK SHEET SEPARATION
The final stage of disassembling a solar panel involves separating the front glass and the back sheet. This segment commands a meticulous approach, as glass can easily shatter, leading to potential injury and waste of components. Using a utility knife or a flat tool can help create separation between the adhesive layers that hold the two parts together.
Once a gap has been established, applying gentle but consistent pressure allows the glass and back sheet to unstick from one another. Caution is advised to ensure that neither layer becomes damaged, further complicating potential reassembly or repairs.
6. DISASSEMBLY CHALLENGES
Despite careful planning and execution, one may encounter various challenges during disassembly. One common issue involves stubborn fasteners that resist removal, requiring extra attention and patience. In situations where screws are rusted or stripped, using penetrating oil may aid in loosening them. Additionally, employing a screw extractor can sometimes salvage difficult screws.
Another challenge often faced is the need for specialized equipment. Some modern solar panels may employ proprietary mounting systems or unique junction boxes that lack readily available tools for disassembly. In such cases, reaching out to the manufacturer or seeking guidance from experts may be necessary.
7. ENVIRONMENTAL CONSIDERATIONS
With an increasing focus on environmental health, it’s essential to consider the ecological impact of disassembling solar panels. The disposal of solar panel components must align with local regulations, as improper disposal can release toxic materials into the environment.
Additionally, recycling opportunities are often available for photovoltaic cells, glass, and metals. Prior to disassembly, researching local recycling programs can provide useful guidance on how to best handle waste. This conscientious approach not only protects local ecosystems but contributes to the broader movement toward sustainable practices.
8. REASSEMBLY AND FUTURE USE
After successful disassembly, one might contemplate reusing or repurposing the panels. Reassembly can serve as a valuable learning experience, offering insight into solar technology and its mechanisms. Understanding the assembly process will deepen knowledge of how solar panels work and enhance one’s ability to troubleshoot future issues.
Additionally, some disassembled components can be used in alternative projects. For instance, creating solar-powered garden lights or screen canopies, provides environmental benefits and utilizes materials that would otherwise be wasted. Thus, the disassembly not only has practical applications but also offers creative opportunities.
9. MAINTENANCE AND CARE POST-DISASSEMBLY
In the aftermath of disassembly, establishing a maintenance schedule is beneficial. Regular inspections of solar panels, even in disassembled states, can help identify potential issues early. Observing for signs of wear, corrosion, or deterioration can ensure that any future reassembly will result in a safe and effective solar system.
Being proactive in maintenance reduces the risks of larger problems down the road. Consideration of the specific environmental conditions surrounding the panels will also inform the maintenance approach. Areas prone to heavy winds or storms may necessitate additional precautions when reassembling or storing disassembled components.
10. COMMON MISTAKES TO AVOID
Embarking on this disassembly process can sometimes lead to common mistakes that could complicate matters. Failing to fully disconnect the unit from the electrical system can be perilous. This oversight opens the door to severe electrical shocks, making thorough disconnection an imperative step not to be skipped.
Another frequent error involves lack of documentation. Without properly documenting the process, including photographs and notes about connections, confusion may arise upon reassembly. Ensuring a detailed record mitigates this risk significantly.
FAQs
WHAT TOOLS ARE NECESSARY FOR DISASSEMBLING A SOLAR PANEL?
A variety of tools are essential for disassembling a solar panel safely. Fundamental tools include screwdrivers, pliers, and utility knives. For disconnecting electrical connections, a multimeter is invaluable, as it checks for residual current, thus ensuring safety during the process. Additionally, safety equipment such as gloves and goggles must be included to protect personal safety and maintain a secure working environment.
In specific scenarios, specialty tools like screw extractors might be necessary to tackle stubborn fasteners that stick or resist removal. Keeping a well-stocked toolkit prepared can streamline the disassembly process and significantly mitigate risks. Assembling the right equipment not only promotes safety but also enhances efficiency in the task at hand.
HOW CAN I SAFELY DISCONNECT A SOLAR PANEL FROM ITS SYSTEM?
To safely disconnect a solar panel, first locate the circuit breakers associated with the solar setup. If your installation includes an inverter, ensure that it too has been powered down. Turning off all associated electrical devices prevents any residual charge from creating a hazard. Confirm that power is fully disengaged by using a multimeter to measure voltage levels.
Once secured, visually trace the wiring connected to the solar panel, following it back to the inverter or the main electrical service panel. Carefully document the connections, taking photographs if necessary, which will aid in reassembly later. This methodical approach ensures safety and eliminates confusion during the disassembly phase, creating a reliable framework for future reference.
WHAT ARE THE POTENTIAL RISKS INVOLVED IN DISASSEMBLING SOLAR PANELS?
The disassembly of solar panels carries several potential risks, primarily related to electrical hazards. Working with electrical components poses the danger of shocks, particularly if the unit is not adequately disconnected from the electrical grid. This threat emphasizes the importance of ensuring all power sources are fully disengaged before starting any work.
In addition to electrical risks, the physical handling of large, heavy panels presents its own challenges. Improper lifting or dropping can result in injuries or damage to the solar equipment. Moreover, the glass components of solar panels are vulnerable to breakage, which could lead to sharp shards causing cuts or other injuries. To mitigate these risks, utilizing proper lifting techniques and maintaining caution throughout the disassembly is vital for safety.
The entire process of disassembling solar panels requires careful consideration of each step and a commitment to safe practices. By adhering strictly to the outlined procedures and remaining vigilant about potential hazards, one can navigate this undertaking successfully. Understanding tools needed, preparation steps, proper separation techniques, and reassembling considerations lays a solid foundation for dealing with solar panels effectively. It is crucial to remain informed about environmental responsibilities as well, seeking out recycling options for disposed components. Further, establishing maintenance practices guarantees the safety of both the individual and the solar technology involved in the process. Engaging with solar panel disassembly can serve as both a practical skill and an opportunity for innovation in renewable energy applications.
Original article by NenPower, If reposted, please credit the source: https://nenpower.com/blog/how-to-disassemble-solar-panel/
