
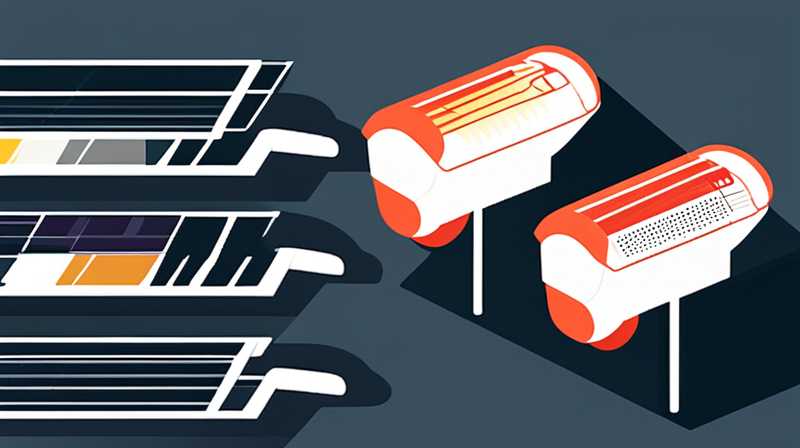
To disassemble shielded solar lights, follow these steps: 1. Safety First: Ensure the light is turned off and disconnected from any power source; 2. Gather Tools: Use appropriate tools such as a screwdriver and pliers to assist in the disassembly; 3. Remove the Top Cover: Carefully unscrew and lift off the top section to expose internal components; 4. Detach the Solar Panel: Disconnect the solar panel, ensuring you handle wires gently; 5. Access the Battery Compartment: Locate and remove the battery housing for servicing or replacement; 6. Final Disassembly: Continue by detaching remaining parts to reach the desired internal segments. The disassembly should be approached cautiously to prevent damage to any components.
1. INTRODUCTION
Disassembling shielded solar lights can be a straightforward task if approached with the right mindset and tools. Understanding the structure and function of these devices is crucial for successful disassembly and eventual reassembly. Solar lights typically include several components, such as the solar panel, rechargeable battery, LED light source, and housing that protects these parts. Each piece plays a vital role in the functionality of the solar lights, and careful handling is essential to avoid impairing the device’s performance.
In this discourse, the step-by-step process of disassembling shielded solar lights will be extensively detailed, providing valuable insights into ensuring sufficient preparation, tool selection, and disassembly technique. Whether you are a DIY enthusiast looking to perform repairs or upgrades, or simply seeking to understand the inner workings of solar lights, this guide will supply the necessary knowledge.
2. TOOLS NEEDED FOR DISASSEMBLY
Before delving into the process of disassembly, having the right tools at your disposal is paramount. 1. Screwdrivers: A set of various screwdriver sizes, including Phillips and flathead, will facilitate the removal of screws securing the solar light’s components. 2. Pliers: Needle-nose pliers can be extremely useful for working with small wires or delicate parts, allowing for precision work without causing damage. 3. Work Surface: Establishing a clean, flat workspace is essential as it enables you to keep track of screws and small pieces.
Additionally, 4. Safety Goggles: It is wise to wear safety goggles to protect your eyes from potential debris when handling the lamp. 5. Flashlight: Have a flashlight handy for enhancing visibility during the disassembly, especially when working in dimmer areas. A good set of tools not only simplifies the process but also minimizes the risk of damaging components or causing harm.
3. SAFETY PRECAUTIONS
Prioritizing safety cannot be overstated when embarking on the task of disassembling shielded solar lights. 1. Power Source: First and foremost, ensure the solar lights are not connected to any external power sources. Even when dealing with solar-powered fixtures, it is advisable to check that the unit is turned off to avoid accidental electrical shock or short circuits. 2. Hand Protection: Wearing gloves can safeguard your hands from sharp edges or broken fixtures that may pose a risk during disassembly.
It is also prudent to risk assess the area where you will be working. 3. Environment: Opt for an outdoor or well-ventilated space to reduce inhalation of any fumes from older batteries or materials. Pay attention to the weather conditions when working outside, as moisture can impact electronic components. By adhering to these precautions, optimal safety can be achieved, enabling a more efficient disassembly experience.
4. STEP-BY-STEP DISASSEMBLY PROCESS
4.1. REMOVING THE TOP COVER
The first significant step in the disassembly process is to remove the top cover of the solar light. When you locate the screws holding down the cover, carefully unscrew them using your designated screwdriver. 1. Undiagnosed Screws: Take note of any screws that may differ in size or type to prevent confusion during reassembly. Gently prying the top cover away from the body will expose the inner workings of the solar light.
It is important to proceed slowly during this step. 2. Handling with Care: If resistance is felt, reassess to ensure that all screws have been adequately loosened. Rushing this process can lead to breakage of plastic lacerations or component dislodgments, complicating future repair attempts.
4.2. REMOVING THE SOLAR PANEL
Once the cover is removed, the next objective is to disconnect the solar panel if it is attached to the light. Generally, the solar panel will be secured with additional screws or clips. Detaching the panel allows for easy access to the internal battery. 1. Unscrew Mechanism: Use the correct screwdriver to loosen any screws without applying excessive force.
2. Detaching Wires: After removing the screws, gently lift the solar panel away. Be cautious of attached wires. If the solar panel connects via a connector, carefully pull the connector apart instead of yanking at the wires to prevent bending pins or breaking connections.
4.3. ACCESSING THE BATTERY COMPARTMENT
With the solar panel removed, the next item of focus becomes the battery compartment. Many solar lights contain a rechargeable unit or two for power supply. 1. Battery Housing: Locate the compartment door, which may either slide open or require additional screws to unlock. Use the same method of unscrewing or sliding to open the compartment to retrieve or replace batteries.
2. Identifying Battery Type: Be mindful to observe battery type and orientation when removing. Different types may exhibit varying voltages, such as NiMH or lithium-ion, and facilitate correct replacements if necessary.
4.4. REMOVING THE LED LIGHT SOURCE
Following battery removal, attention should be directed towards the LED light source. In many designs, LEDs are integrated with other components. 1. Disconnecting LEDs: Look for wires feeding into the LED light assembly and gently pull them from their connectors, just as was done with the solar panel. If screws hold the LED unit, remove them with care not to strip any threads.
Inspect for any other securing methods that might exist, such as adhesive or clips. 2. Extracting LEDs: Gently but firmly remove the LED assembly from its housing, ensuring the non-damaging removal of wiring. Know that LED components may sometimes get hot; wait for them to cool properly when necessary.
4.5. FINAL DISASSEMBLY
At this stage, you have reached the final parts of the assembly. Some models may need disassembling down to the housing structure, which can also require additional screws to be released. 1. Clearing Remaining Parts: Identify any remaining components that need disassembly, such as motion sensors or circuit boards. Work on these elements carefully, replicating previously discussed techniques.
2. Completing the Process: Lastly, ensure all parts are labeled or organized for easy identification during reassembly. Collect all removed screws in a container to avoid loss and assist remembering their respective positions. With careful handling, you will be ready to conduct repairs or modifications needed or safely store for future use.
5. FREQUENTLY ASKED QUESTIONS
WHAT KIND OF BATTERY DO SOLAR LIGHTS USE?
Solar lights commonly employ rechargeable batteries designed for repeated charging and discharging cycles. The most prevalent types include NiMH (Nickel-Metal Hydride) and Li-ion (Lithium-Ion). NiMH batteries are favored for their durability and eco-friendly aspects, along with their ability to withstand a variety of environmental conditions. Lithium-ion batteries, on the other hand, offer higher energy densities and longer lifespans but can be more expensive.
When replacing batteries, it is advisable to ensure compatibility with the solar light type and follow the manufacturer’s specifications to maintain optimal performance. Furthermore, consulting the product manual or manufacturer’s website will provide specific guidance on selecting suitable replacement batteries. Always dispose of old batteries responsibly at designated recycling centers to minimize environmental impact.
HOW LONG DOES IT TAKE TO DISASSEMBLE SOLAR LIGHTS?
The duration required to disassemble shielded solar lights largely depends on several factors, including design complexity and individual familiarity with the process. Typically, a novice might take around 30 minutes to an hour for complete disassembly, especially if using unfamiliar tools or techniques.
Those with experience can complete similar tasks in about 15 to 30 minutes as they become proficient in recognizing component placements and techniques required for each step. Regardless of experience level, it is crucial to work methodically, ensuring each step is executed correctly to prevent parts from breaking or becoming lost. The complexity of reassembly may also be influenced by understanding how the unit was originally constructed, which can contribute to the overall time assessment for disassembly.
CAN SOLAR LIGHTS BE REPAIRED AFTER DISASSEMBLY?
After disassembly, numerous repair opportunities become available for solar lights. The most common repairs include replacing faulty rechargeable batteries, changing out broken LED bulbs, or replacing damaged wiring. By assessing the components, owners can decide whether to repair or replace individual parts.
1. Cost-Effectiveness: Often, repairing is considerably more economical than purchasing a completely new unit, particularly for high-quality solar lights. However, ensure that replacement parts match original specifications to retain functionality and compatibility.
2. DIY Repairs: Those equipped with soldering tools or fine motor skills may attempt to fix internal wiring or connections. Alternatively, individuals can contact manufacturers or specialized repair services for assistance with complex issues. Ultimately, the potential for repair exists, empowering users to maximize the lifespan of their solar lighting investment.
6. CONCLUSION
Disassembling shielded solar lights involves several specific stages, each of which warrants careful attention and methodical execution. 1. Upholding Safety: Prioritizing safety through proper tools and techniques ensures a successful breakdown of solar lights without damaging any parts. Understanding the assembly structure and utilizing appropriate equipment simplifies the tasks, making the process manageable for individuals of all skill levels.
2. Cleaning and Maintenance: Regular maintenance after disassembly can significantly enhance the efficiency and longevity of solar lights. By removing debris, replacing batteries, and inspecting components periodically, users can ensure optimal light performance. 3. Environmentally Friendly: Repairing rather than replacing solar light features can contribute to sustainability efforts, prompting conscientious use of resources.
When the need arises to conduct repairs or upgrades, knowing how to disassemble solar lights effectively is an invaluable skill. 4. Knowledge Gain: This skill not only maximizes the lifespan of the fixtures but also empowers users through knowledge, allowing them to adapt their solar lighting arrangements to various needs or preferences. Engaging in this teaching allows individuals to actively participate in the maintenance of their living environment while protecting the investment they made in solar technology.
Original article by NenPower, If reposted, please credit the source: https://nenpower.com/blog/how-to-disassemble-shielded-solar-lights/
