
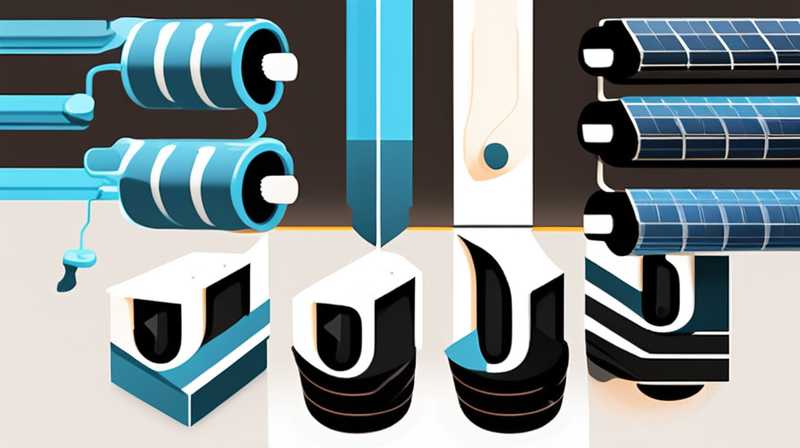
1. Disassembling solar tubes requires careful handling, specific tools, and an understanding of the system’s components, 2. Thorough instructions should be followed for both safety and efficiency, 3. Assembling involves precise alignment and sealing for optimal performance, 4. Visual guides like videos can greatly enhance comprehension of the process. Elaborating further, the disassembly phase may involve removing end caps and connectors carefully, ensuring not to damage any components, which could affect the efficiency of the solar tube upon reassembly. This highlights the necessity of following systematic instructions and having a clear visual reference.
DISASSEMBLING SOLAR TUBES
Understanding Solar Tubes
Solar tubes, also known as solar collectors or tubular skylights, are designed to harness sunlight and convert it into usable energy. These devices are commonly used for heating water or providing natural daylight indoors. The efficient design of solar tubes allows them to capture sunlight even on overcast days. Understanding their components, including the reflective inner surface, the sealing mechanisms, and the connection points, is essential before initiating disassembly.
Tools Required for Disassembly
To begin the process, several tools are necessary for a safe and efficient disassembly. A screwdriver set, adjustable wrenches, safety goggles, and gloves are essential. A multimeter may also be helpful for testing electrical components if applicable. Having the proper tools ensures that the process can be conducted smoothly without damaging any parts. The importance of using the correct tool cannot be overstated, as this minimizes the risk of accidents and promotes a thorough understanding of the system’s workings.
Safety Precautions
Prior to commencing disassembly, certain safety measures should be adhered to. Wearing gloves and safety goggles is imperative to protect oneself from sharp edges and debris. It’s equally important to disconnect the solar tube system from any power source to prevent electrifying hazards, particularly if the tubes are part of an electrical installation. Following through with safety procedures ensures a secure environment during the entire disassembly process. Therefore, being mindful of safety not only protects the individual but can also safeguard the components from potential damage.
Removing End Caps and Connectors
The initial step in disassembling solar tubes involves carefully removing the end caps and connectors. Using the appropriate screwdriver, one should unfasten any screws or fasteners securing the caps in place. Depending on the design, connectors may involve either simple clips or more complex fastening systems. If any resistance is encountered, applying gentle force in a twisting motion can help with loosening stubborn components without causing damage. Once the caps are removed successfully, it becomes much easier to access the internal structures of the solar tubes for further disassembly.
Detaching the Tubing
Once end caps and connectors are adequately removed, the next step involves detaching the tubing itself. Gently pulling on the tubing while ensuring there are no obstructions is critical. Oftentimes, the tubing will be connected to other system components, thus careful maneuvering is necessary to avoid breakage. If applicable, adhering to manufacturer-guided instructions for detaching tubes will ensure a more streamlined and effective process. At this stage, any damage done to the tubing can result in complications during reassembly.
Evaluating Component Conditions
After successfully disassembling the solar tube, the components should be evaluated for any signs of wear or damage. This evaluation process is critical for understanding whether certain parts require replacement before reassembly. Signs of corrosion, leaks, or cracks should be documented, and appropriate replacements should be obtained. This evaluation is essential for ensuring optimal performance once the tubes are reassembled. An effective evaluation will not only facilitate better functionality but also prolong the lifespan of the solar tube system.
ASSEMBLING SOLAR TUBES
Preparing for Reassembly
Once all components have been inspected, the focus shifts to the assembly of the solar tube system. Proper organization of all parts will simplify this process significantly. Lay out all components systematically, ensuring that screws, connectors, and end caps are readily accessible. Having a visual reference, such as a manual or instructional video, can significantly aid in understanding how each part fits into the overall assembly. Such forethought prepares the individual for a more structured and efficient reassembly task.
Aligning Components
In reassembly, proper alignment of components is essential for optimal functionality. Each part must be positioned accurately, particularly the tubing, which should align with existing connectors. Misalignment can result in leaks or operational inefficiencies. Gently coaxing parts into position while verifying their fit is pivotal during this stage. Additionally, examining fittings and ensuring they are clean and free of debris will enhance the sealing process, thus promoting better energy capture and utilization.
Reattaching Tubing and Fixtures
Once all parts are aligned correctly, reattaching the tubing and fixtures is the next significant step. It is crucial to ensure that connections are secure without over-tightening, which could lead to material stress. Utilizing hand pressure followed by minor adjustments with a tool ensures a firm yet gentle connection. Each component must be connected in line with the manufacturer’s recommendations to prevent operational malfunctions. These connections should then be thoroughly checked to assure no gaps exist that might hinder system efficiency.
Sealing the Components
Sealing is a vital aspect of reassembly that should not be overlooked. Using gaskets or specific sealants can help prevent air or water leaks that may occur after reassembly. These materials should be applied according to guidelines, ensuring that joints are hermetically sealed. Seal integrity cannot be compromised, as this directly affects performance. Taking time for proper sealing can help mitigate any future issues, thus preserving the investment in solar technology.
After all assembly steps are complete, conducting a series of functional tests will verify that the solar tube system operates correctly. Functionality tests may include checking for leaks, measuring temperature variations, and ensuring that energy harnessing processes are effective. Instruments such as multimeters and thermometers can be invaluable during this stage as they help gauge system performance. Identifying any discrepancies early on allows for timely corrections before deploying the system for actual use.
Final Considerations for Reassembly
Taking a methodical approach to reassembly leads to a functional solar tube system. All connections must be double-checked to ensure they are sufficient for regular use. Revisiting safety measures during tests will guarantee that all parts operate efficiently without risk. Moreover, considering the possibility of future maintenance, documenting the reassembly process might aid in more straightforward disassembly in subsequent years. Ultimately, a diligent approach ensures not only optimal performance but also fosters a greater understanding of solar technology.
FREQUENTLY ASKED QUESTIONS
WHAT TOOLS DO I NEED FOR DISASSEMBLING SOLAR TUBES?
To disassemble solar tubes, several essential tools are required for the process. A screwdriver set is crucial for removing screws that secure end caps and components. Having adjustable wrenches at hand can be beneficial for loosening nuts and bolts that may be part of the assembly. Safety equipment is equally important; goggles will protect the eyes from debris while gloves will safeguard hands from sharp edges. A multimeter is advisable if electrical connections are involved. Ensuring that all necessary tools are available before beginning will facilitate a smoother disassembly and reassembly process. Familiarizing oneself with each tool’s purpose and proper use can also minimize the potential for accidents or mistakes.
HOW CAN I ENSURE THE SYSTEM WORKS AFTER ASSEMBLY?
After reassembling solar tubes, verification of functionality is vital. To ensure the system runs as intended, conducting a range of tests is advised. Begin by checking for any visible signs of leaks around joints or connections. Monitoring temperature variations can indicate whether the tubes efficiently capture solar radiation. Additionally, it can be useful to observe the system during different times of day to assess performance variations. Having the proper instruments, such as thermometers and multimeters, will significantly enhance accuracy in testing. Should any issues arise during tests, immediate adjustment and thorough checks of connections and seals are necessary to rectify potential problems, ensuring optimal performance going forward.
IS IT SAFE TO DISASSEMBLE AND REASSEMBLE SOLAR TUBES MYSELF?
Undertaking disassembly and reassembly of solar tubes can be safe, provided proper precautions are taken. Wearing suitable safety gear, including gloves and goggles, minimizes risks associated with sharp object handling. Additionally, ensuring that the system is disconnected from any power sources prior to starting will mitigate the chances of electric shock. Understanding the mechanics of the solar system or consulting reliable manuals can enhance safe practices during the process. Moreover, if at any time one feels uncertain about performing these tasks, seeking assistance or hiring a professional is a recommended option. Thus, safety should always be the priority, especially when working with mechanical systems like solar tubes.
Bold assertions underline the importance of each phase involved in the disassembly and assembly processes of solar tubes. Ultimately, mastering this skillset not only enhances individual capability but also contributes towards a greater appreciation for solar energy technology. This knowledge equips individuals to maintain their systems effectively, thereby optimizing energy production and ensuring sustainability. Thus, the mastery of solar tube disassembly and assembly stands as a valuable competence in a progressively eco-conscious world.
Original article by NenPower, If reposted, please credit the source: https://nenpower.com/blog/how-to-disassemble-and-assemble-solar-tubes-video/
