
1. To disassemble a solar powered thermos barrel, a systematic approach is essential to effectively separate components without damage. 1. Gather all necessary tools, including a screwdriver, pliers, and a utility knife. 2. Remove external insulation carefully to avoid impairing the functionality of any attached parts. 3. Disconnect the solar panel wiring cautiously to ensure no electrical faults occur during disassembly. 4. Detach the main body sections of the barrel, ensuring each part is labeled for proper reassembly later. One critical aspect to elaborate on is the need for safety precautions; always wear safety gloves and goggles to protect against sharp edges and potential hazards from the solar components, as handling electronics can pose risks.
1. PREPARING FOR DISASSEMBLY
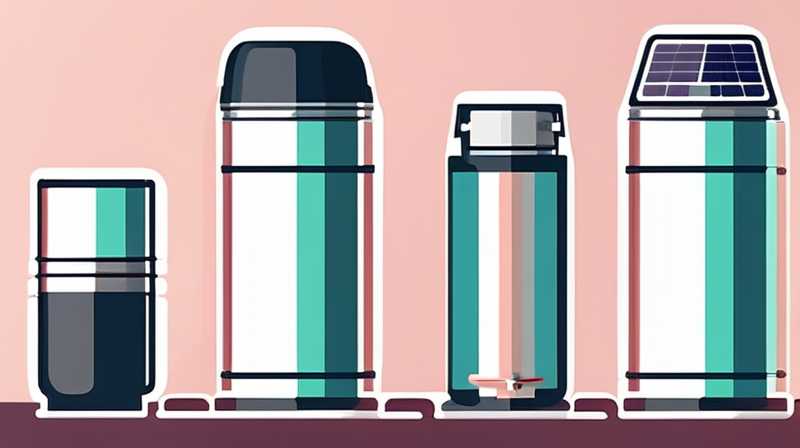
Before embarking on the task of taking apart a solar powered thermos barrel, preparation is key. Understanding the structure and functionality of the thermos barrel allows for a more efficient disassembly process. This type of barrel is designed to harness solar energy, typically featuring a solar panel, a battery for energy storage, and various insulation materials to maintain temperature.
In examining the exterior, it’s important to note that the barrel may have protective coatings or screws of different sizes. Gathering tools is a crucial step; what is needed includes a screwdriver set, pliers, a utility knife, and possibly a heat source if adhesive parts are used. Knowing the right tools will save valuable time and prevent frustration during disassembly, leaving you ready to tackle the project systematically.
2. INITIAL REMOVAL OF COMPONENTS
Commencing the disassembly process involves removing the outer insulation and protective layers. These materials may be glued or fastened tightly, so gentle but firm handling is recommended. Using a utility knife can help cautiously slice through adhesive without damaging the underlying components.
After removing the insulation, the next step is disconnecting the solar panel. This panel is critical, as it gathers sunlight to generate energy. Caution is necessary since mishandling can lead to permanent damage or electrical hazards. Use pliers to gently wiggle connectors free, ensuring that no wires are torn or frayed. The solar panel’s integrity is paramount for future use, so preserving its condition should be a priority in this phase.
3. DISASSEMBLING THE INTERIOR COMPONENTS
With the outer parts successfully removed, attention turns to the internal elements of the thermos barrel. Inside, you’ll find the battery, internal insulation, and possibly additional electronic components that facilitate the solar technology. Carefully note how these elements are connected to ensure they can be properly reassembled later.
Start with the battery unit; it may be secured with screws or clips. Carefully detach it from its housing, making note of the wiring connections. This process should be approached with the utmost caution, ensuring that any residual charges are safely managed. Once the battery is extracted, examine how internal insulation is layered. It may be necessary to cut through adhesive if it’s tightly fitted.
4. ORGANIZING REMOVED PARTS
As components are removed, organization becomes vital. Set aside sections in clearly labeled containers or bags to maintain clarity on what has been taken apart. This organized approach not only facilitates ease during reassembly but also ensures no pieces are lost in the interim.
A methodical layout of parts allows a smoother transition to either reassembling the barrel or using the parts for other projects. Taking photos during disassembly can be beneficial, serving as a visual reference. By carefully documenting this process, one can ensure that when it comes time to put everything back together, there is a clear pathway to follow.
5. TROUBLESHOOTING COMMON ISSUES
Disassembling a solar powered thermos barrel may sometimes lead to complications. With electronics involved, it’s not uncommon to encounter stubborn screws that refuse to budge. Apply gentle pressure and consider using penetrating oil on screws if they appear rusted or stuck.
Additionally, if any parts appear to be damaged during removal, assess the extent of the damage before proceeding further. Having a backup plan for replacements or repairs can save time in the long run. It’s crucial to remember that safety should be prioritized; if an electrical system gives any indication of shorting or potential danger, cease all disassembly efforts until a qualified technician can intervene.
6. REASSEMBLY GUIDELINES
After successfully taking apart the solar powered thermos barrel, reassembly becomes the focus. Having developed a clear understanding of how each component fits together will facilitate a seamless reconstruction. Reference materials and photos taken during disassembly can significantly aid in this stage.
First, reconnect the internal components, starting with the battery. Ensure that all connections are snug and secure to promote functionality once the barrel is used again. Following this, reinsulate the internal areas, making sure there are no exposed wires or gaps that could lead to heat loss or inefficiency.
7. MAINTAINING SOLAR PANELS
After reassembling the thermos barrel, consider the long-term maintenance of solar panels. Regular cleaning and examination of the solar panel will enhance energy collection efficiency. Dust and dirt can obstruct sunlight, leading to diminished performance. A straightforward cleaning routine involves wiping down the surface with a damp cloth, taking care to avoid abrasive cleaners that could scratch the surface.
Consider checking wiring for wear and tear every few months as well. Maintaining all components, including ensuring battery health and connection stability, will contribute to a longer lifespan for your thermos barrel. Engaging in preventative care is essential for maximizing functionality.
FAQs
HOW OFTEN SHOULD THE SOLAR PANEL BE CLEANED?
Regular cleaning of a solar panel is recommended to maintain optimal performance. Every one to three months, depending on the local climate and environmental conditions, is a good target frequency. Accumulated dust, leaves, and grime can significantly reduce solar efficiency, as these obstructions limit sunlight exposure.
Using a soft cloth or sponge with plain water usually suffices for cleaning. However, for areas with particularly stubborn residues or heavy pollution, a mild detergent may be utilized. Avoid using abrasive materials that could scratch or damage the panel surface. Finally, ensure safety is prioritized, especially when cleaning panels located in elevated positions.
CAN REPAIRED SOLAR COMPONENTS BE RELIABLE?
Yes, repaired solar components can be reliable if handled correctly. The essential factor in maintaining reliability after repair is ensuring quality parts and connections are utilized. Using original manufacturer components or high-quality replacements will significantly improve performance consistency and durability.
Moreover, it’s important to ensure that the repair itself is conducted accurately, following proper guidelines. Regular maintenance checks are also advisable following repairs, as they can reveal any potential issues early, allowing for timely interventions. With conscientious care, repaired solar elements can function effectively for many years.
WHAT SAFETY MEASURES SHOULD BE FOLLOWED?
Safety during the disassembly and reassembly of a solar powered thermos barrel is paramount. Wearing protective gear such as gloves and goggles is essential to guard against cuts and electrical hazards. Additionally, ensuring that the device is fully powered down and discharged before working on it prevents shocks or short-circuits.
During the disassembly, one must avoid forcing components apart, which can create sharp edges or break parts. Always work in a well-lit, clutter-free space to minimize accidents and ensure ease of access to tools. Following these measures establishes a safer environment throughout the entire process.
After meticulously addressing the disassembly of a solar powered thermos barrel, several key takeaways emerge. Careful planning and preparation set the foundation for a successful undertaking. By employing the right tools and adopting a methodical approach, individuals can separate components efficiently, preserving their functionality for future use or reassembly. Organized meticulousness during the process facilitates a seamless transition between disassembly and reassembly, ensuring that tracked parts are readily accessible. Understanding the nuances of both the barrel’s solar technology and general electrical safety broadens an individual’s capacity for maintenance practices. By remaining committed to regular upkeep, functionality can be maintained effectively over time. In summary, through diligent preparation, organization, and ongoing maintenance, one can successfully navigate the intricacies of disassembling and reassembling a solar powered thermos barrel, leading to enhanced longevity and performance of the device.
Original article by NenPower, If reposted, please credit the source: https://nenpower.com/blog/how-to-disassemble-a-solar-powered-thermos-barrel/
