
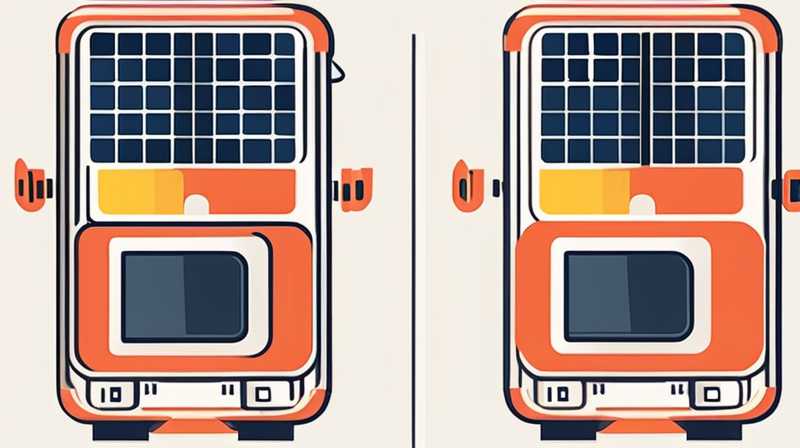
To disassemble a solar-powered three-blade ventilator, one must follow a systematic approach to ensure safety and efficiency throughout the process. 1. Gather necessary tools, 2. Disconnect power source, 3. Remove outer casing, 4. Detach fan blades, 5. Take apart motor assembly are crucial steps that need careful execution. To elaborate further, ensuring safety by disconnecting the power source is paramount; any accidental short-circuit or electrical shock can lead to severe injuries. Before commencing disassembly, ensure the work area is clean and well-lit, and all required tools are within reach.
1. SAFETY PRECAUTIONS
When handling electrical devices such as solar-powered ventilators, maintaining safety should be the foremost priority. Start by ensuring the device is completely powered down and disconnected from its solar panel. This prevents any accidental activation while disassembling.
Using personal protective equipment (PPE) like insulated gloves and safety goggles is advisable. These precautions help protect individuals from potential electric shocks or debris that may arise during the disassembly process. Additionally, ensuring the workspace is free of clutter minimizes risks.
Thoroughly read any accompanying manuals that provide guidance specific to the model in question. Being informed about the components will aid in reducing mishaps during the procedure. Safety cannot be overstated—making informed decisions adds layers of protection against accidents.
2. GATHERING TOOLS AND MATERIALS
Preparing the right set of tools is critical before embarking on disassembly. The requisite tools generally include screwdrivers, pliers, a multimeter, and possibly a socket set. Each tool plays a specific role in achieving a successful disassembly. For instance, screwdrivers facilitate the loosening of screws that hold parts together, while pliers can help in gripping winding or tight components.
A multimeter may be required to confirm that no power is circulating through the device when disconnecting the power source. It’s advisable to have a clean surface to lay down all components as they are removed. Keeping organized will simplify the later reassembly process and ensure no parts are lost. Having a user manual or schematic can be very beneficial for identifying how the parts are structured, enhancing understanding of the assembly.
3. DISCONNECT POWER SOURCE
Prioritizing energy disconnection is vital in the disassembly of the ventilator. Always start by disconnecting the solar panel from the regulator or battery, as this ensures all electrical connections are inactive. After ensuring that the power source is inactive, check with a multimeter to ascertain the absence of voltage. This extra step is essential, as any residual energy can cause unwanted incidents.
Additionally, it is prudent to examine any possible hidden connections within the device. Solar-powered ventilators often contain intricate wiring that can be deceptively complex. Ensuring that these connections are fully deactivated guarantees a safer and smoother disassembly.
Once the power source is confirmed as disconnected, you can confidently proceed to the next steps. This foundational action sets the tone for an efficient disassembly process, minimizing risks of accidents associated with electrical currents.
4. REMOVING THE OUTER CASING
Once the power disconnection is successfully executed, the next step involves removal of the outer casing that encases the internal components. This casing is usually secured with a series of screws or fasteners. Using the appropriate screwdriver, carefully detach these screws without applying excessive force—they can strip or break. Place the screws in a separate container to keep them organized and avoid misplacement.
When the screws are fully removed, gently prize open the outer casing. Be vigilant during this step, as internal components may still be precariously attached and might require careful handling. Employing a plastic pry tool can help prevent scratching or damaging the casing or internal parts. This phase lays bare the structural layout of the vent, enabling access to the fan blades and motor.
At this stage, ensure that the area you are working in is still secured against accidental power connections as the interior of the device is now accessible. A thoughtful approach ensures the integrity of components, making subsequent steps easier.
5. DETACHING FAN BLADES
With the outer casing now removed, the next intention focuses on detaching the fan blades, which are integral to the device’s functionality. Typically, these blades are secured to the motor shaft via a central nut or bolt. Employing the correct size wrench or socket tool, carefully unscrew these fasteners.
As you unfasten the blades, make sure to support them. They can be somewhat heavy and may fall if not securely held. Once the fasteners are completely removed, gently lift off the blades from the motor shaft. It’s advisable to take note of where and how the blades attach to avoid confusion during reassembly.
Following blade removal, inspect them for damage or wear. This inspection could provide insights regarding performance issues, helping to make informed decisions on repairs or replacements. Being methodical in this approach ensures that each component retains its functionality upon reinstallation.
6. TAKING APART THE MOTOR ASSEMBLY
The core motor assembly is often the heart of the solar ventilator’s function, containing essential components like the rotor and stator. To access the motor, you will often need to remove additional screws, ensuring that you keep track of their locations. Removing the motor housing safely is pivotal, as it encloses the intricate parts critical for the ventilator’s operation.
Upon disassembly of the motor housing, check for any wear indicators such as burnt smells or discoloration that might suggest overheating or electrical faults. Identifying these early can mitigate future challenges.
It’s essential during this phase to handle each component with care. Some mechanical parts may be delicate and could easily break if mishandled or dropped. Maintaining a steady pace and ensuring each component’s safety leads to successful disassembly and subsequent reassembly when necessary.
7. ASSESSING COMPONENT INTEGRITY
After disassembly, it’s prudent to perform a thorough examination of each component. Assessing each piece ensures that any damaged or worn-out parts are identified before reassembly or repair efforts begin. Begin with the fan blades, checking for any chips or cracks that could affect efficiency.
Next, move on to inspecting the motor and its peripherals. Look for signs of corrosion, wear on electrical connections, and ensure that pads or insulation appear intact. Each detail can significantly impact performance; thus, being meticulous in scrutiny becomes essential.
Also, take the opportunity to clean components as necessary. Dust and debris accumulation can hinder efficiency and lead to overheating. Cleaning can prolong the lifespan of the ventilator. After thorough inspection and cleaning, organization of parts into categories—functional, repairable, and discardable—will streamline reassembly processes.
8. REASSEMBLY TIPS
With disassembly complete, focus should shift to how to best reassemble the solar ventilator. Reassembly should mirror the disassembly process, tracking each component’s original position. Refer back to any photographs or diagrams you may have taken throughout the process. This visual documentation ensures accuracy in restoring the device to its original state efficiently.
Begin the reinstallation with the motor assembly. Ensure all electrical connections are secure and fitting snugly into their respective slots. Once the motor is securely attached, reattach the fan blades, ensuring they’re aligned correctly.
When reinstalling the outer casing, make sure it seals properly to protect interior components from environmental factors. Go back over each screw or fastener, ensuring they are all highly tightened but not over-constricted. This attention to detail serves as a final safeguard against future malfunctions and enhances overall functionality.
FREQUENTLY ASKED QUESTIONS
WHAT TOOLS DO I NEED TO DISASSEMBLE A SOLAR POWERED 3-BLADE VENTILATOR?
To effectively disassemble a solar-powered ventilator, one must coordinate a selection of proper instruments. Required tools typically include: 1. Screwdrivers for loosening screws, ideally Phillips and flat-head ones; 2. Pliers to grip, twist, and maneuver components; 3. A multimeter for verifying electrical status during safety checks; 4. A socket set, if necessary, for any nut fittings that may hold parts together. Each tool is designed to facilitate specific tasks in the disassembly process, ensuring ease of access and minimizing damage.
Notably, it’s vital to use insulated tools whenever working with electrical components to avoid mishaps. Furthermore, it may be handy to keep a magnifying glass at your disposal, especially if there are small parts that may be hard to see clearly. Maintaining an organized workspace and having a methodical approach toward your tools ensures that the disassembly process is efficient and effective.
HOW CAN I ENSURE SAFETY DURING DISASSEMBLY?
Safety should be paramount when engaging in the disassembly of electrical devices. Firstly, verify that the unit is powered down completely by disconnecting it from its solar panel, ensuring no current can accidentally flow while working on the device. Additionally, utilizing personal protective equipment (PPE) such as insulated gloves and safety goggles is advisable, protecting against electrical shocks and debris.
Secondly, a well-organized workspace can help eliminate trip hazards or accidental contact with live wires. It’s prudent to have a clean table or bench where all parts can be laid out methodically. This approach will assist in keeping track of small components during disassembly, also facilitating a smooth reassembly process.
Regularly inspecting tools for damage before use is also essential. If any tool appears unsafe or worn, it should be replaced. Observing these practices can go a long way in ensuring a successful and injury-free disassembly endeavor.
HOW LONG DOES IT TAKE TO DISASSEMBLE A SOLAR POWERED VENTILATOR?
The length of time required to disassemble a solar-powered ventilator can vary substantially based on several factors. Primarily, familiarity with the device’s construction plays a role; individuals experienced in such disassembly can complete the process in approximately 1-2 hours, while newcomers may take longer, possibly up to three hours or more, as they familiarize themselves with each component’s functionality.
Moreover, the model of the ventilator is another influencing factor. Some models may have intricate assembly configurations, requiring numerous steps, while others might be simpler, enabling quick disassembly. Factors like environmental conditions can also influence the process—working outdoors in poor weather could slow things down significantly.
Ultimately, taking your time to ensure each step is correctly executed is more beneficial than rushing, as this lowers the risk of errors or damage. Allocating sufficient time to study the construction beforehand and ensuring a methodical approach will streamline the disassembly process.
Taking apart a solar-powered three-blade ventilator necessitates a meticulous, well-planned approach to ensure safety and functionality. Each step carries significance, from understanding essential safety precautions to gathering the right tools, securely disconnecting the power supply, removing the outer casing accurately, detaching the fan blades, and assessing the integrity of all components. Thoroughly examining parts after disassembly is equally crucial to guarantee they are functioning optimally upon reassembly. Thus, maintaining a systematic approach allows users to not only carry out disassembly efficiently but also prepares them for potential reassembly or repairs down the line. Each stage’s precision ensures a smooth transition from assembly back to functionality, preserving the sustainability ethos of solar-powered devices. By prioritizing safety, organization, and methodical actions, users can navigate the disassembly of a ventilator comfortably and effectively, ensuring its operational efficacy long into the future.
Original article by NenPower, If reposted, please credit the source: https://nenpower.com/blog/how-to-disassemble-a-solar-powered-3-blade-ventilator/
