
1. Disassembling a solar drain requires precision and careful handling of its components.
2. Preparation is crucial, involving the gathering of necessary tools and safety gear.
3. Documentation and understanding of the unit’s assembly will facilitate the disassembly process.
4. Technical knowledge about the solar drain system is important for efficient dismantling.
5. After disassembly, proper storage and labeling of parts ensure easy reassembly and maintenance in the future.
INTRODUCTION TO SOLAR DRAINS
Solar drains consist of complex systems designed to utilize solar energy for various applications, including water drainage and heating. Disassembling these devices is not only a matter of need but also a journey into understanding their intricate components. Before embarking on this task, it is essential to grasp the significance of each part and how they interrelate. The following sections will delve deeply into the methods, precautions, and techniques necessary to successfully dismantle a solar drain.
As solar technology continues to advance, the need for maintenance and repairs increases. Disassembling a solar drain can help in diagnosing issues, performing upgrades, or simply replacing worn-out parts. Thus, this document serves as a guide to assist individuals who may find themselves needing to take apart a solar drain system.
PREPARATION BEFORE DISASSEMBLY
In any disassembly process, preparation acts as a vital step that often determines the ease and success of the operation. This phase encompasses gathering necessary tools, ensuring safety, and understanding the solar drain’s layout.
GATHERING TOOLS AND EQUIPMENT
Choosing the right tools is imperative for a smooth disassembly experience. Common tools required include screwdrivers (flathead and Phillips), wrenches, pliers, and potentially a power drill. Having a complete toolkit at hand minimizes disruptions during the task. Each tool serves a unique purpose, ensuring that each component of the solar drain can be handled correctly without causing damage.
Additionally, a workbench or flat surface to place the solar drain while disassembling can significantly ease the workload. The organization of tools likewise ensures that the process remains efficient and orderly. Furthermore, obtaining safety gear such as gloves and goggles will protect against injuries, especially when handling sharp or heavy parts.
SAFETY PRECAUTIONS
Safety should never be underestimated, particularly when dealing with electrical components and potentially hazardous materials. Ensure that the solar drain is completely powered down before starting any disassembly. Unplugging the system from its electrical source is essential to prevent electrical shocks.
Moreover, be aware of any sharp edges or heavy components that could cause physical harm. Wearing gloves protects the hands from cuts, while safety glasses shield the eyes from debris. Taking time to think through safety measures before disassembling can save much trouble later on.
UNDERSTANDING THE SOLAR DRAIN SYSTEM
A comprehensive understanding of how the solar drain operates is essential for disassembly. Analyzing the layout and functionality of each component will provide clarity and facilitate the dismantling process.
COMPONENT OVERVIEW
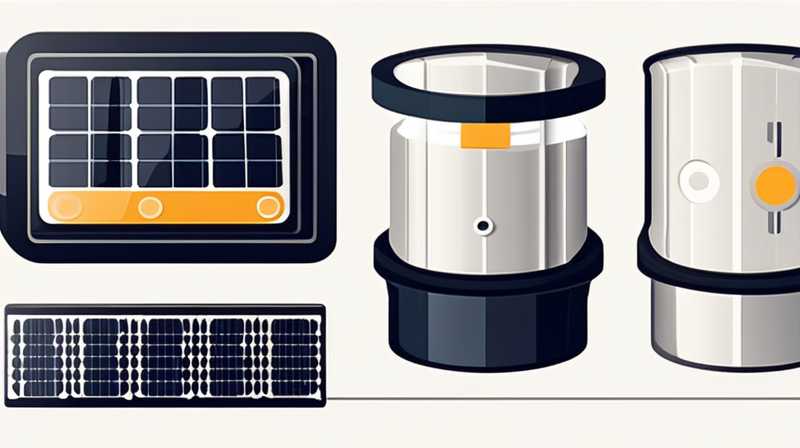
Solar drains typically consist of panels, pumps, piping, valves, and control units. Each component plays a critical role in the overall system’s functionality. Solar panels capture sunlight and convert it into energy, while pumps move the collected water. Understanding the purpose of each part aids in disassembling the system methodically.
It is also beneficial to document where each component is located and any wiring configurations present. This observation will be invaluable if the need arises for reassembly or repairs later. A diagram or photographs may be useful visual aids, ensuring that no detail is overlooked during this critical phase of disassembly.
INTERNAL WORKINGS
Delving deeper, the internal mechanisms of the solar drain reveal how intricately the components interact. Most models operate with a water reservoir connected to the solar panel and pump systems. Understanding how water flows through this system is crucial for reassembling correctly. Recognize that any obstruction in piping could potentially lead to significant problems later, making careful observation necessary during disassembly.
Familiarity with these workings can also help identify any potential issues during the dismantling process. For instance, if there are signs of leakage or rusting, it may require immediate attention or replacement parts. Acknowledging these intricacies empowers the disassembler with knowledge and ensures thoroughness.
STEPS TO DISASSEMBLE A SOLAR DRAIN
The actual disassembly of a solar drain involves a series of methodical steps designed to maximize efficiency while minimizing damage. Following these procedures closely will yield the best results.
REMOVING EXTERNAL COMPONENTS
The first step typically involves the disconnection of any external attachments such as pipes, tubes, and mounting brackets. Beginning with the pipes, use the appropriate wrench to loosen any fittings without forcing them, which could lead to cracking or breaking. Always label each piece according to its removal order; this practice will simplify reassembly.
Once the pipes are detached, focus on the mounting brackets that secure the solar panel to its base. These brackets are often made of metal, thus ensuring careful handling will avoid unnecessary wear or bending. Detaching these elements requires specific tools, and ensuring they are unscrewed fully is crucial to removing the solar panel without causing damage.
TAKING APART THE SOLAR PANEL
With external elements removed, attention can shift to the solar panel itself. It is essential to understand that solar panels consist of multiple layers, including protective glass and several photovoltaic cells. Using a flat head screwdriver, carefully pry away any fastened seals without damaging the glass surface. This step requires caution, as breaking the glass can lead to hazardous situations.
Upon successfully removing the glass covering, gently handle the photovoltaic cells, as they are delicate and susceptible to fractures. A soft cloth or anti-static grip can provide additional padding while handling these components. It is advisable to document each step visually, as this will support information gathering for reassembly.
Dismantling Internal Mechanisms
With the external parts dismantled, it’s time to delve into the internal structure of the solar drain system. This phase is particularly intricate as it includes the pump, reservoir, and electrical components.
DISCONNECTING THE PUMP SYSTEM
The pump is a crucial component responsible for transferring water within the system. To safely disconnect the pump, identify its connection points and unscrew any fixed fittings around it. A socket wrench is usually effective for such tasks.
Once the fittings are unfastened, removing the pump requires simultaneous attention to any attached electrical wiring. Always make sure to double-check that power is disconnected before handling these wires. Safely label the wires and connectors so that they can be easily reattached during reassembly.
HANDLING THE ELECTRICAL COMPONENTS
Ensuring proper care with the electrical aspects of the solar drain unit cannot be overstated. Understanding how to safely disconnect these components is essential in preventing damage. Always use insulated tools to avoid any accidental shocks, and remove electrical connectors gently. If necessary, take photographs of the wiring layout as a reference for putting it back together.
Once all electrical components have been safely removed, inspect each part meticulously for wear or damage. Identifying issues at this stage allows for timely repairs instead of waiting until reassembly occurs.
REASSEMBLY PREPARATION
After successfully disassembling the solar drain system, the focus shifts to preparing for reassembly or storage. This part is critical for maintaining the integrity of the system and minimizing the risk of future problems.
ORGANIZING COMPONENTS
Proper organization of disassembled components greatly eases the reassembly process. Each part should be carefully cleaned, inspected, and labeled according to its original positioning within the system. Using designated containers for screws, nuts, and bolts can minimize the chances of losing parts.
Additionally, keeping a detailed log of the removal process will help in understanding the order of reassembly. This organized approach fosters efficiency, reducing the time spent searching for parts when you are ready to put everything back together.
CREATING A REASSEMBLY PLAN
Establishing a step-by-step plan for reassembly enhances clarity and directs the workflow. This plan should encompass the simplest tasks first before progressing to more complicated reattachments, which involve electrical wiring or securely fastening panels. Visual aids, like diagrams or photographs taken during disassembly, significantly aid in reestablishing the original structure.
The reassembly phase is often much easier when approached systematically. A well-structured plan assists in avoiding unnecessary errors and ensures each component is aligned and connected correctly.
COMMON CHALLENGES DURING DISASSEMBLY
Disassembling any complex system presents its own set of challenges. Being aware of common obstacles can prepare an individual for overcoming these hurdles effectively.
BREAKAGE AND DAMAGE
One of the prevalent challenges is the potential for component breakage during disassembly. Broken parts such as the solar panel or pipes may occur if improper tools are used or excessive force is applied. To mitigate this risk, patience is crucial—taking your time to understand the components will help in avoiding haste that leads to damage.
Additionally, using the correct tools plays a significant role. Relying on makeshift tools can lead to squeezing or crushing components, causing irreversible damage. Ensuring the use of the appropriate equipment and taking a meticulous approach can significantly diminish the chances of broken parts.
LOSS OF SMALL PARTS
A common problem encountered is the misplacement or loss of smaller components during disassembly. This situation can become frustrating, particularly when the reassembly requires specific screws or fittings that are no longer available.
To combat this issue, proactive labeling and organization are key. Allocating different containers or zip bags for various parts can help in recalling their respective locations. Furthermore, maintaining a dedicated workspace that is clear of distractions can minimize the likelihood of losing essential components.
MAINTENANCE AFTER DISASSEMBLY
Upon either reassembling or storing the solar drain’s components, an essential next step involves implementing maintenance practices. These practices ensure the system remains in good working order for future use.
REGULAR INSPECTIONS
Regular inspections serve as a preventative measure against future breakdowns. Each inspection should include checking the physical state of all components, including visible wear or signs of fatigue. Identifying potential issues early can save substantial time and resources later.
Importantly, keeping an eye on the electrical connections and ensuring their integrity is vital for the overall functionality of the system. It’s advisable to carry out routine clean-ups to prevent dust and grime from accumulating, which can degrade performance over time.
UPDATING COMPONENTS
To ensure efficiency, consider periodically upgrading certain components of the solar drain, particularly if newer technologies or options are available, such as more efficient pumps or advanced sensors. Implementing updates can yield significant improvements in water flow and overall system operation.
Researching advancements in solar technology and embracing those changes can also enhance sustainability and efficiency. Engaging in continuous learning about innovations in the field can result in a significant positive impact on the effectiveness of the solar drain system.
FAQs
HOW LONG DOES IT TAKE TO DISASSEMBLE A SOLAR DRAIN?
The duration required to disassemble a solar drain can vary depending on several factors, including the complexity of the system, the level of expertise of the individual performing the task, and the tools readily available. On average, a straightforward disassembly may take approximately two to five hours. Individuals who are proficient in working with similar systems may complete the task on the shorter end of this scale. Conversely, those unfamiliar with the intricacies of solar drainage systems may require additional time to familiarize themselves with each component.
Moreover, taking breaks to ensure safety and precision can also extend the period needed for disassembly. It is important to avoid rushing, as haste may lead to missing steps or damaging components, ultimately increasing the time required for future reassembly. Alleviating this pressure can foster a more careful and considerate approach.
WHAT TOOLS ARE NEEDED FOR DISASSEMBLY?
A variety of tools are essential for the safe and effective disassembly of a solar drain. At a minimum, individuals should have access to screwdrivers (both flathead and Phillips types), a set of wrenches for loosening nuts and bolts, pliers for gripping, and possibly a power drill for removing stubborn screws. Having these primary tools ensures that each component can be effectively detached without undue stress.
In addition to standard hand tools, safety equipment including gloves and goggles is crucial for ensuring the safety of the disassembler. A designated workbench can also prove valuable, providing ample space to organize tools and components during the disassembly process.
Moreover, accessory tools like a utility knife or a soft cloth for cleaning can enhance overall efficiency. Assembling a comprehensive list of required tools before commencing indicates preparedness and organization, laying the groundwork for a smooth disassembly experience.
HOW CAN I ENSURE PROPER REASSEMBLY?
To facilitate successful reassembly after disassembling a solar drain, several strategies can be employed. Taking photographs or making diagrams during disassembly clearly illustrates the layout of components, allowing a point of reference when putting everything back together. Labeling parts and hardware as they are removed can also significantly alleviate confusion during reassembly.
Utilizing a step-by-step reassembly plan helps one to remain organized and focused, encouraging systematic rebuilding without overlooking crucial connections. Taking the time to meticulously follow these guidelines ensures that the solar drain will be reinstated correctly and function efficiently.
In addition, consulting manufacturer’s manuals or guidelines can provide valuable information regarding specific requirements for each component. Engaging in this thorough preparation fosters confidence and assurance of a successful reinstallation.
REINFORCING DISASSEMBLY PROCESSES AND REQUIRED RESOURCES
Ultimately, the nuances of disassembling a solar drain encompass significant attention to detail, understanding, and planning. By taking a methodical approach that involves careful preparation, knowledgeable recognition of components, and ongoing maintenance, individuals can navigate the disassembly process effectively. Ensuring familiarity with each stage minimizes risks associated with mistakes or loss of parts.
Being organized, along with employing safety measures, enhances the overall experience and outcome. The work involved might seem daunting at first glance, yet mastering these techniques opens doors to not only repairs and maintenance but also augmenting one’s comprehension of solar technology.
Efforts put into disassembling and reassembling a solar drain ultimately reflect the commitment towards environmental sustainability and efficient resource use. Thus, embarking on this endeavor not only addresses immediate functional needs but also promotes broader ecological conscientiousness.
Original article by NenPower, If reposted, please credit the source: https://nenpower.com/blog/how-to-disassemble-a-solar-drain/
