
1. Begin by gathering necessary tools such as a screwdriver or pliers, which are essential for disassembling, 2. Take precautions by ensuring the solar light is turned off and disconnected from any power source if applicable, 3. Identify components, including the lens, housing, and solar panel, facilitating easier disassembly, 4. Carefully detach the lens from the bulb, often secured with clips or screws, to avoid damage, 5. Unscrew or unclip the solar panel, accessing the inner wiring and battery, 6. Remove all internal elements, including the LED and circuit board, taking note of their arrangement for reassembly, 7. Clean the components with appropriate materials before reassembly, enhancing functionality and longevity.
DISASSEMBLING THE SOLAR LIGHT BULB
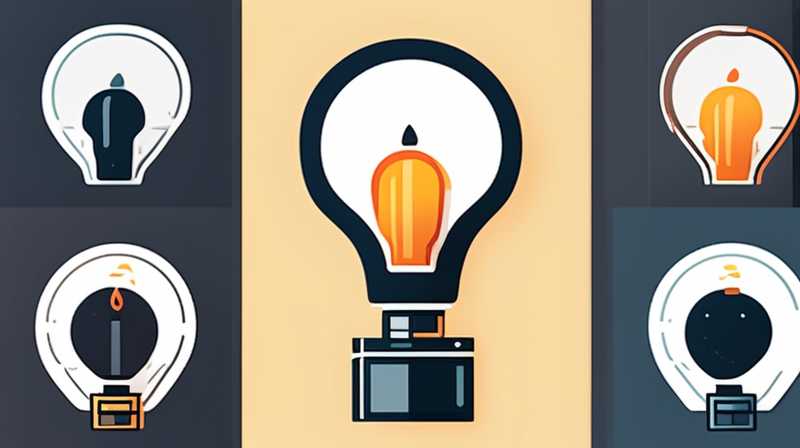
Understanding the Construction: A Detailed Overview
The disassembly process of a small round solar light bulb necessitates a comprehensive understanding of its structure. Most commonly, these bulbs comprise several fundamental components: the transparent lens, the solar panel, the LED emitter, battery, and sometimes, a circuit board that regulates the electrical flow. Recognizing these elements is crucial as it enables an efficient and careful separation of parts without inflicting damage. Typically, the outer casing is designed to resist environmental elements, thus safeguarding the internal components from deterioration.
Moreover, different manufacturers might use varying methods of construction, such as different types of adhesives or locking mechanisms. Therefore, it’s advisable to closely observe how the pieces fit together before initiating the disassembly process. Carelessness can lead to breakage or loss of functionality in subsequent repairs or replacements. An exploratory examination can also reveal whether specific tools would be required, such as a specialized screwdriver for screws that may not be standard. This investigative step is vital in ensuring a smooth operation throughout the disassembly process.
Tools Required for Disassembly
Before embarking on the disassembly journey, assembling the right tools is essential. This venture will generally include a flathead screwdriver, Phillips screwdriver, and a pair of pliers. Each of these tools serves a specific purpose; for instance, the flathead screwdriver helps pry off any stubborn lenses while the Phillips screwdriver is needed for screws that may secure the solar panel or housing. Additionally, having a work surface that is clean and well-lit will make locating small parts, such as screws or clips, easier.
Another useful tool is a multimeter, which can help measure the voltage of the battery and assess functionality after reassembly. Wearing safety goggles is also advisable to protect your eyes from any debris that might dislodge during the disassembly process. The commitment to using the correct tools and practicing safety precautions substantially lowers the risk of accidents and enhances overall efficiency during this operation.
PROCEEDING WITH DISASSEMBLY
Powering Off and Disconnecting
Prior to initiating any disassembly action, it is crucial to ensure that the solar light bulb is powered off. If the light operates on batteries, it is prudent to remove the batteries to mitigate potential electrical hazards. For solar lights that connect to a chamber or outdoor fixture, disconnecting from the assembly prevents unintended activation. If in doubt about operational status, waiting a day after last use can provide additional safety.
After powering off, examine the base of the light bulb. Most designs feature a simple connector that secures the bulb to a mounting bracket, which may require a twisting action or a gentle pull to release. Ensuring it is properly disconnected minimizes stress on the wires during the disassembly process. This step is critical not only for personal safety but also for maintaining the components’ integrity.
Identifying Fasteners and Components
With the device switched off, it’s time to meticulously assess how the various components interact and their respective securing mechanisms. Most solar lights use a combination of screws and clips to hold the lens in place. Recognizing whether the lens is attached with clips or screws will facilitate an easier removal process. If clips are present, a gentle upward pressure should allow them to pop out without causing damage.
For lights that utilize screws, employing the correct screwdriver is paramount. A mismatch may strip the screws, complicating future removal. Carefully unscrewing the fasteners allows for the next layer of disassembly to become visible, typically consisting of the solar panel and inner workings of the bulb. A methodical approach during this phase ensures that each component can be accounted for when reassembling later.
DIVING INTO COMPONENT REMOVAL
Removing the Lens and Accessing Internal Parts
Once the securing methods have been addressed, focus shifts to removing the lens from the main body. In most cases, the lens will snap off after unlocking the fasteners, either by pulling gently or with the help of a flathead screwdriver. Taking care to safeguard the lens from scratches or breaks during its removal is essential; if broken, replacements can be difficult to source.
After removing the lens, you will expose the solar panel, which typically rests atop the bulb assembly. In situations where screws secure the solar panel, these need to be addressed prior to removal. Gently lift or unclip the panel to prevent damage to the wiring attached to it.
Accessing the Battery and LED Configuration
With the solar panel detached, attention needs to turn toward the battery and LED components. The battery can usually be found resting in a compartment of the bulb assembly, connected via wires leading to the circuit board. Careful detachment of these wires is necessary to avoid short-circuiting. When removing the battery, observe the type it is (for example, NiMH or lithium), as replacements will need to match these specifications.
The LED should be next on the list for removal, usually secured by wiring or a small socket. Identifying the connection mechanism involves examining the specific type of LED used, as they can vary from soldered connections to connector-based fixtures. Once the LED is free, you can assess it for functionality and cleanliness.
CLEANING AND PREPARING FOR REASSEMBLY
Cleaning Components Before Reassembly
After disassembly, it’s always beneficial to clean the components thoroughly. Dust, dirt, and residues can accumulate, affecting the performance over time. Using a microfiber cloth and a gentle cleaning solution will help avoid scratching surfaces. It’s advisable to avoid submerging electrical components in water. A careful wipe-down of the solar panel, lens, and housing allows for optimal reassembly.
Moreover, the internal areas can often attract debris or moisture. A soft brush can assist in dislodging trapped particles, particularly around sensitive areas like the circuit board and connections. This ensures that upon reassembly, each component will fit together neatly without hindrances caused by obstructions, thereby improving conductivity and functionality of the solar light.
Checking Functionality of Each Part
Once cleaning is complete, the next step is to check the functionality of various components. Using a multimeter can help assess battery life, which is an important indicator of whether the solar light is operational. Testing the LED for emission of light ensures that this primary feature will function when reassembled.
Taking the time to verify each part’s functionality mitigates the risk of a malfunctioning solar bulb after completion of the disassembly. Troubleshooting any issues before reassembling simplifies the correction process, making it less tedious in subsequent tests.
SAFELY REASSEMBLING THE SOLAR LIGHT BULB
Reconnecting All Components Carefully
Once all parts have been cleaned and tested, the reassembly journey can begin. Starting with the LED, carefully reinsert it into its designated position, ensuring the connections are secure without overexerting pressure, which could damage the fixture. Taking notes from the disassembly phase or capturing photos enhances accuracy during this procedure.
Next, the battery should be positioned back into its compartment, again ensuring that the wires are correctly connected. Following this, the solar panel must be replaced, secured in a manner that it will remain intact against weather conditions. Each component should fit snugly but not be forced, alleviating the risk of stress fractures or improper seals.
Final Placement of the Lens and Testing the Light
The last piece to place will be the lens. Aligning it properly with any clips or screw holes is vital; the lens should seat back into position with ease. After securing the screws or snapping the clips into place, a visual inspection can confirm that each component is well-fitted and appears structurally sound.
To finalize, before re-setting the light into its original position, an operational test is critical. Reconnecting the power source or replacing the batteries will help determine if everything functions as intended. If all elements light up correctly, successful disassembly and reassembly have been achieved.
FREQUENTLY ASKED QUESTIONS
WHAT KIND OF TOOLS DO I NEED FOR DISASSEMBLY?
When disassembling a small round solar light bulb, certain tools are essential for efficient operation. Typically, one will require a flathead screwdriver and a Phillips screwdriver to tackle the fasteners effectively. Depending on the model, pliers might also be beneficial for gripping and pulling tough components apart. In addition, having a multimeter can assist in checking battery voltage for functionality post-disassembly. Ensuring your workspace is adequate and organized, with good lighting, will enable you to keep track of small screws and parts that might easily be misplaced. Focusing on using the appropriate hand tools not only simplifies the disassembly but enhances safety throughout the process.
HOW CAN I AVOID DAMAGING COMPONENTS DURING DISASSEMBLY?
Preventing damage during disassembly revolves around a progressive and attentive approach. Begin by comprehensively understanding the components involved in the assembly. Avoid using excessive force when unscrewing or unfastening elements; rather, gentle manipulation is key. Invest time in identifying how each part connects and segregates, then apply the required technique accordingly. Furthermore, cleaning components gently, especially the lens, can prevent scratches. Always keep in mind that some components may be more fragile than others, and taking the time to distinguish these parts can save you from incurring damage that may lead to further repair costs.
WHAT SHOULD I DO IF A COMPONENT BREAKS DURING DISASSEMBLY?
If a component becomes damaged during disassembly, it’s essential to assess the severity of the damage first. In the case of minor cracks on the lens or housing, often, a strong adhesive can temporarily bridge the gap. However, if a significant component such as the LED or solar panel is damaged, sourcing replacements becomes necessary. Understanding the model and brand of the solar light will simplify locating compatible replacement parts. It’s often possible to find replacement parts through manufacturer websites or other hardware retailers. Observing damage as a learning opportunity, rather than an obstacle, will allow for more effective disassembly techniques on future projects.
FINAL THOUGHTS ON THE DISASSEMBLY PROCESS
Engaging in the disassembly of a small round solar light bulb can serve multiple purposes, from troubleshooting non-working lights to cleaning or simply understanding its internal workings better. Having the right tools and knowledge will empower anyone to approach the task with confidence and result in a more thorough and rewarding experience.
Thoroughly preparing by collecting needed equipment, recognizing the construction of the light bulb, and following a logical order during disassembly further streamlines the process, allowing for efficient reassembly afterward. Maintaining a careful attitude throughout will ensure the preservation of all components, facilitating smooth operations.
Ultimately, mastering disassembly provides insight and a greater appreciation for everyday devices. As individuals delve into understanding these kinds of household items, they foster skills that can lead to more significant projects in the future, opening a range of possibilities in DIY endeavors.
Original article by NenPower, If reposted, please credit the source: https://nenpower.com/blog/how-to-disassemble-a-small-round-solar-light-bulb/
